Smart Product In-Store Display
The Midea Smart Product In-Store Display Guidelines present new standards and principles to highlight smart products. The guideline demonstrates the appropriate use of design components and suggests various in-store applications for di erent product categories.
To preserve the integrity of our brand, the specifications have been developed to uphold the aesthetic standards and keep our brand identity distinctive and consistent across the globe, elevating brand recognition and encapsulating our quality of work and value.
1.0 Smart Product Tag Specifications
1.1 BASIC
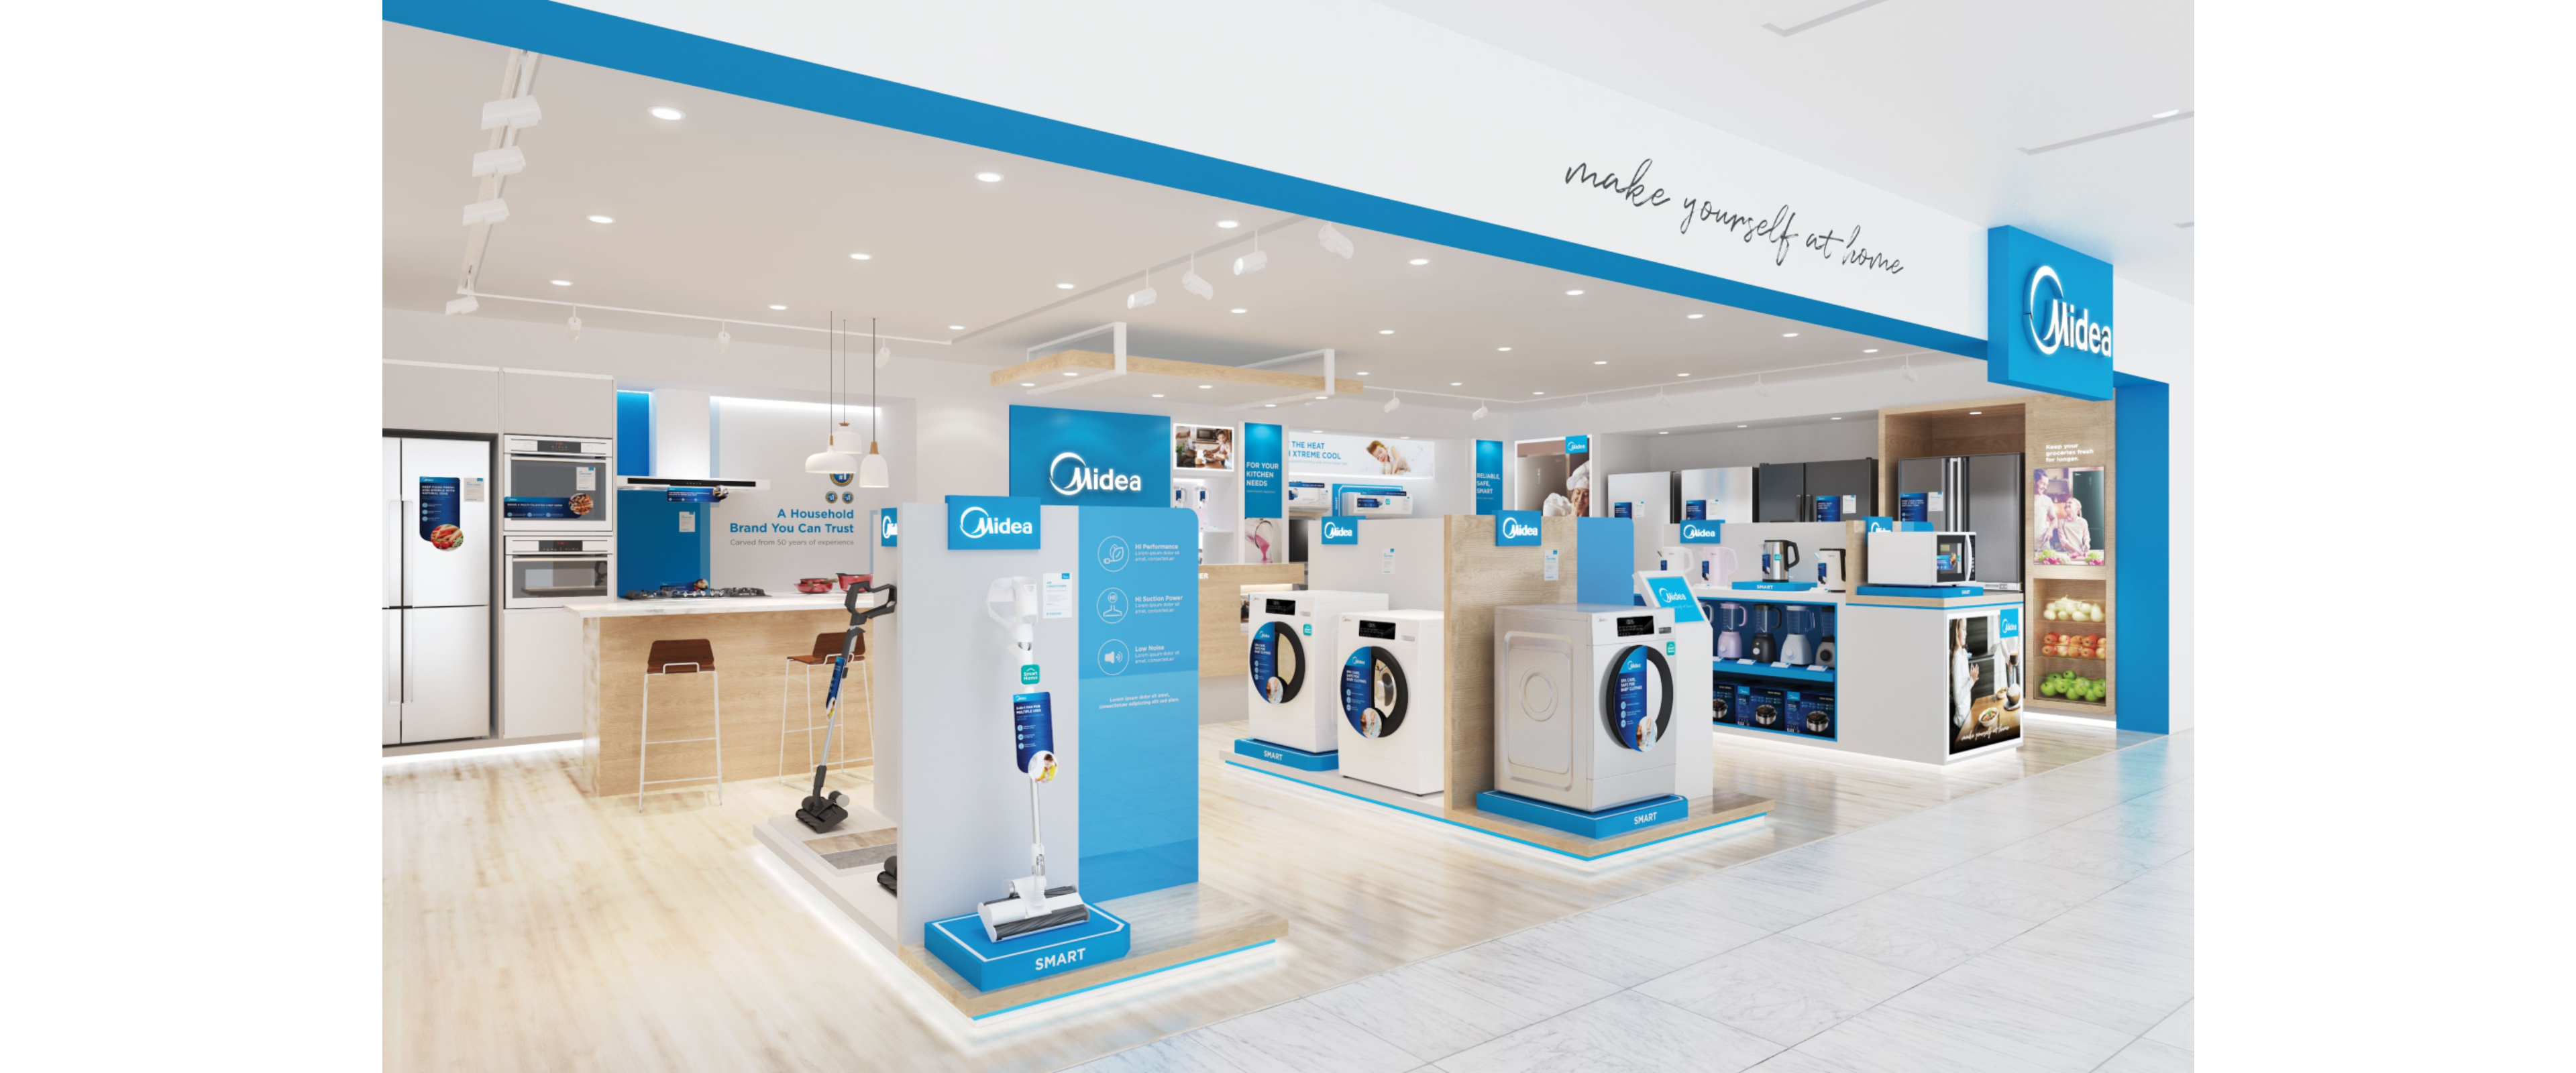
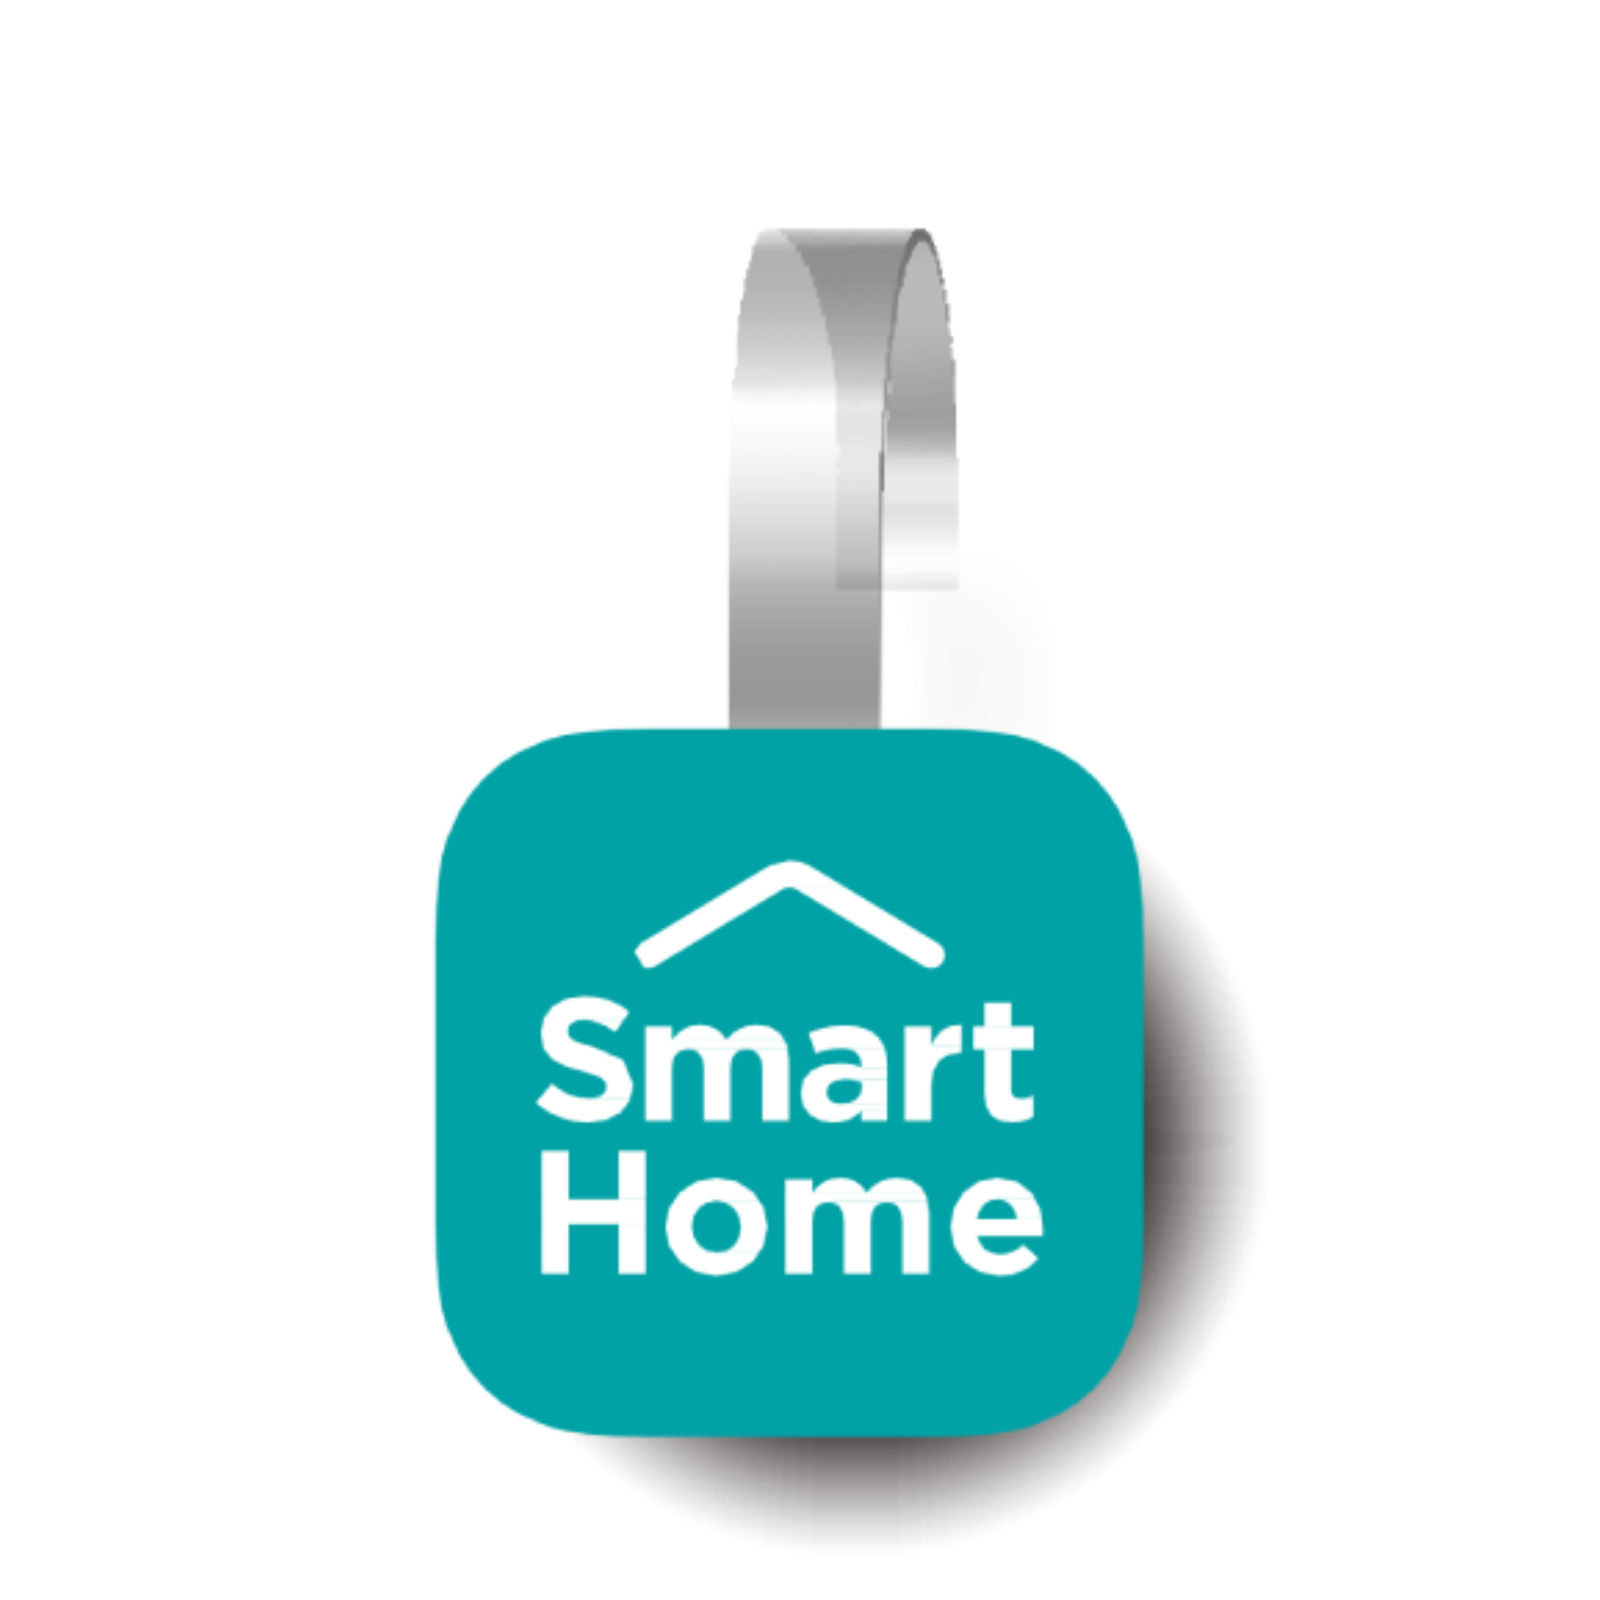
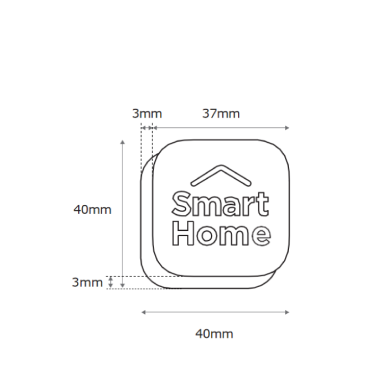
Wobbler
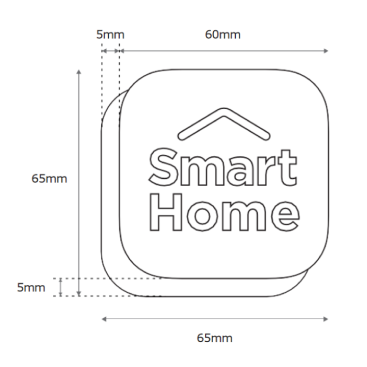
| Size | 65mm w65 x h65mm (without plastic holder) 40mm w40 x h40mm (without plastic holder) |
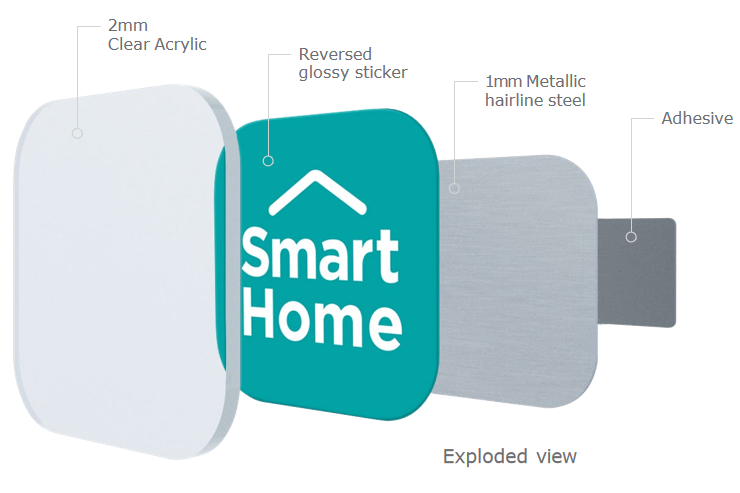
| Material | Printing uses reverse white SmartHome icon |
| Finishing | Gloss laminated, die-cut with a plastic holder on the top of wobbler |
| Adhesive | Transparent double-sided tape |
-
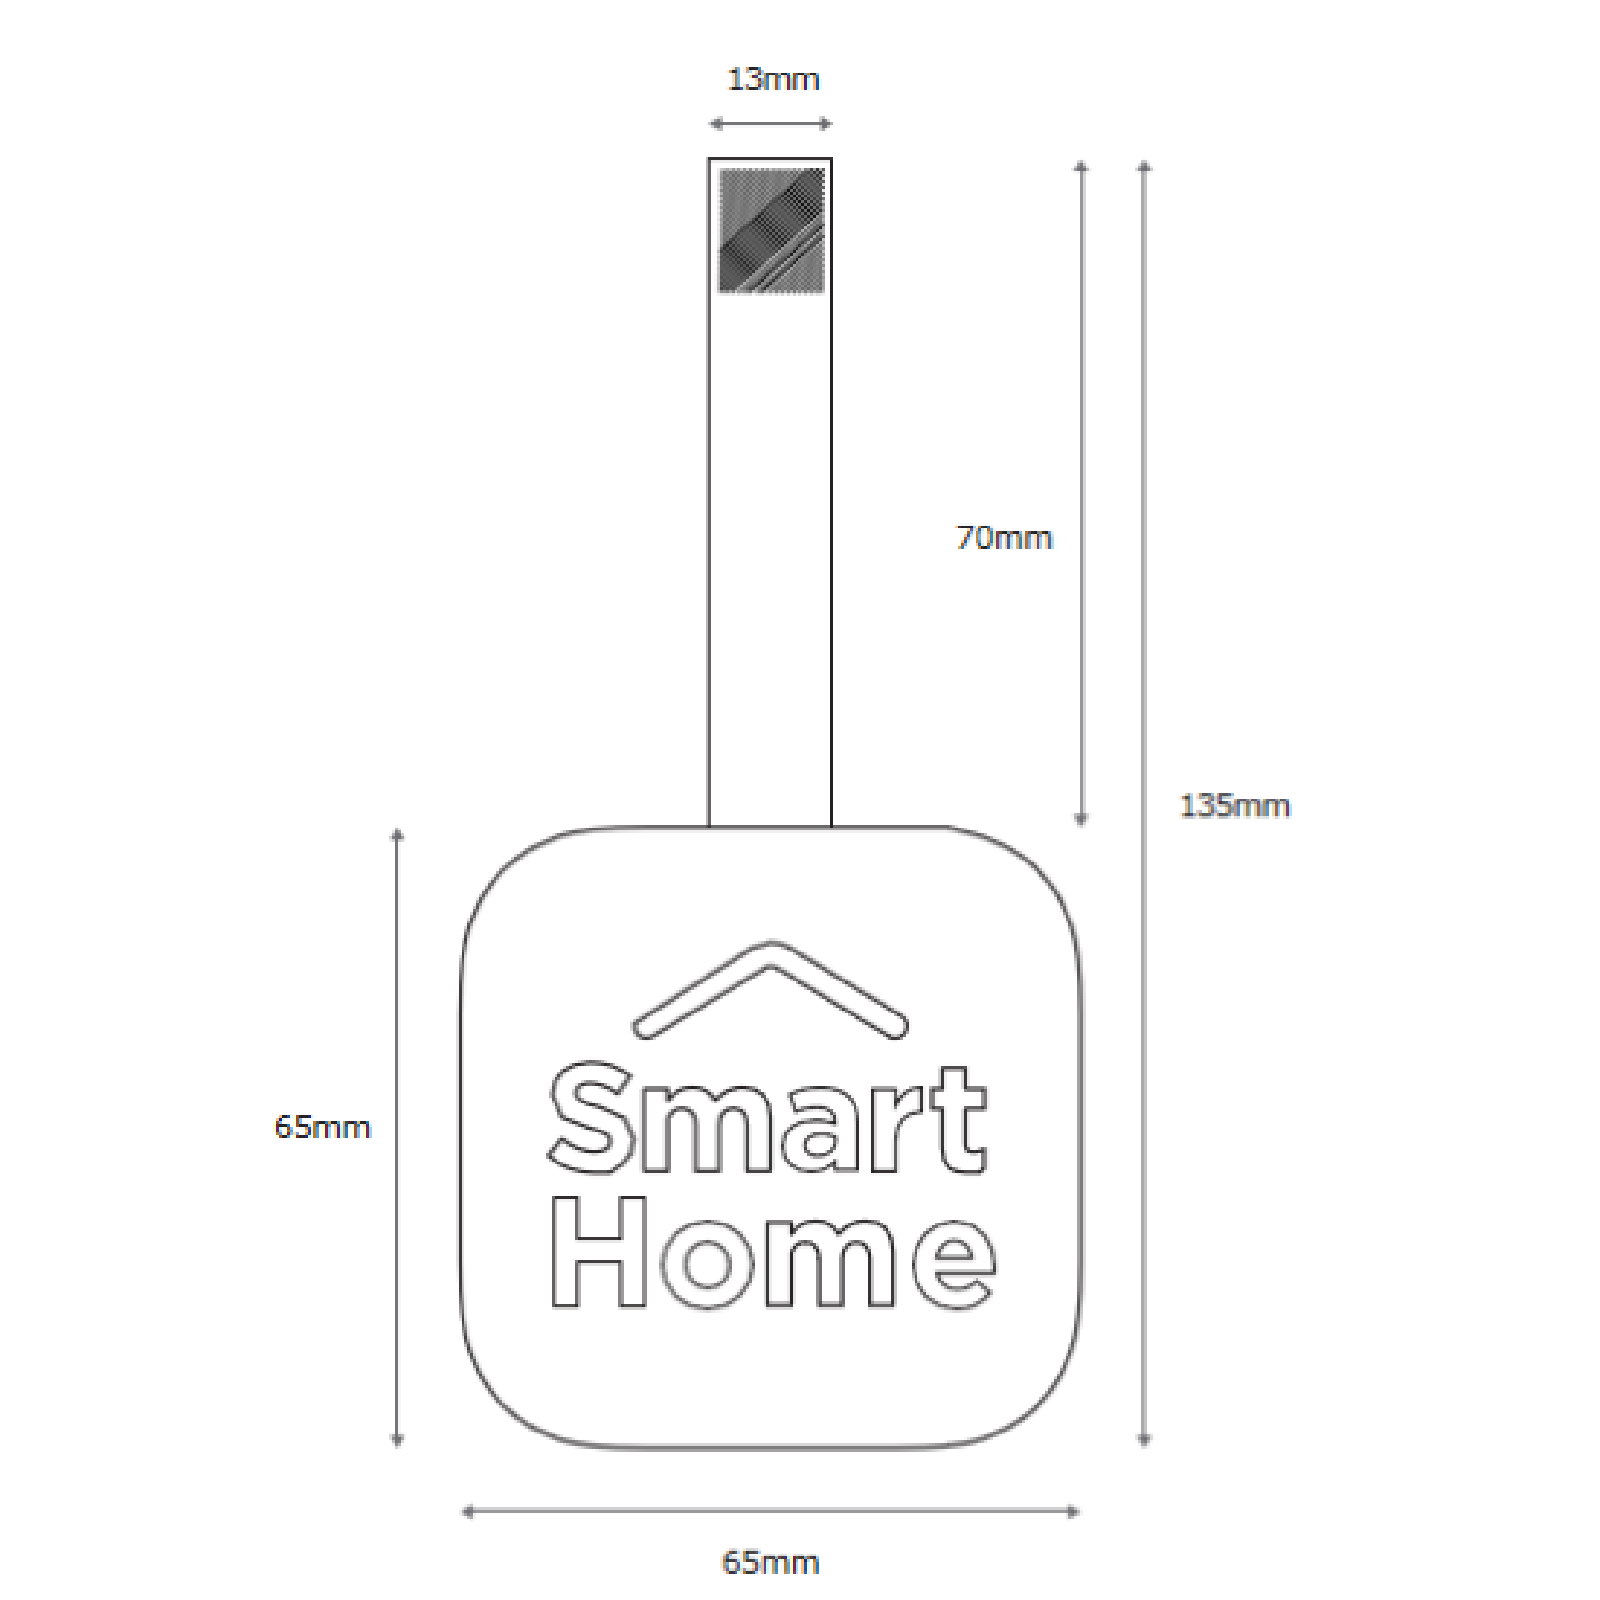
65mm wobbler
-
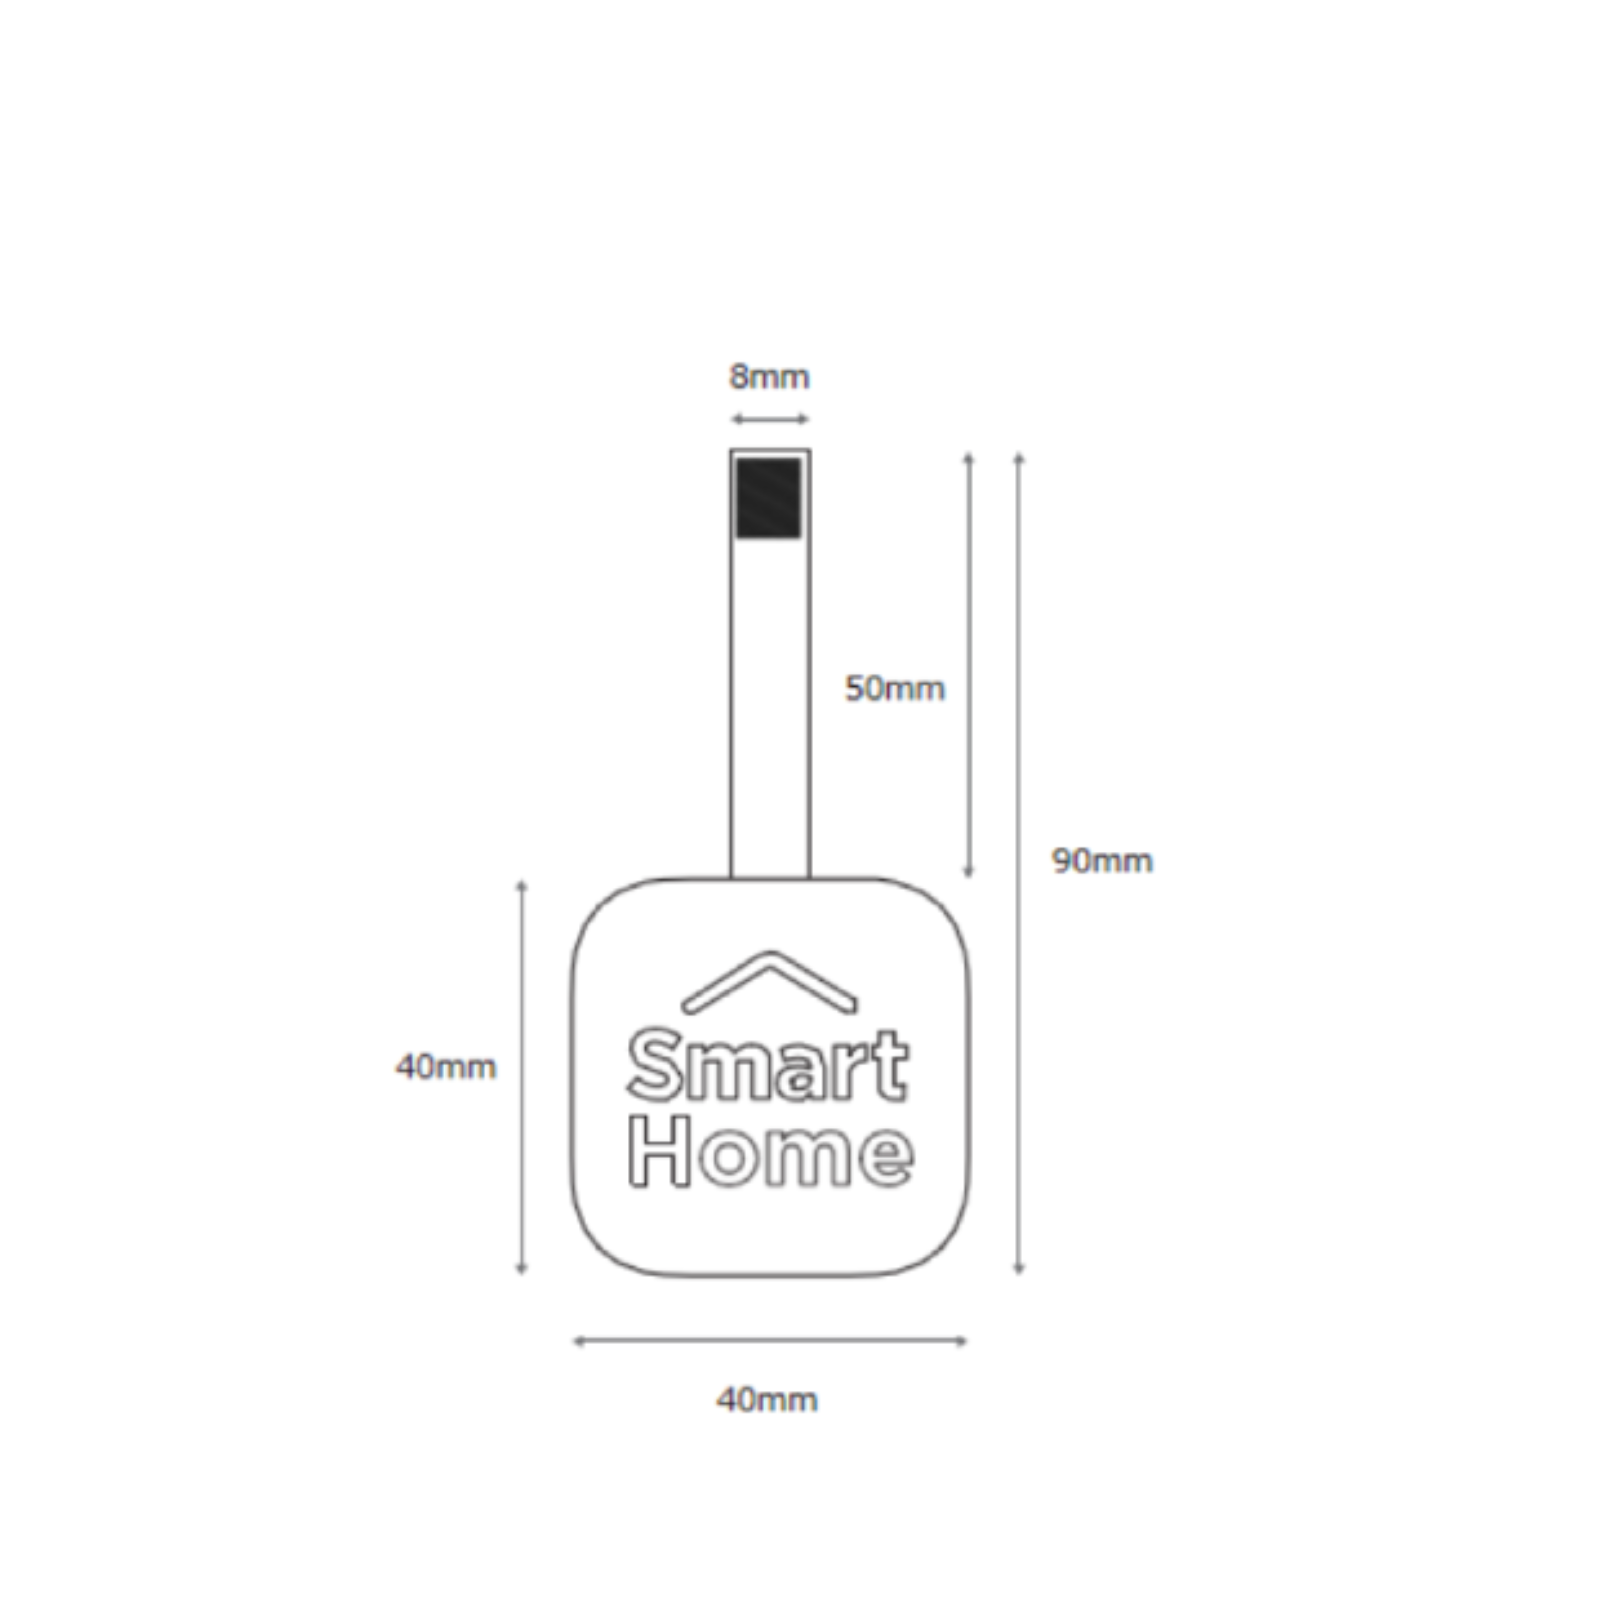
40mm wobbler
-
Application on different products
| 65mm Wobbler | 40mm Wobbler |
Standing Fan & Air Cooler Vacuum Cleaner |
-
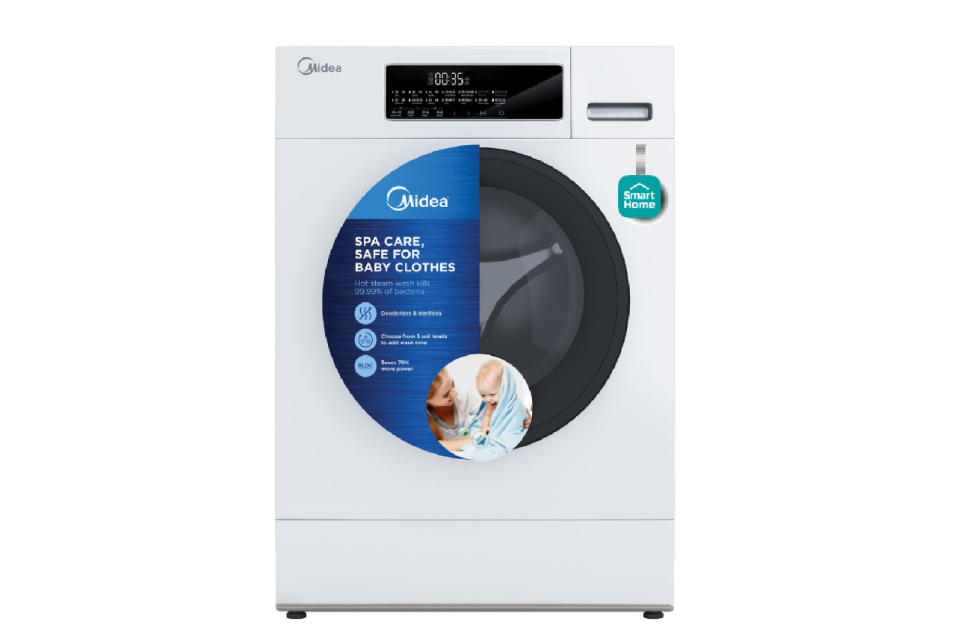
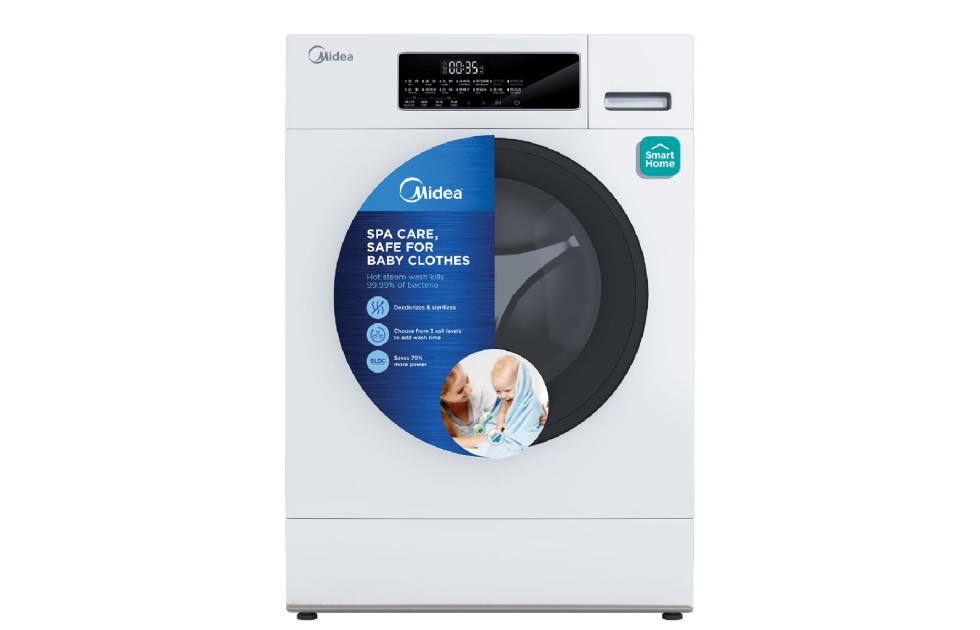
65mm wobbler on washing machine
-
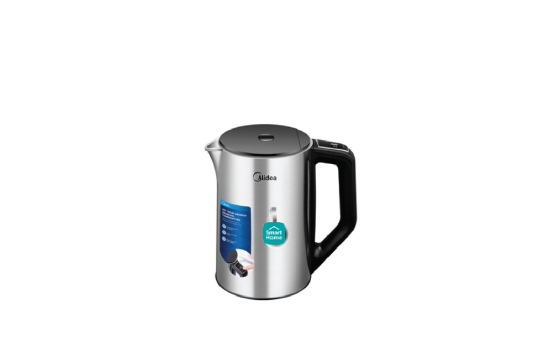
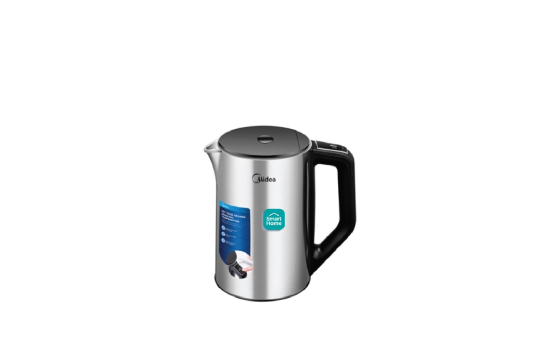
40mm wobbler on kettle
1.2 ADVANCE
Acrylic Tag
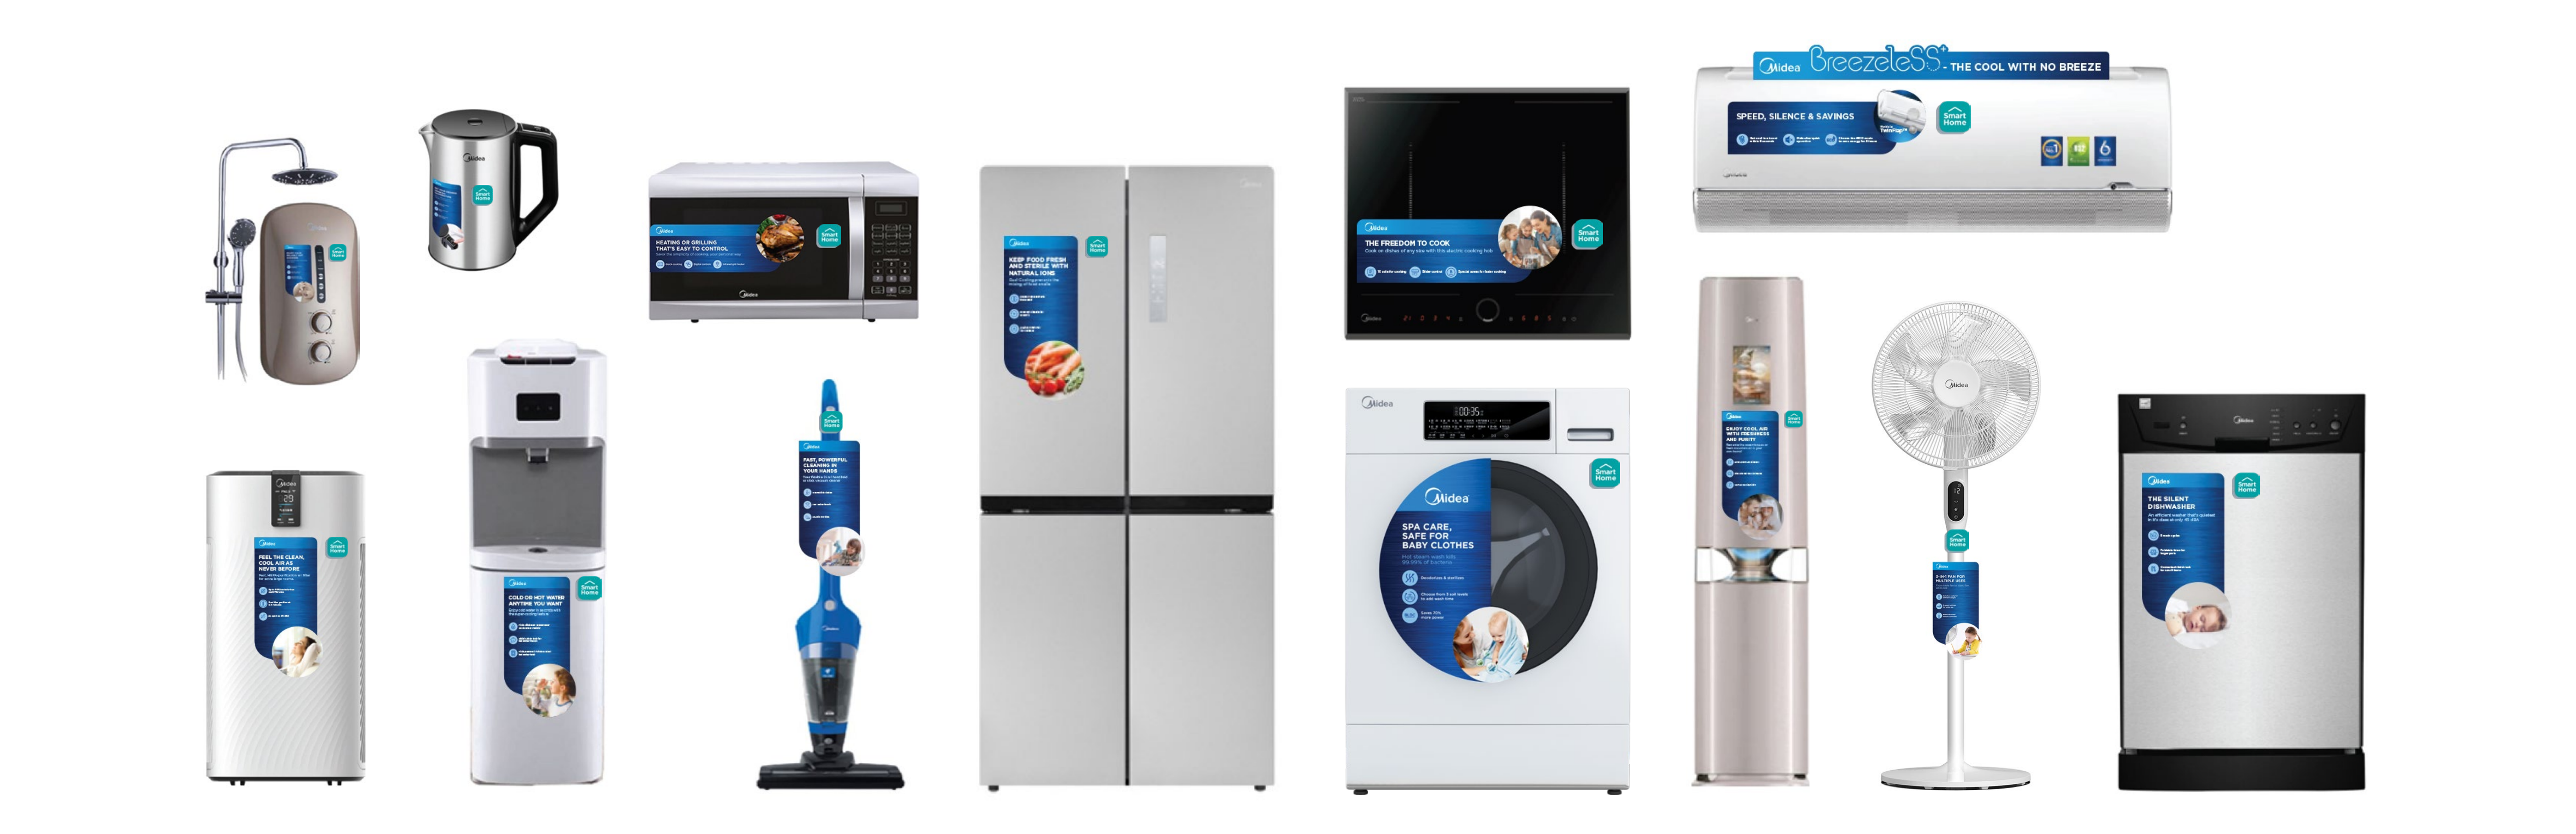
POSMs for Midea smart products will always feature the SmartHome icon.
-
65mm acrylic tag
-
40mm acrylic tag
-

Acrylic tag
Application on different products
| 65mm Acrylic tag | 40mm Acrylic tag |
Standing Fan & Air Cooler Vacuum Cleaner |
-
65mm acrylic tag on washing machine
-
40mm acrylic tag on kettle
Adhesive Mounts Instructions
Apply the mount to a smooth and clean surface. A textured surface or any imperfections to a smooth surface can keep the adhesive from making a strong bond. Firmly press the mount into place ensuring full contact over the entire surface area. Be sure to apply the mount at room temperature, and also allow at least 24 hours for the mount to properly adhere to the surface.
To remove the adhesive mounts, it is recommended to use a hairdryer or heat gun to soften the adhesive and slowly peel it back. Please note that you will not be able to reuse an adhesive mount once you remove it.
| Type 1 | Type 2 |
| Mounted onto flat surfaces | Mounted onto curve surfaces |
-

3M Adhesive
-

Curved mount with 3M Adhesive Pads
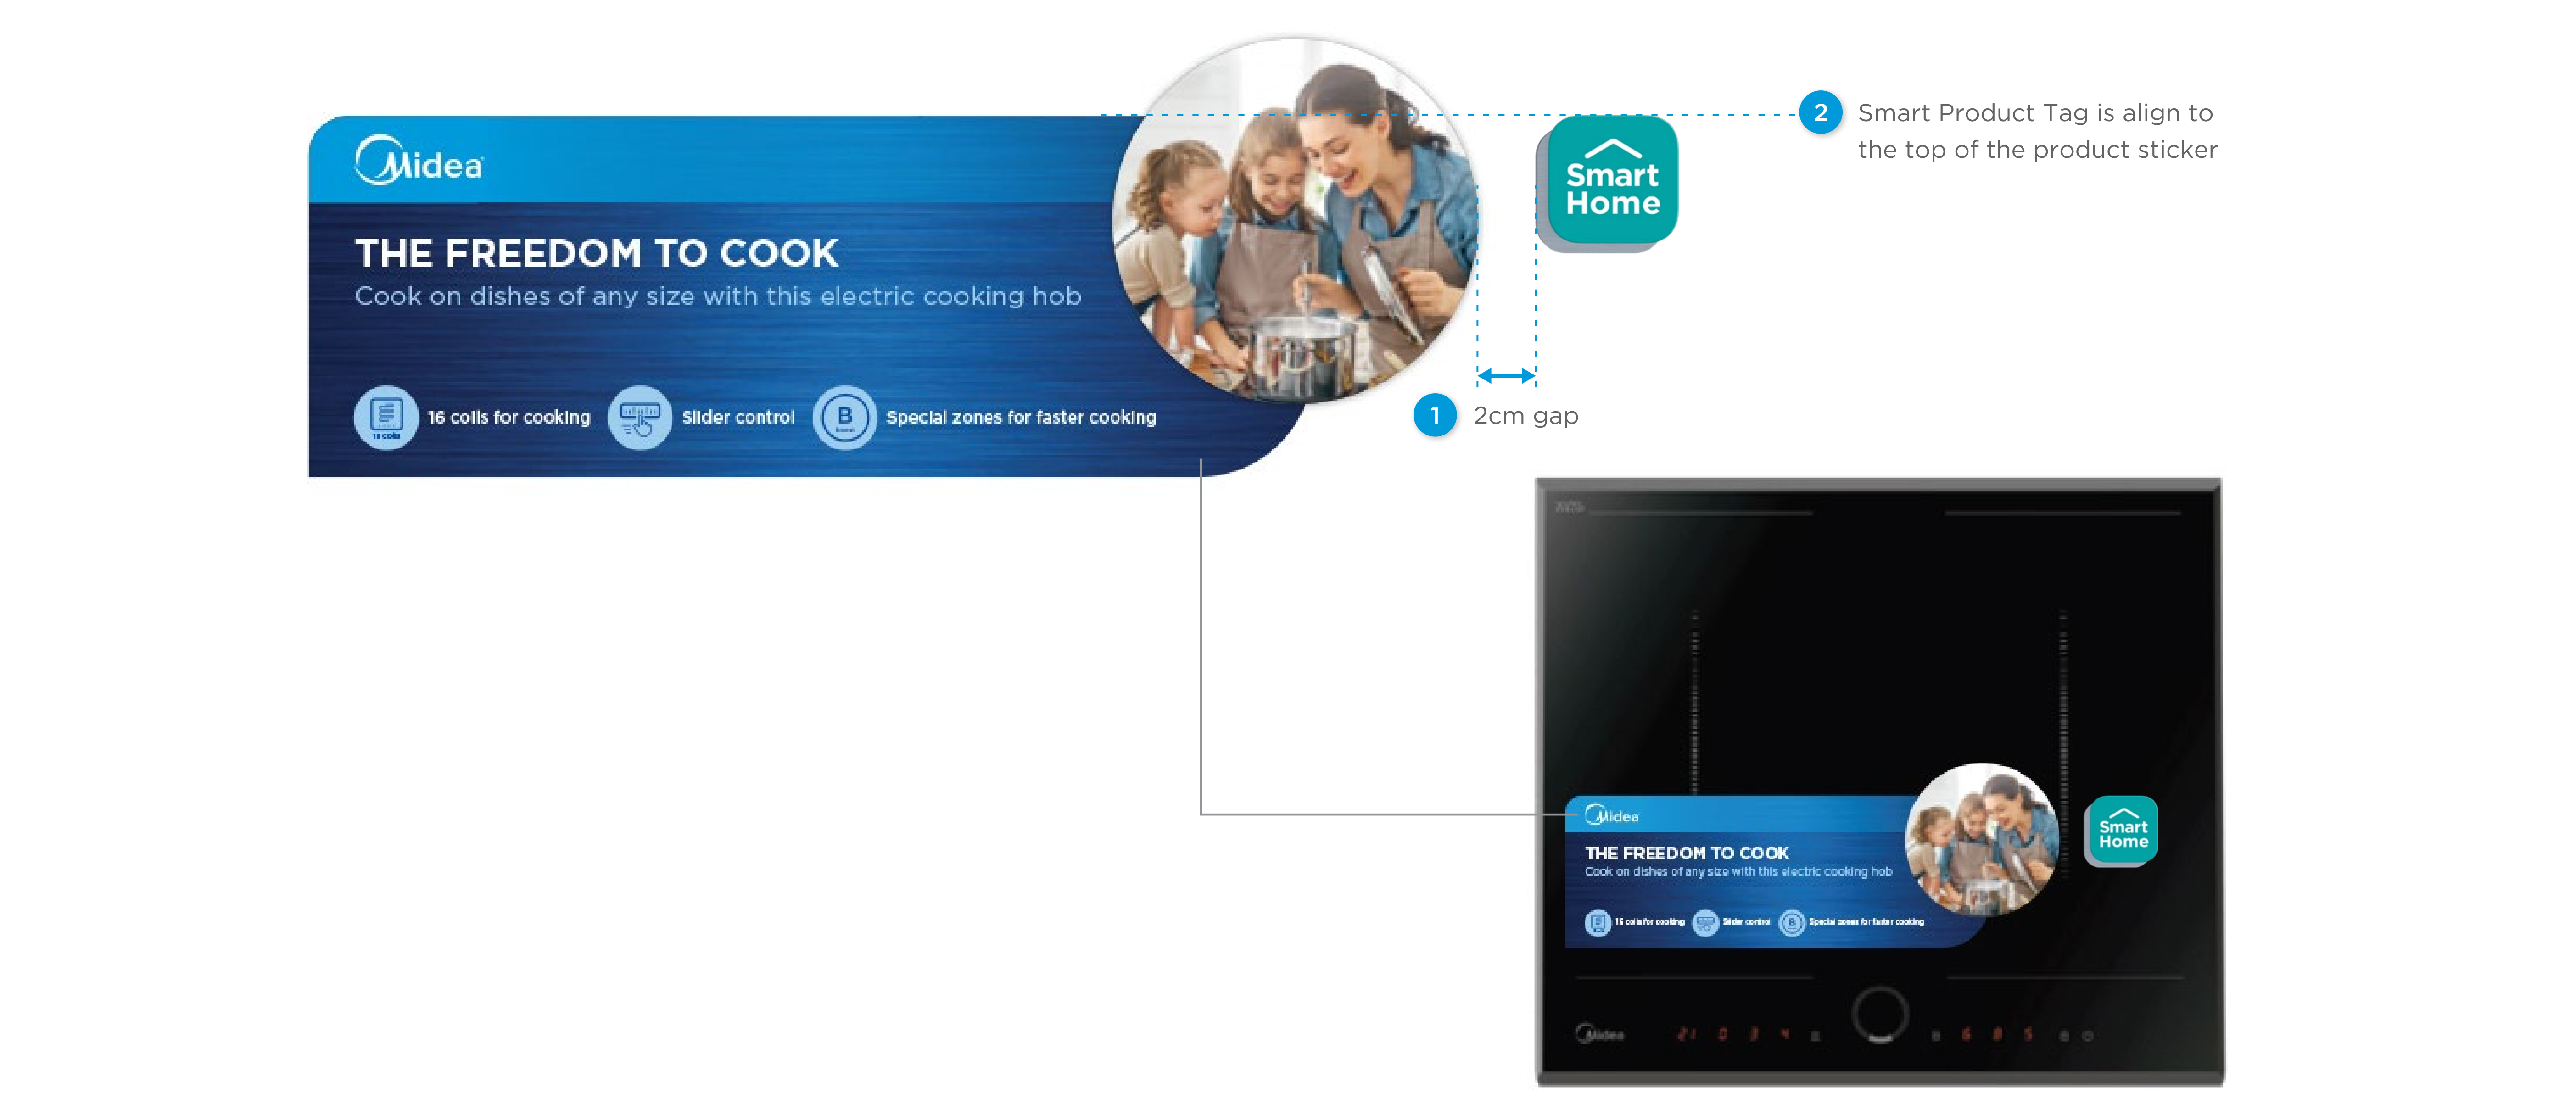
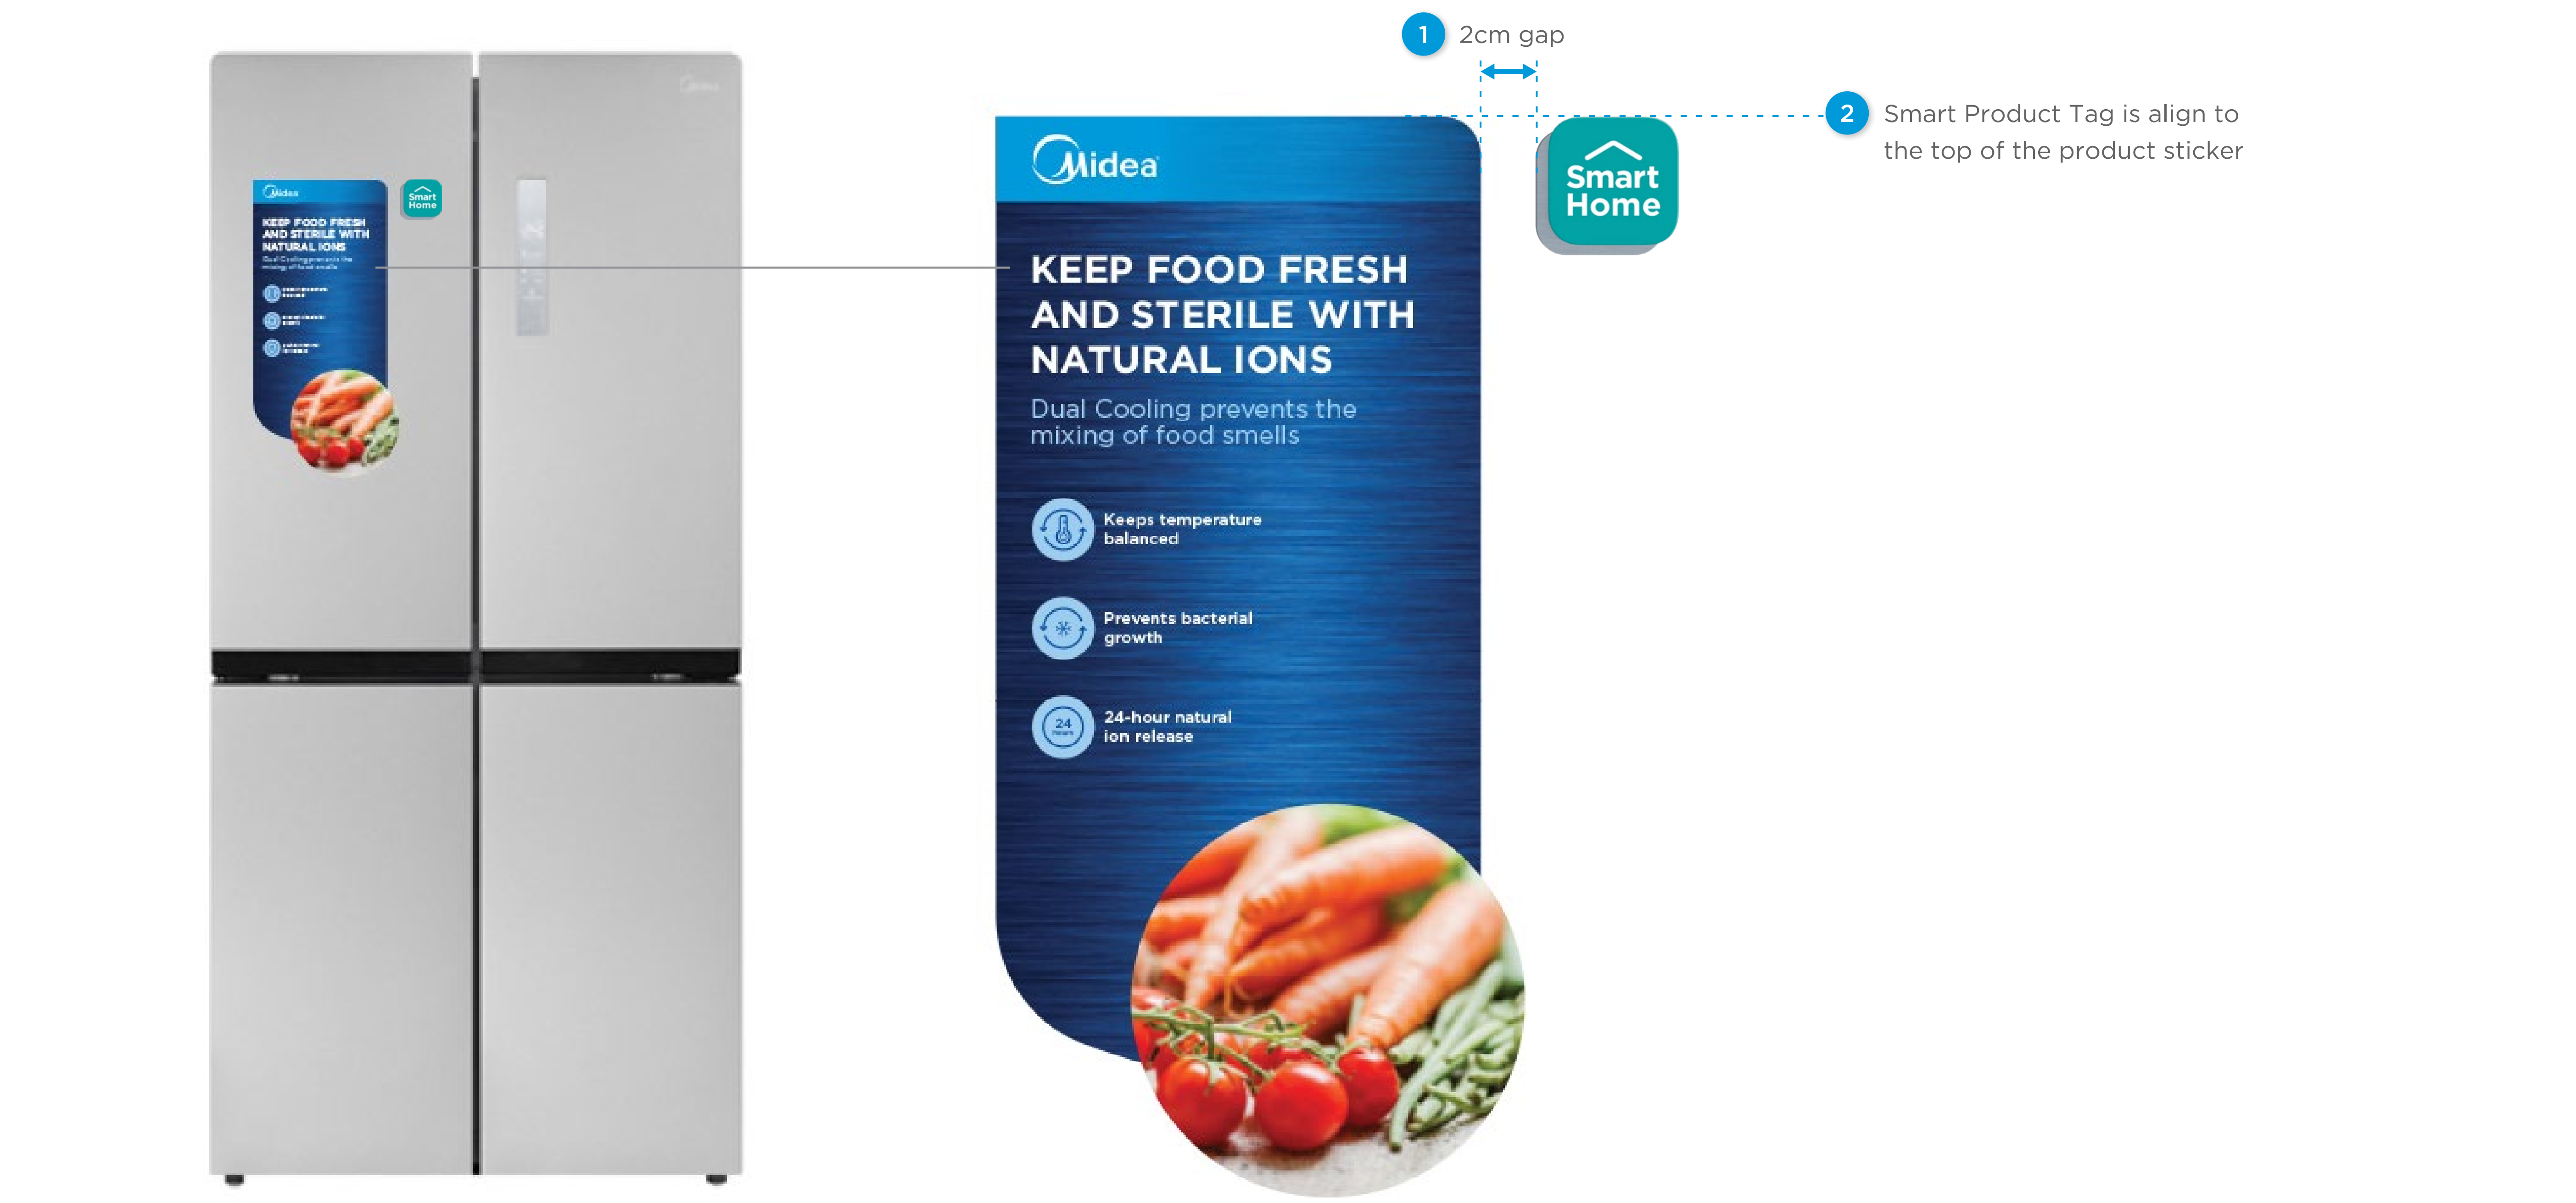
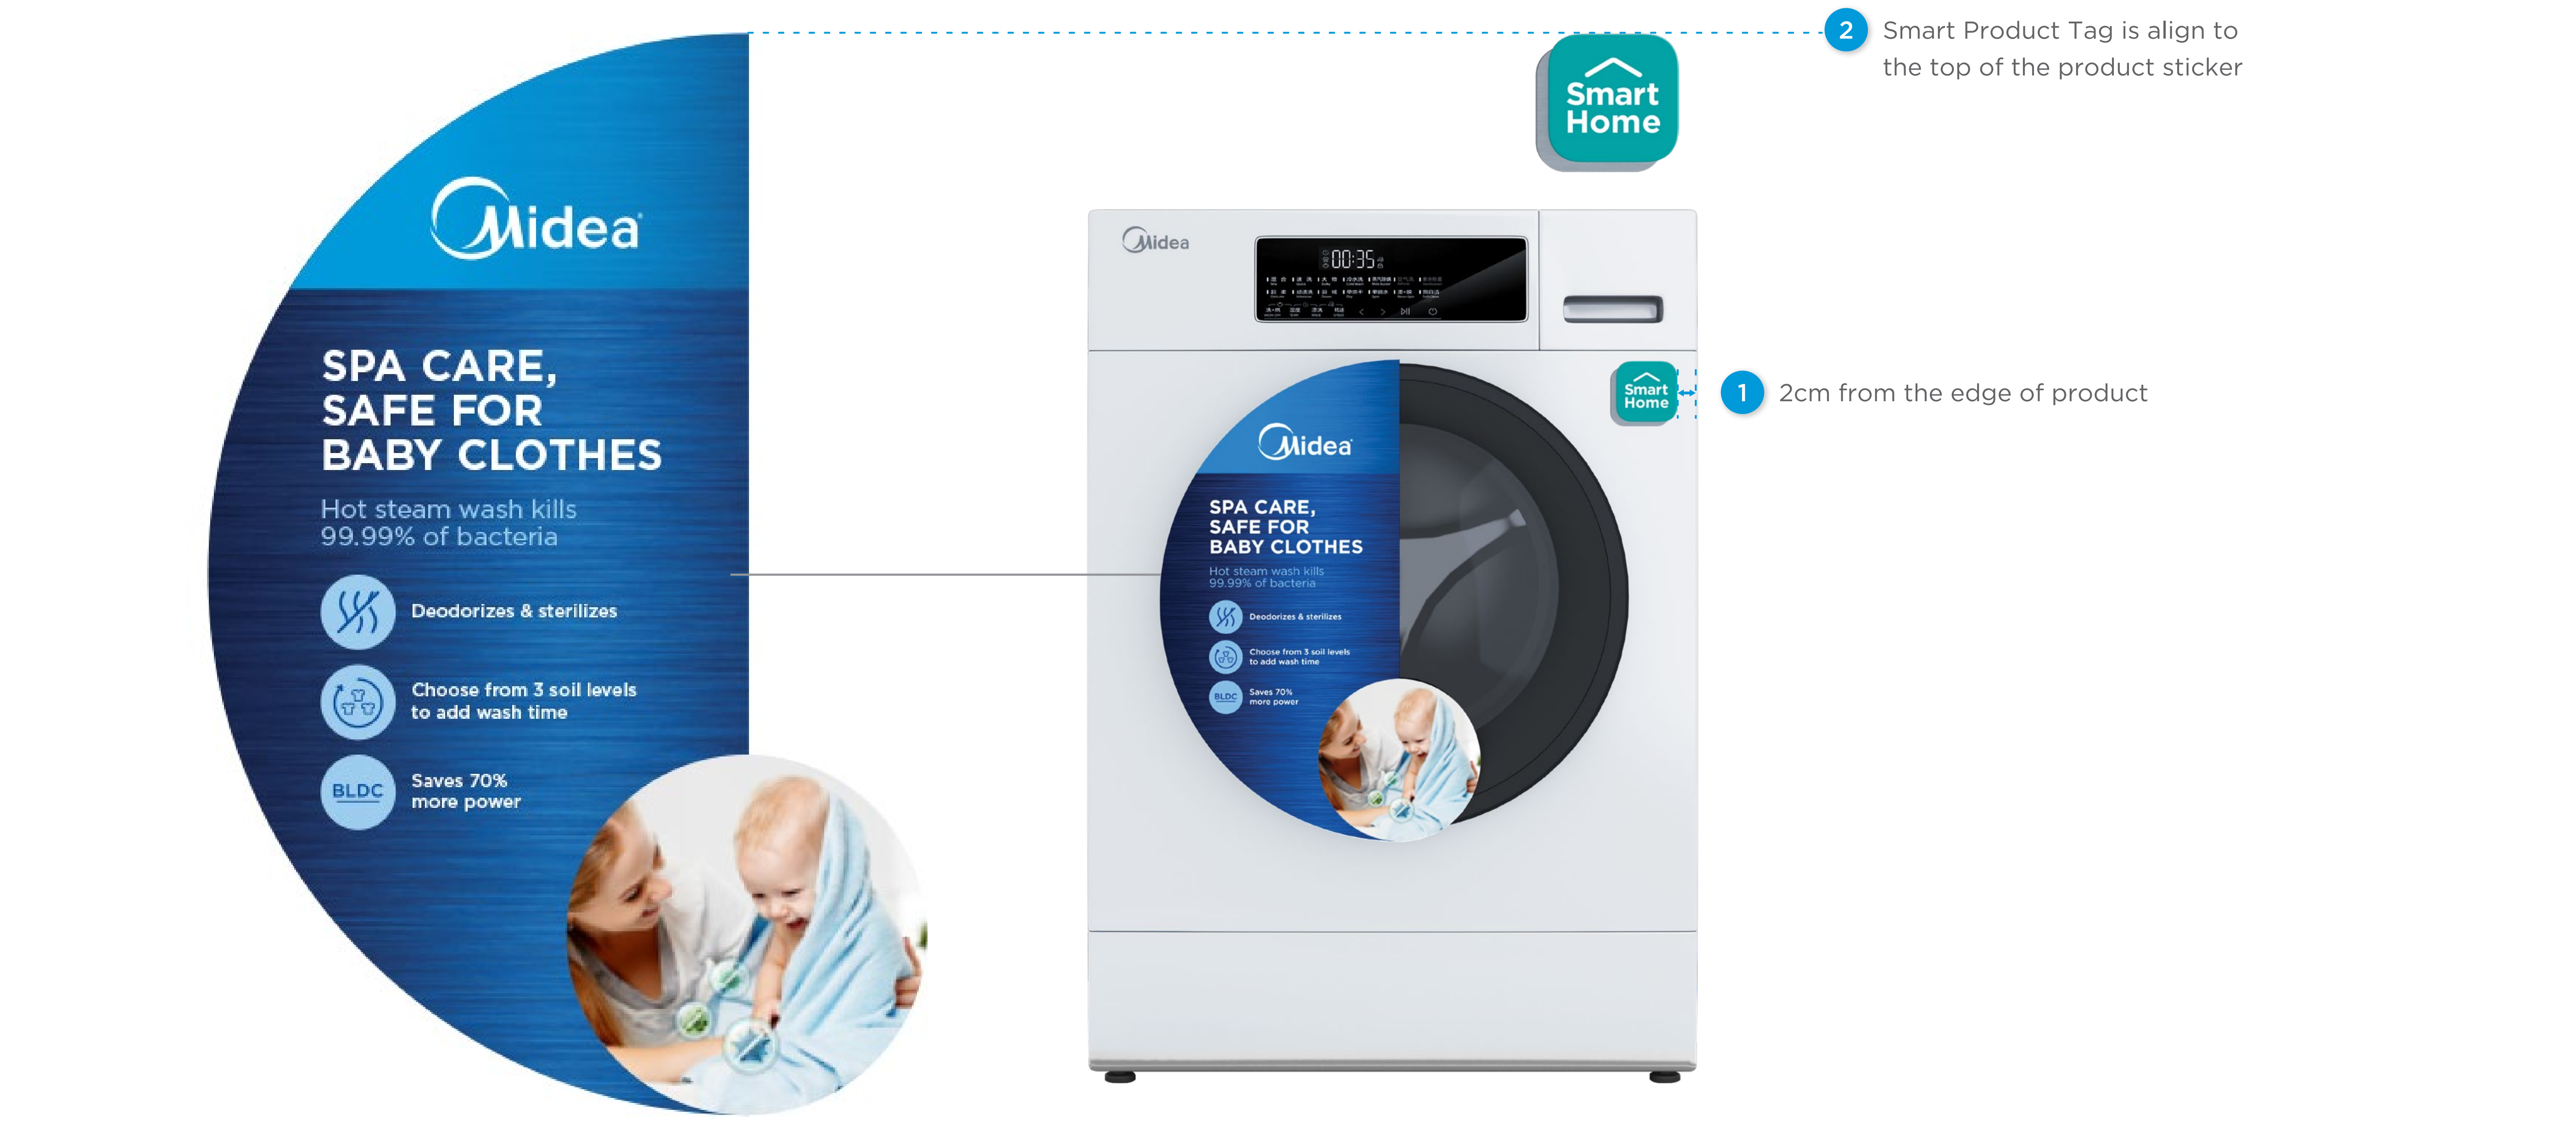
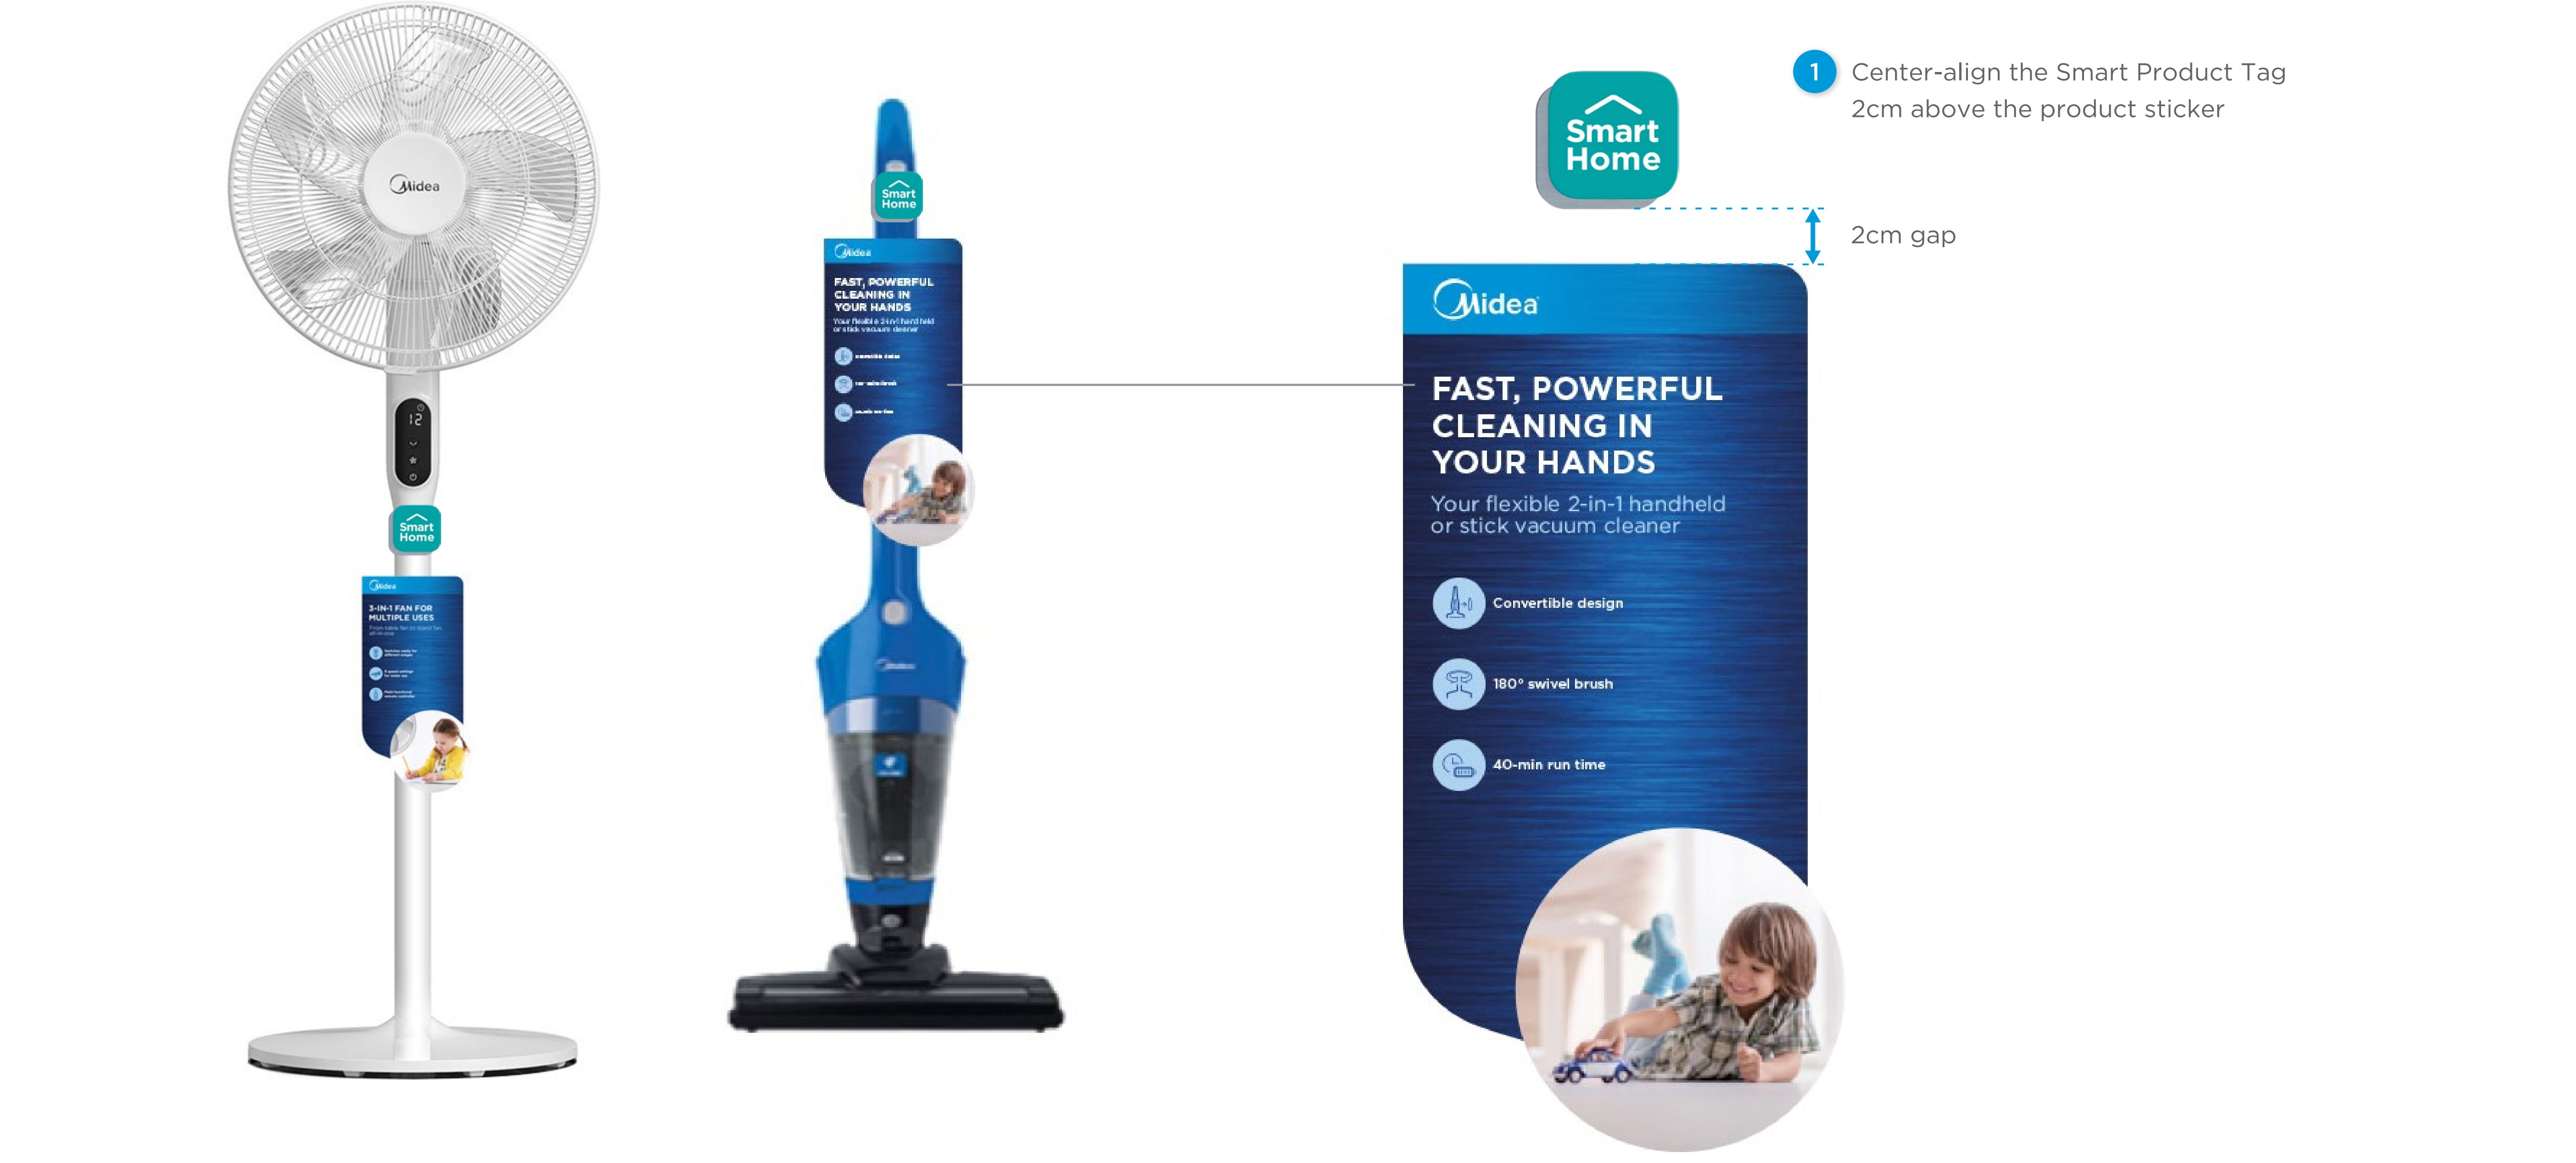
2.0 Smart Product Tag Placement
→The visual above illustrates the placement guide for different product category using Advance Smart Product Tag (acrylic tag) as an example. The placement applies the same to Basic Smart Product Tag (wobbler).
3.0 Retail Applications
3.1 GOOD VS BEST
-
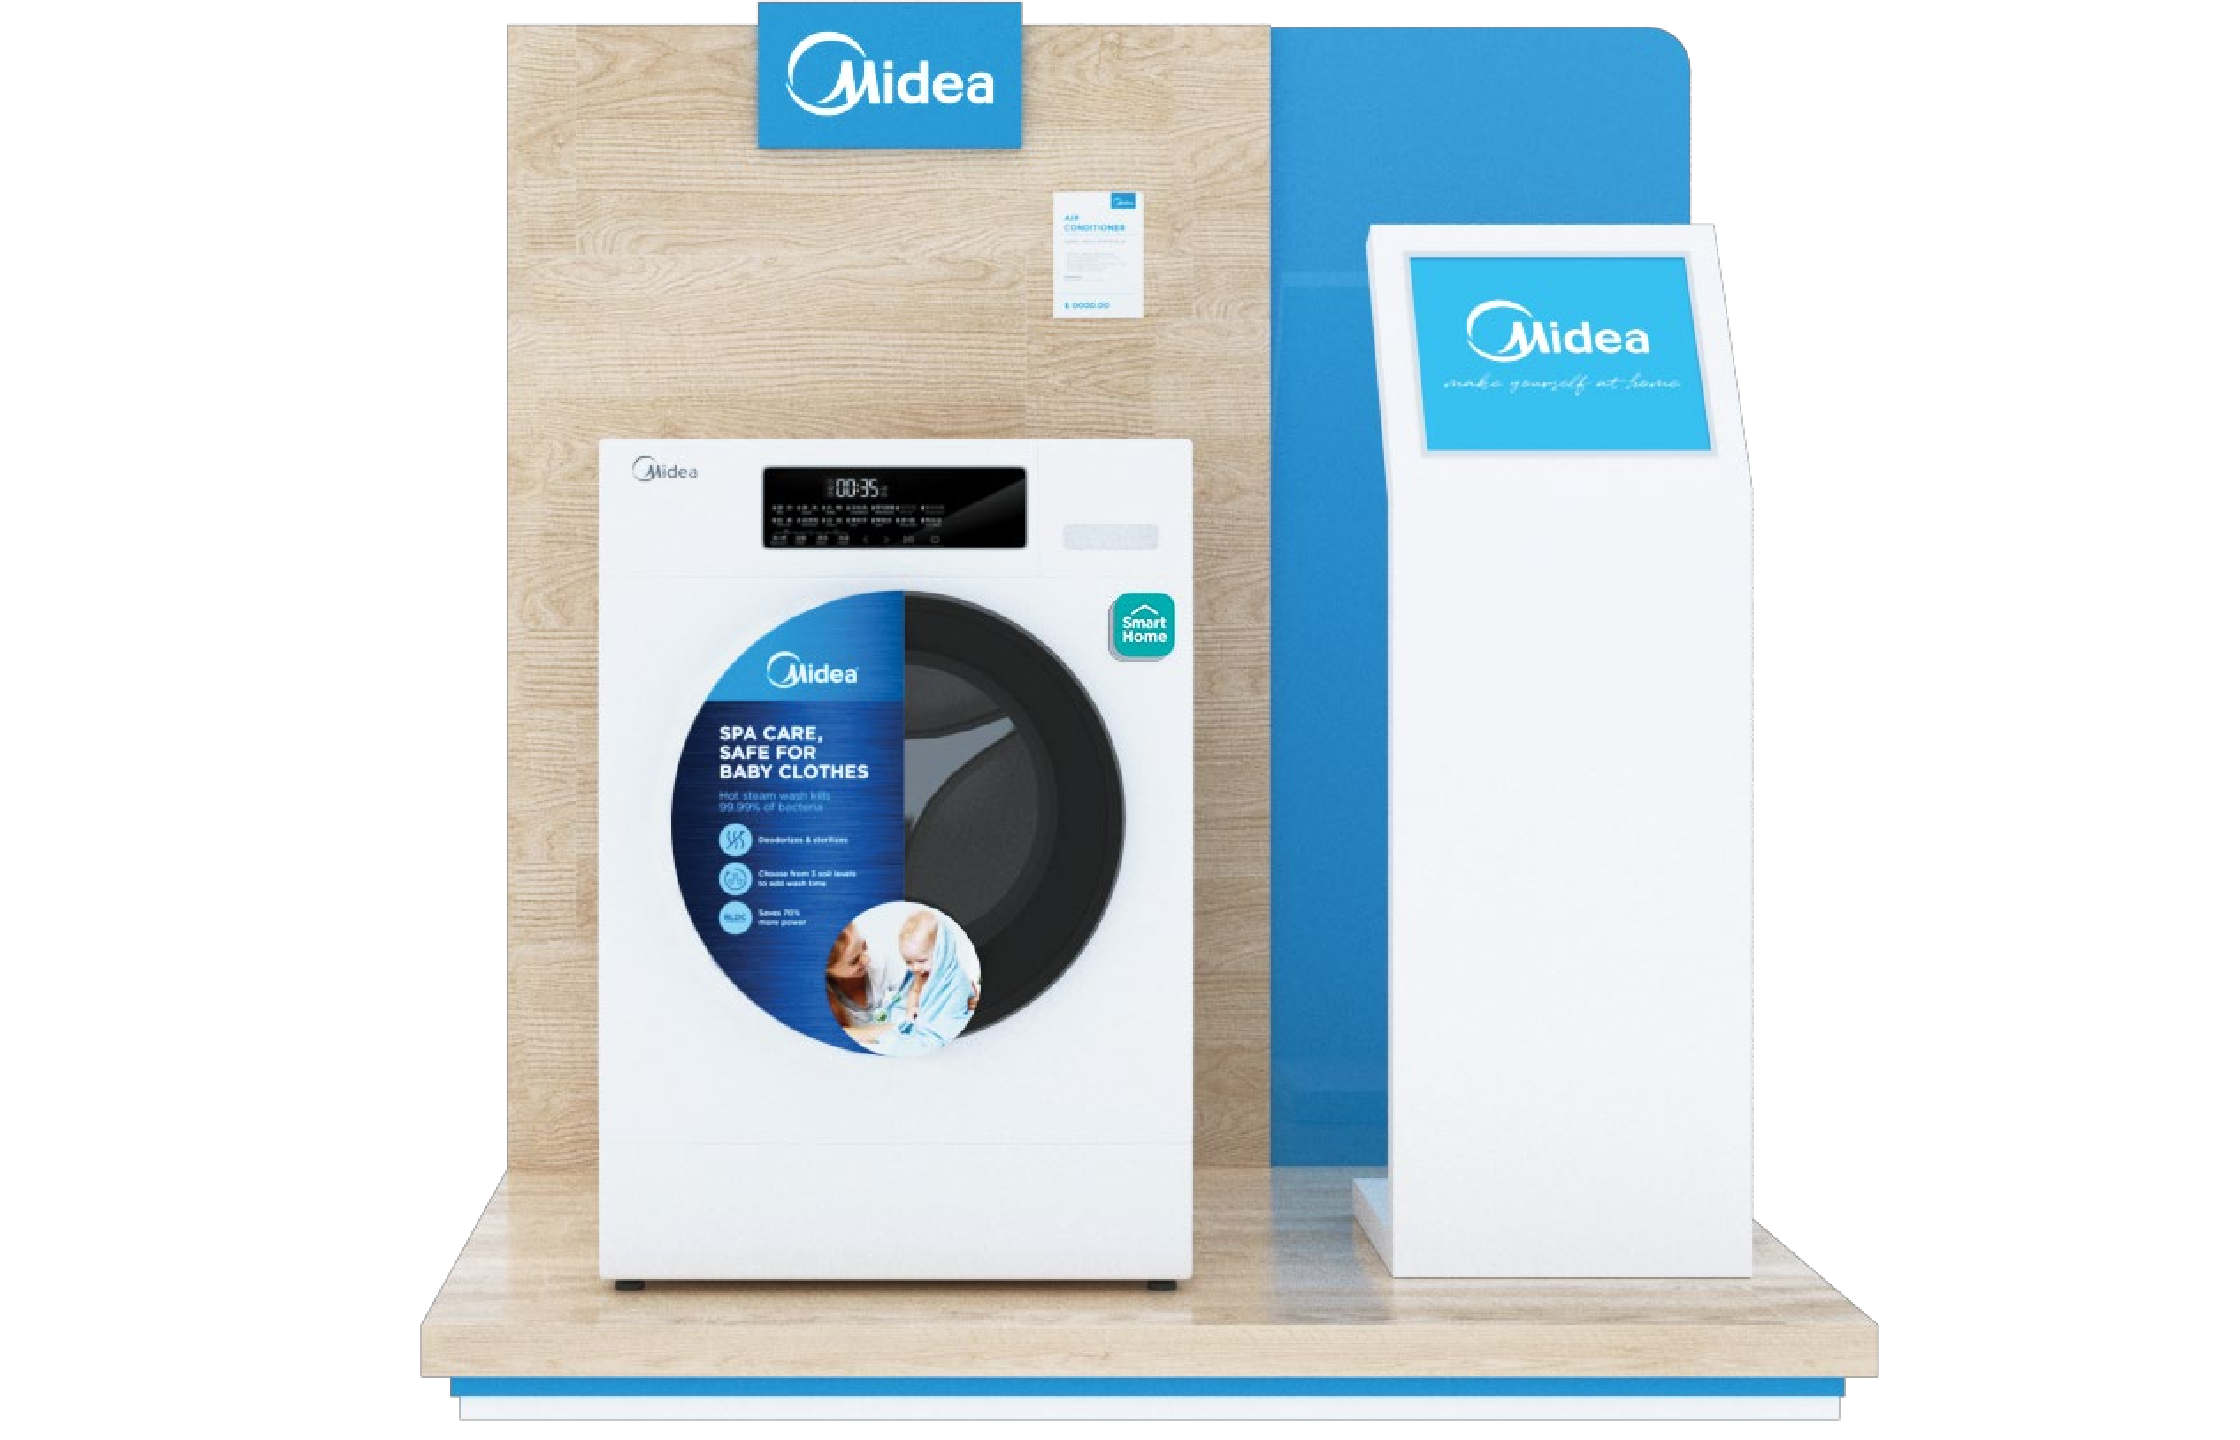 Good
GoodSmart Product Tag attached onto product
-
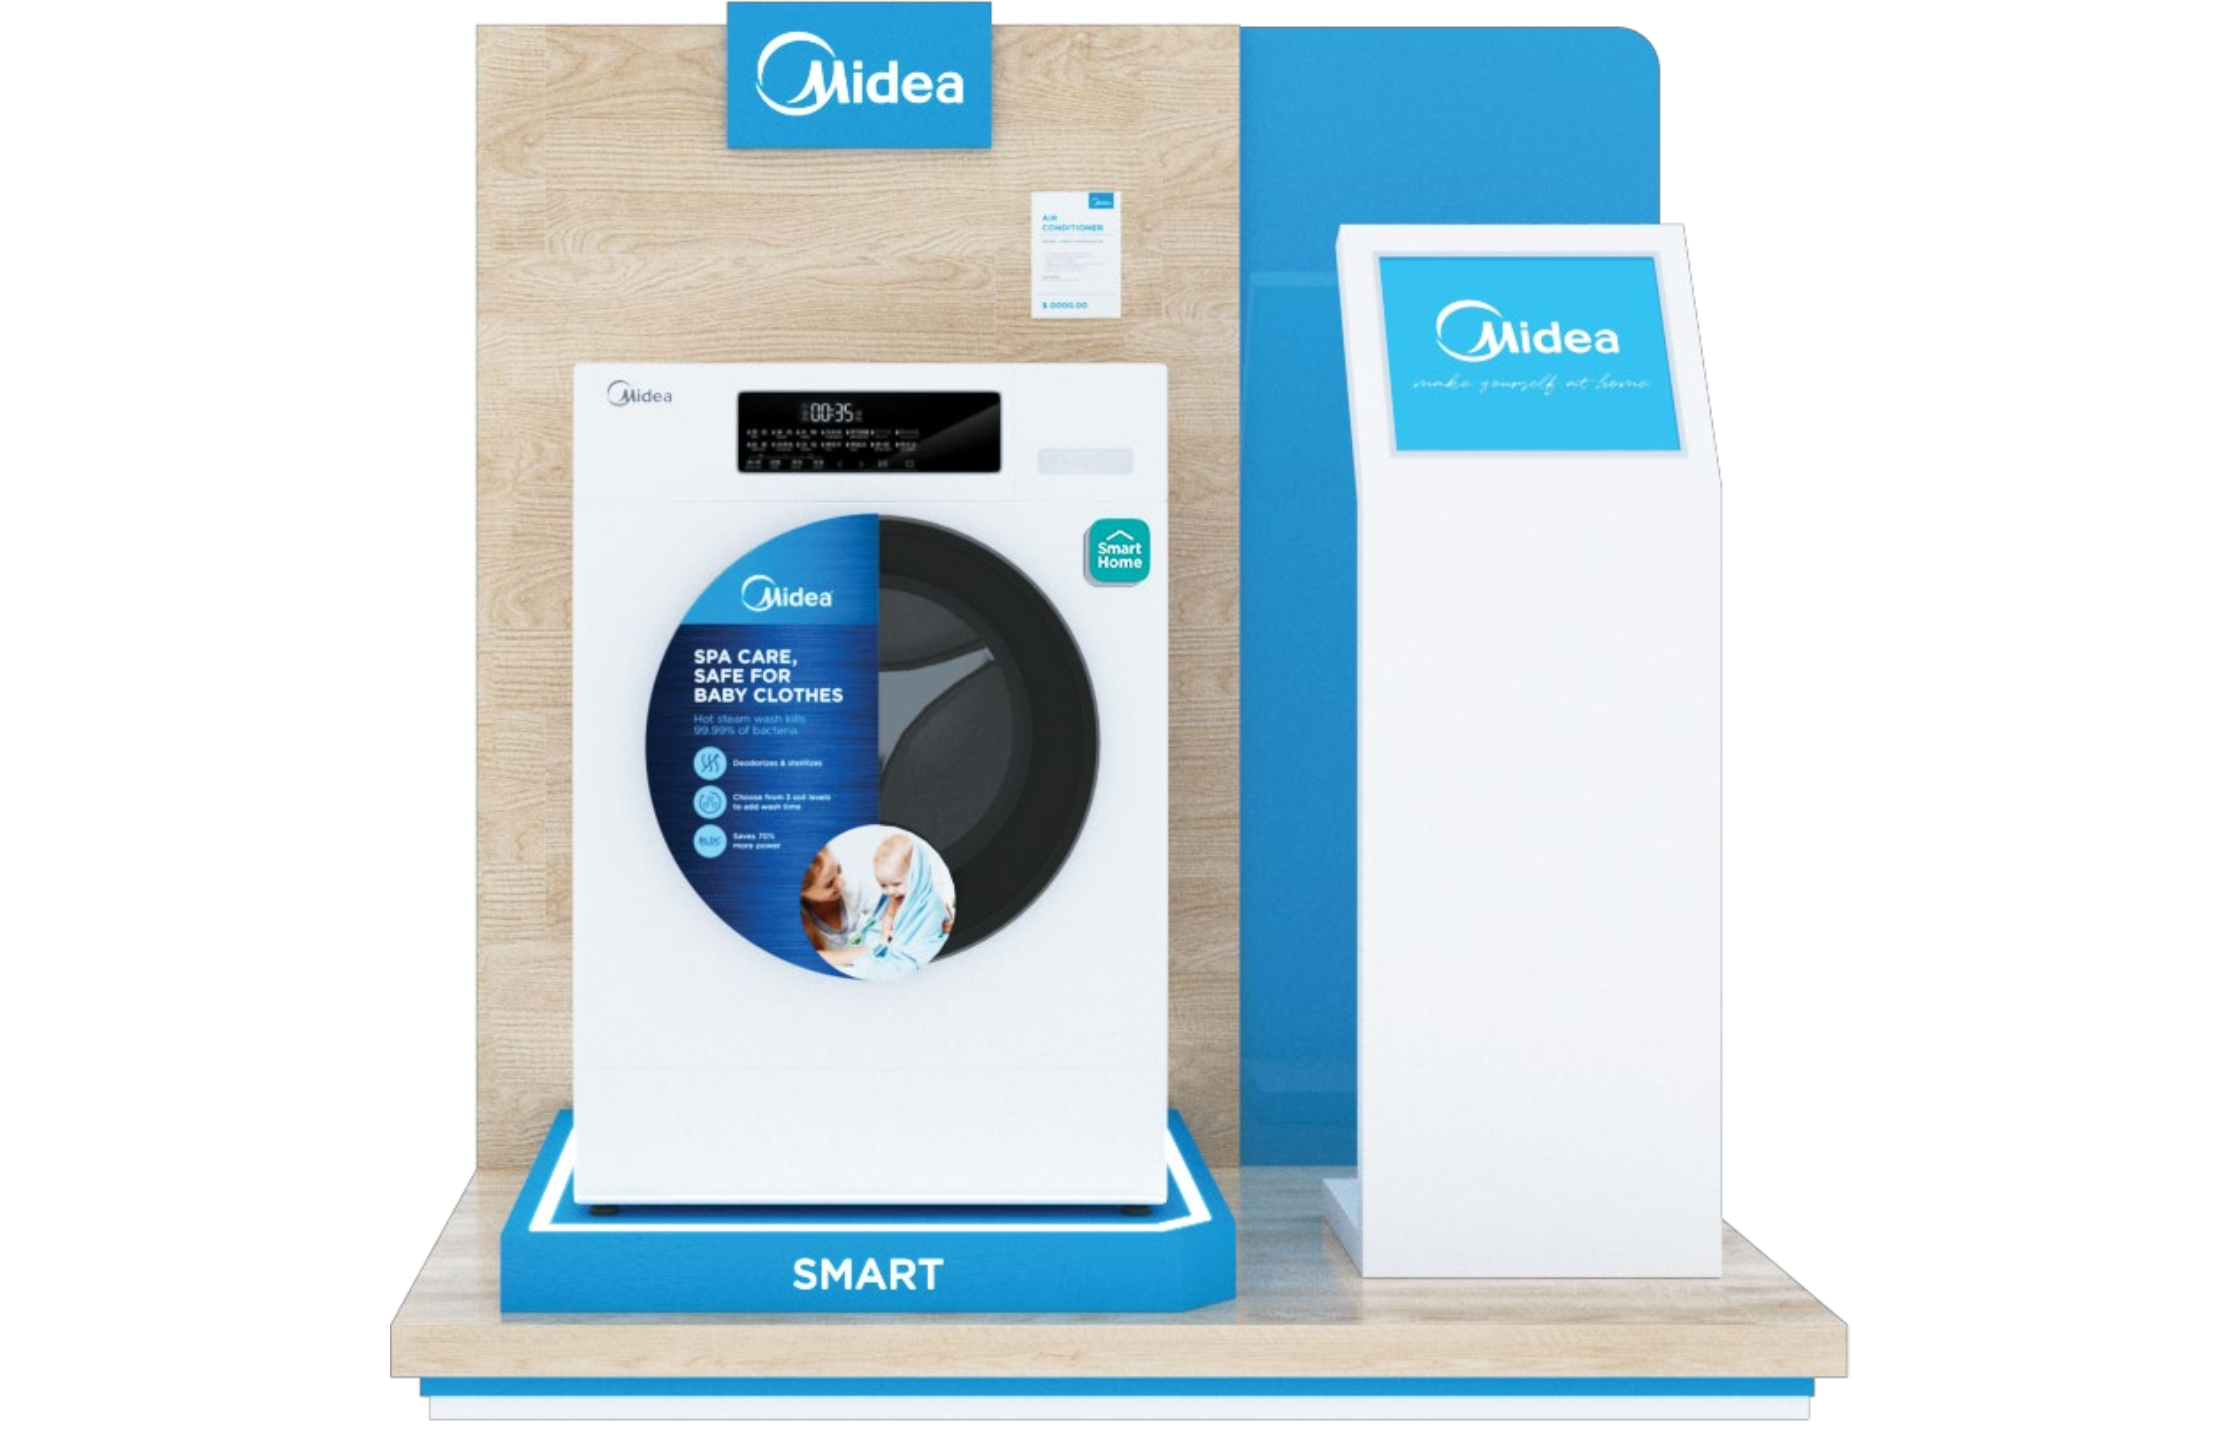 Best
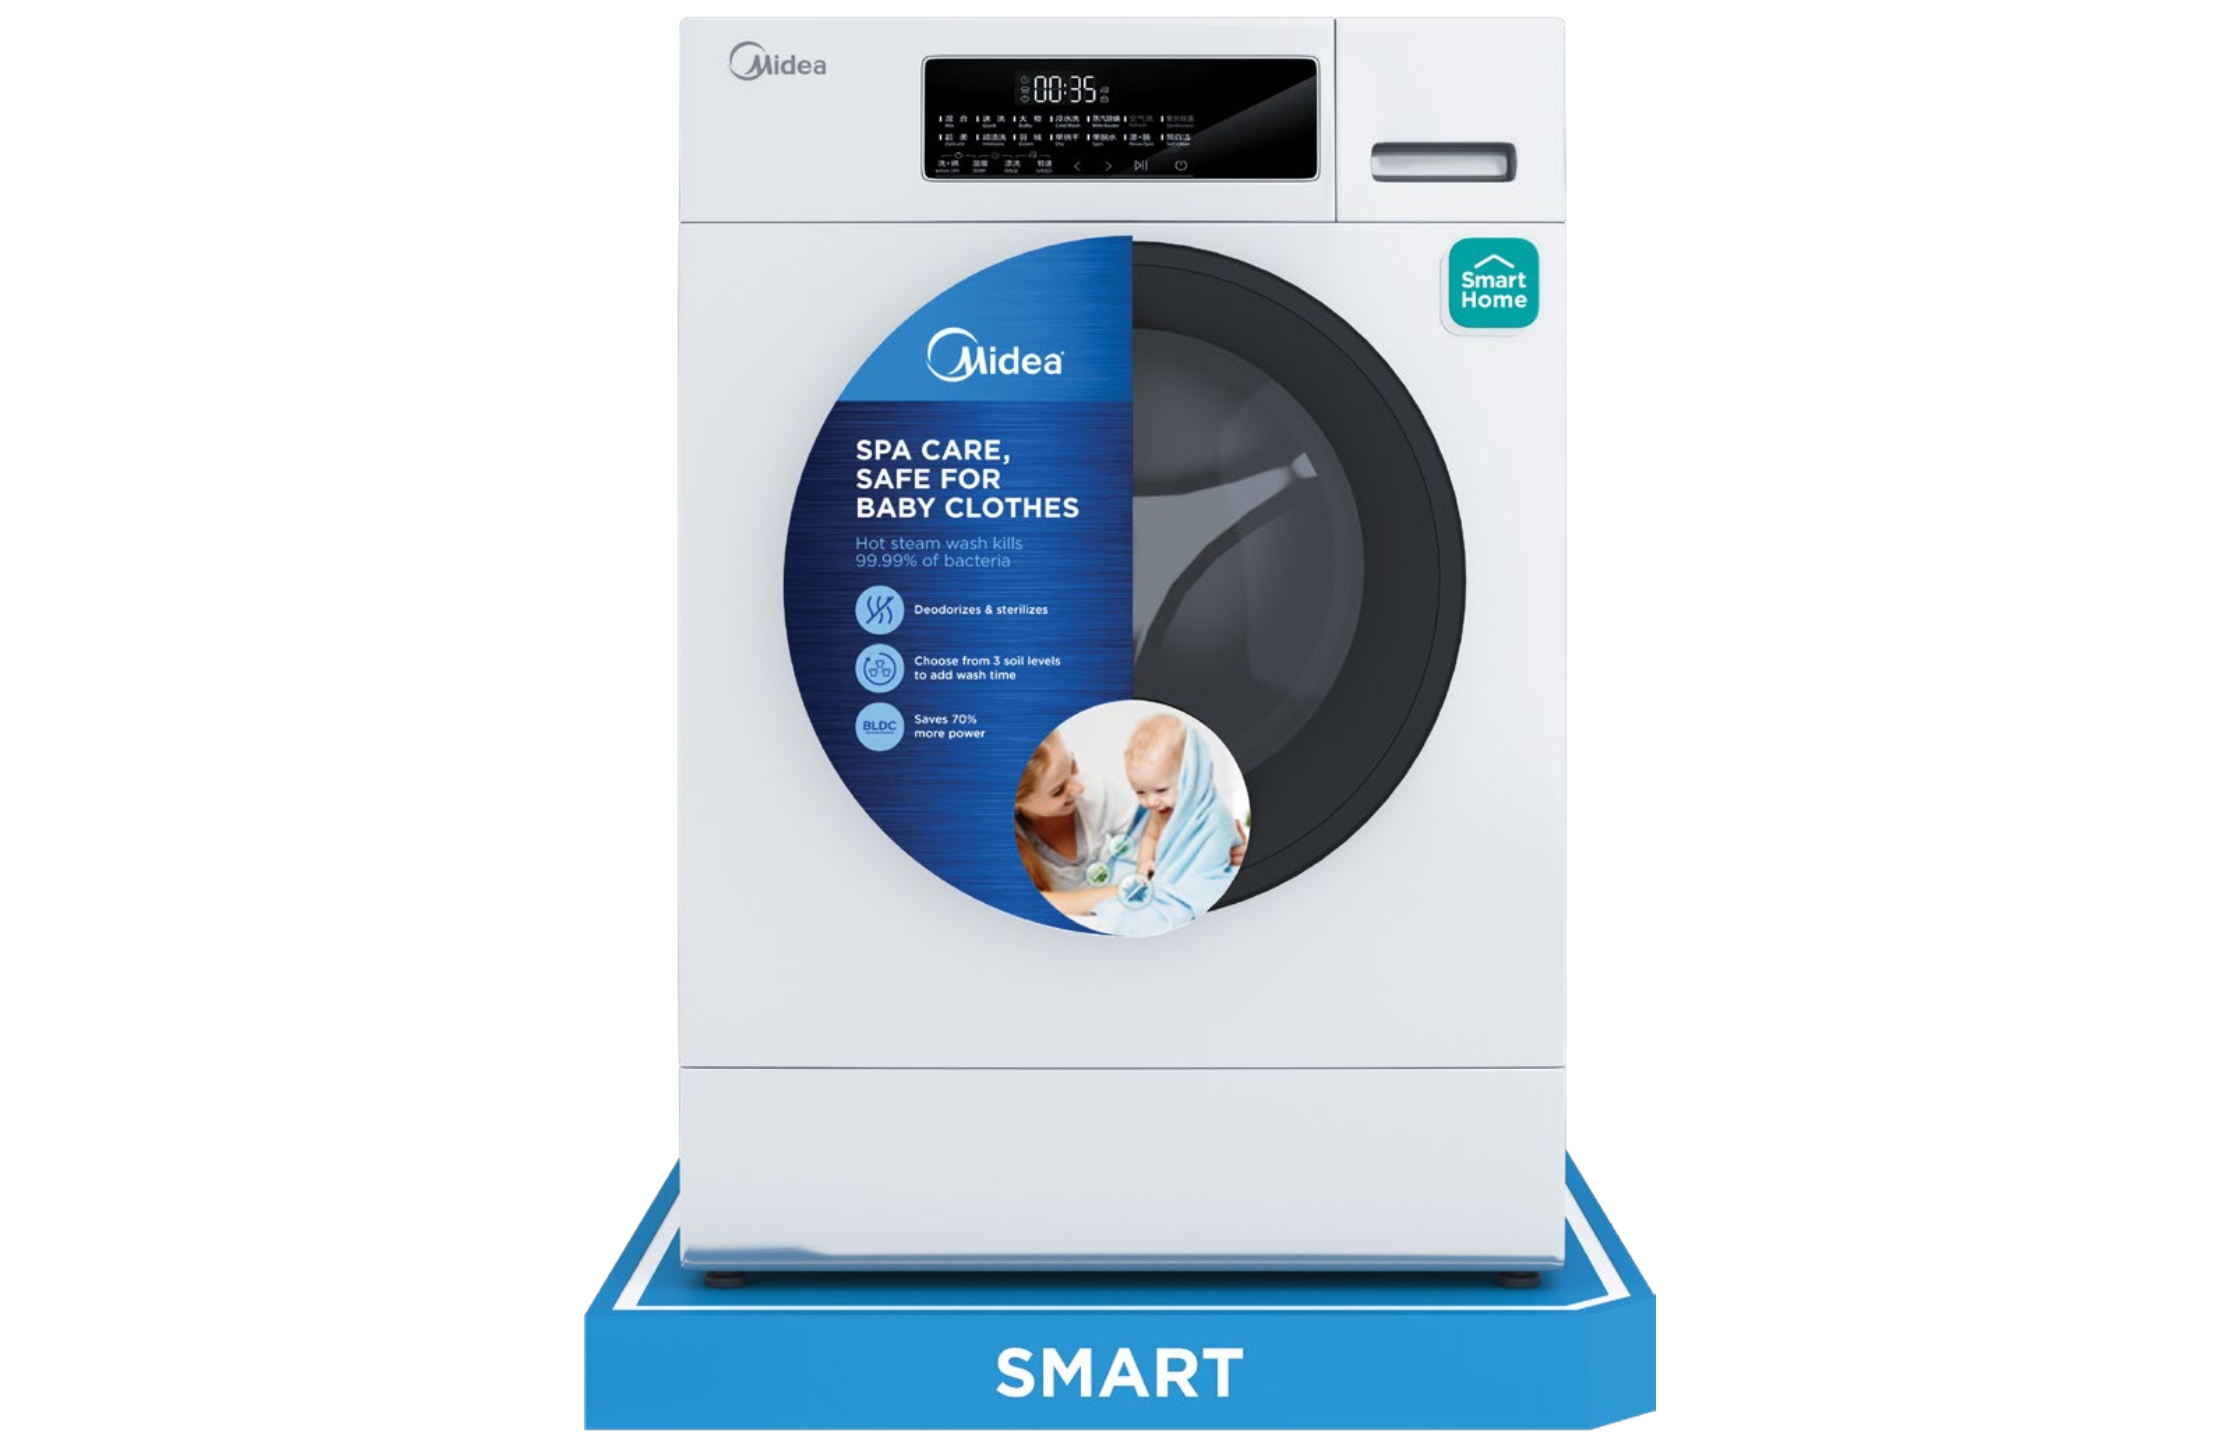
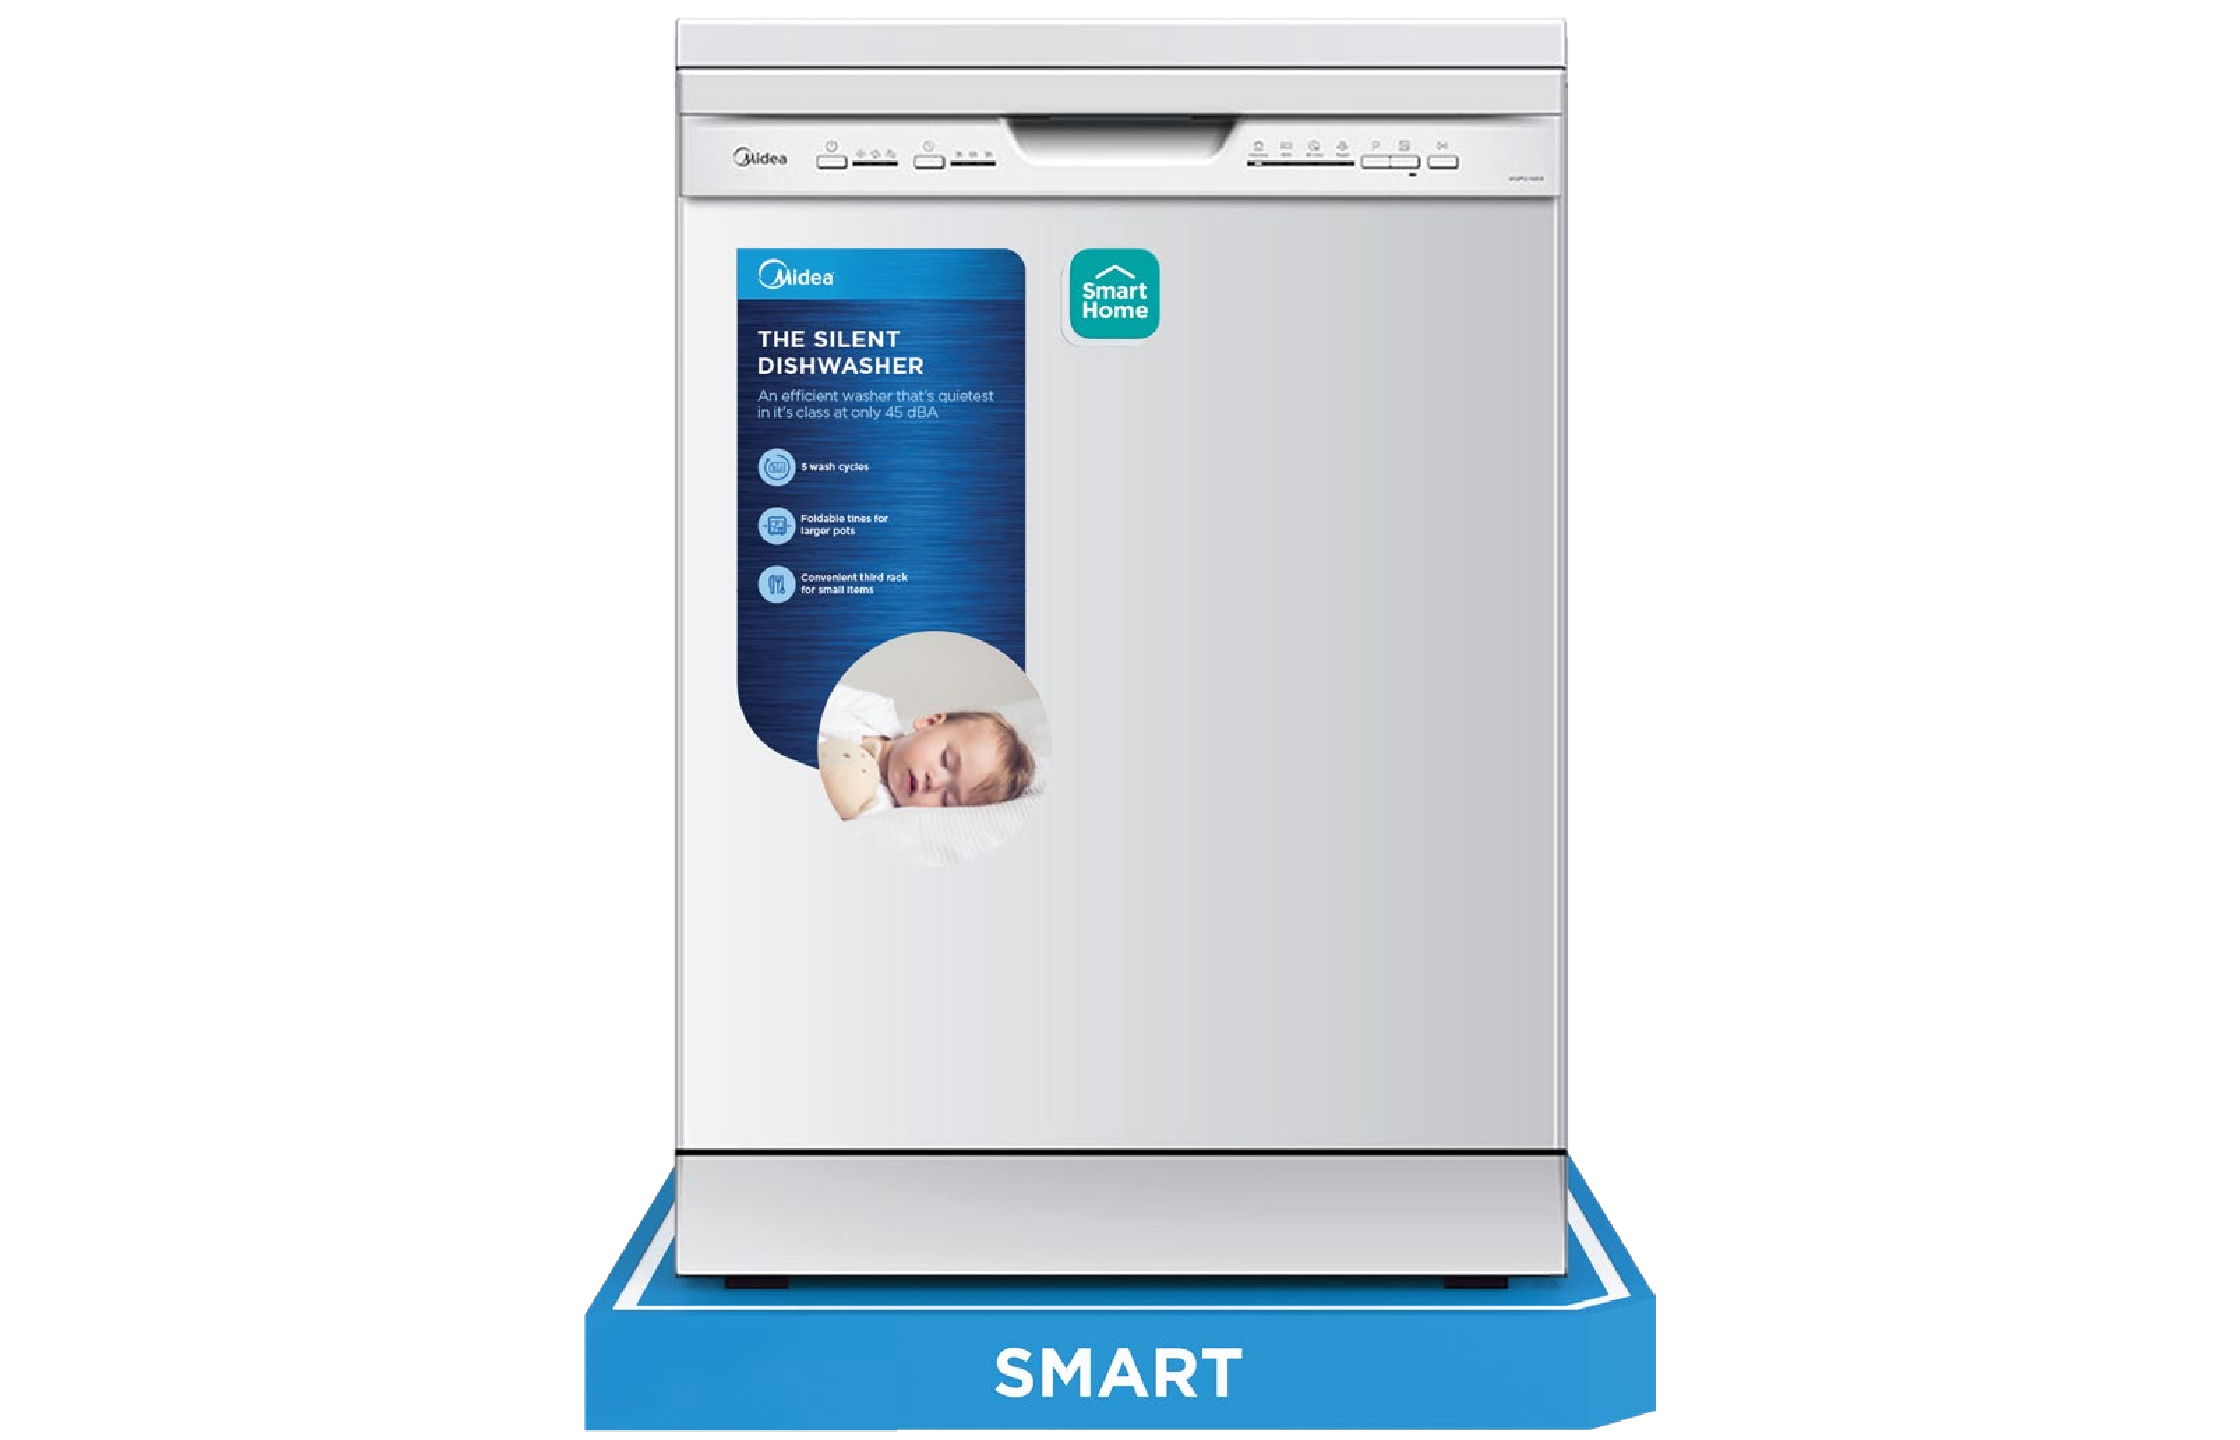
BestSmart Product Tag attached onto product + Smart Product Base
→The illustration is an example using Advance Smart Product Tag (acrylic tag) which has the same application as Basic Smart Product Tag (wobbler).
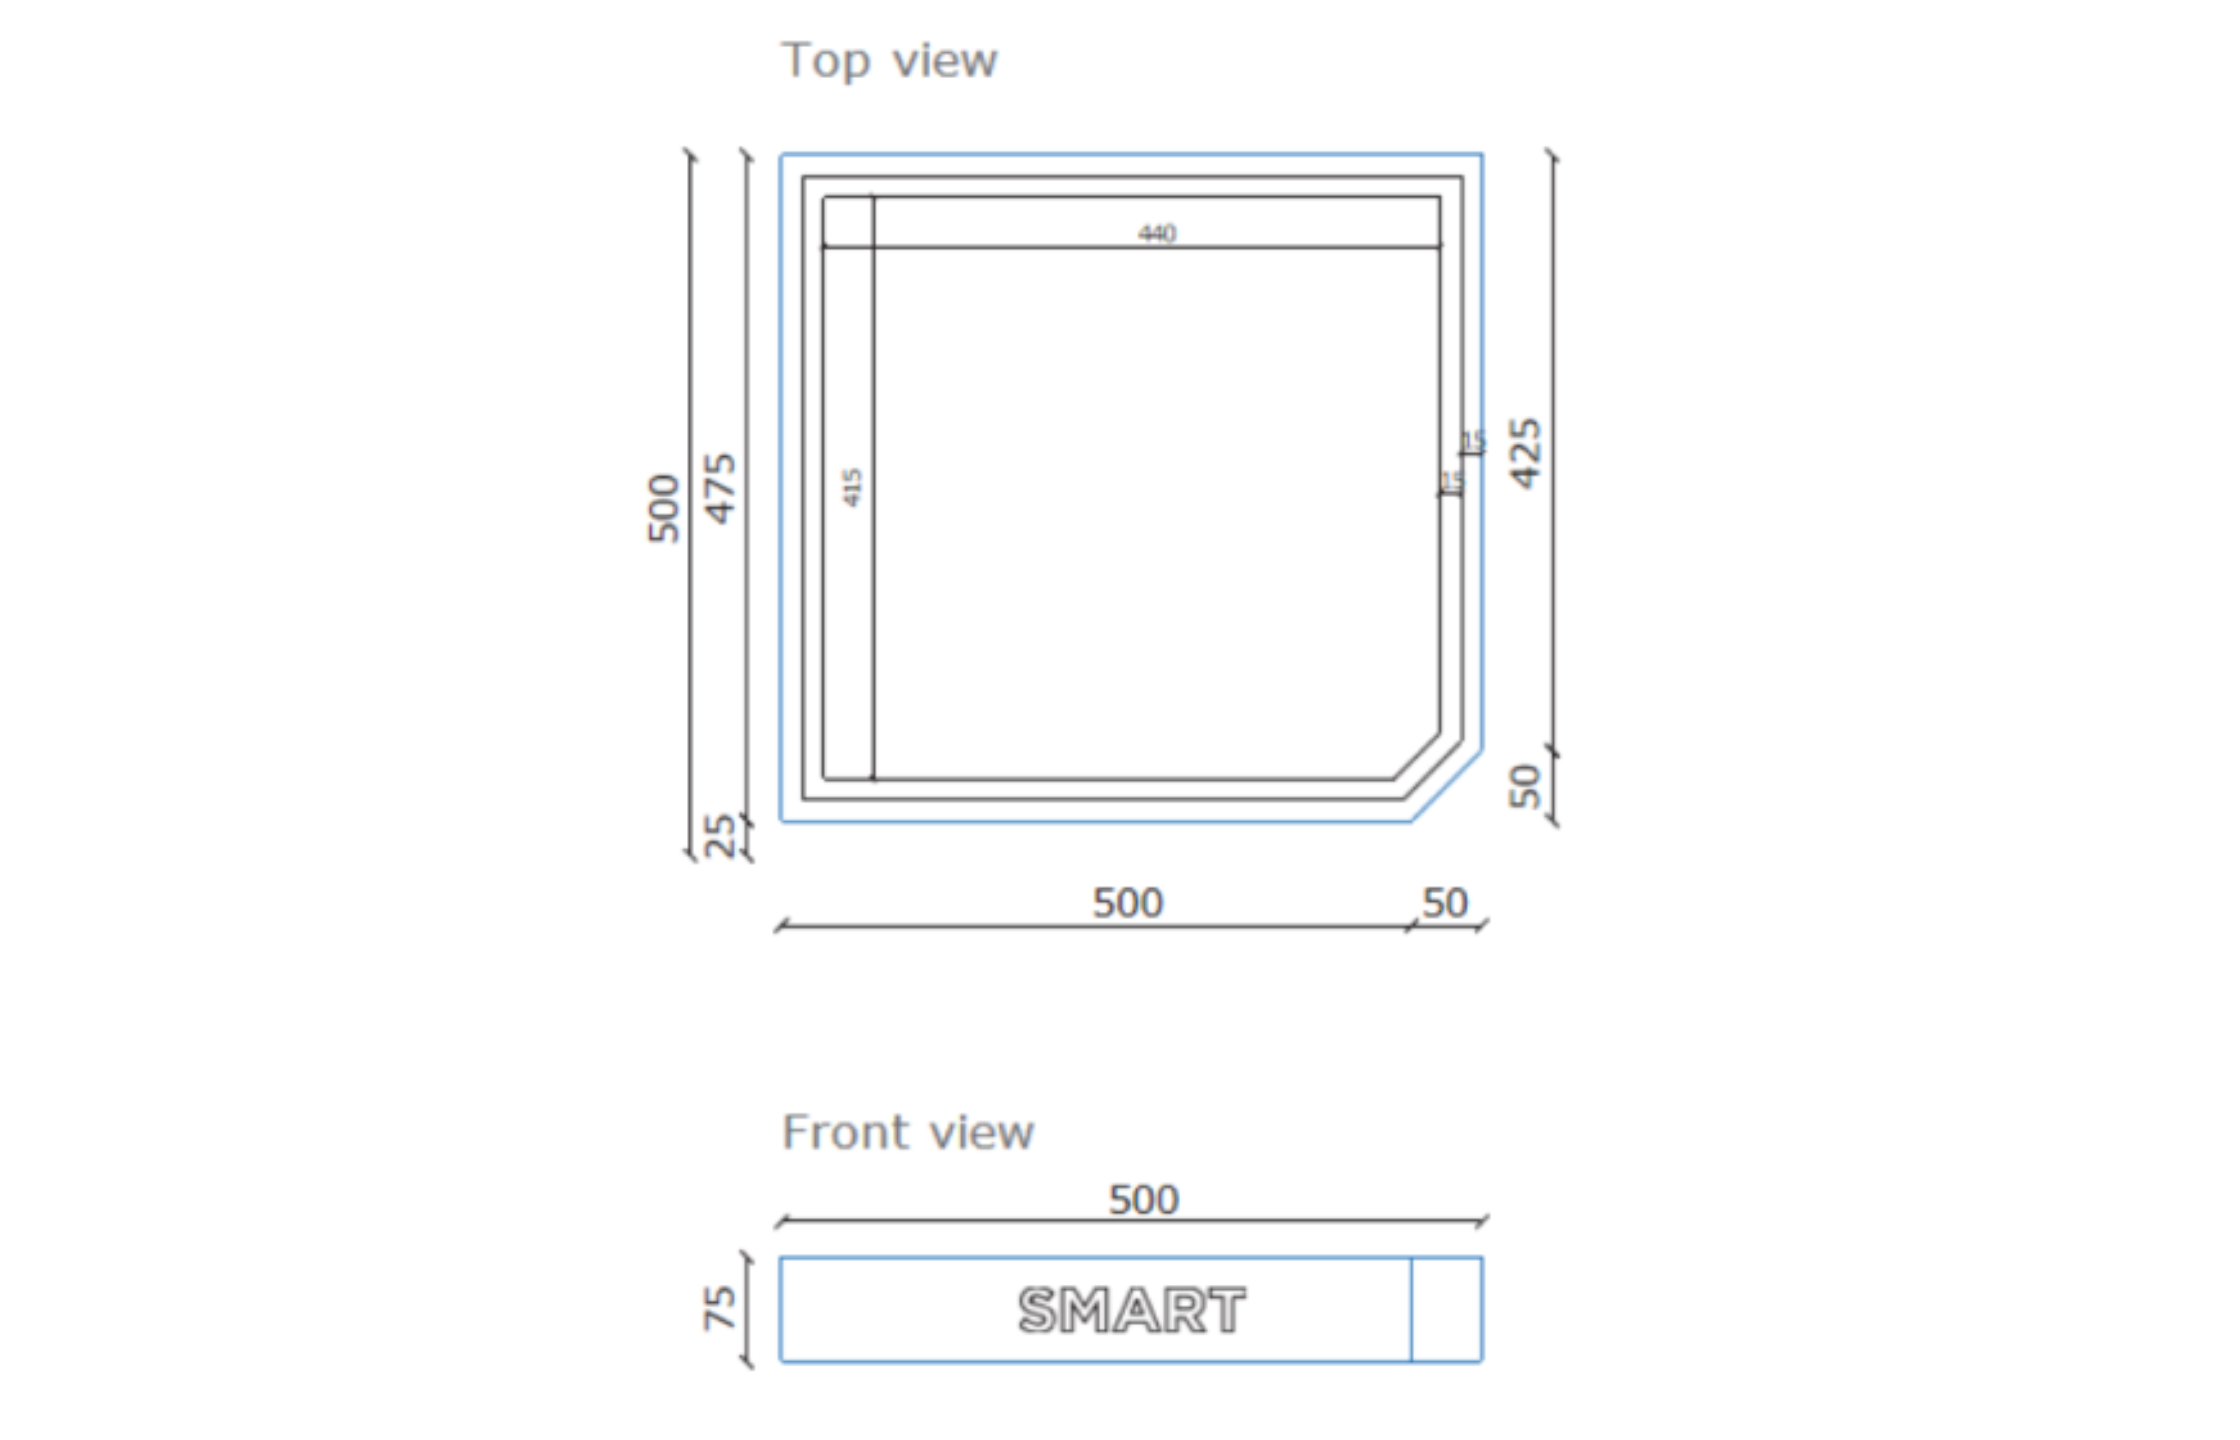
3.2 SMART PRODUCT BASE SPECIFICATIONS
Major Domestic Appliances
Washing Machine | Dryer | Dishwasher
-
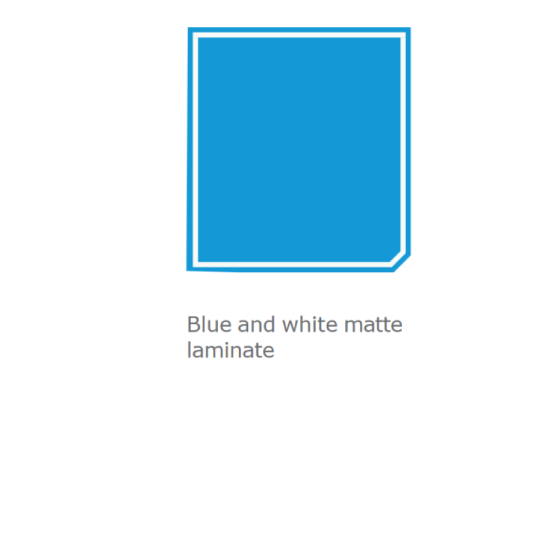
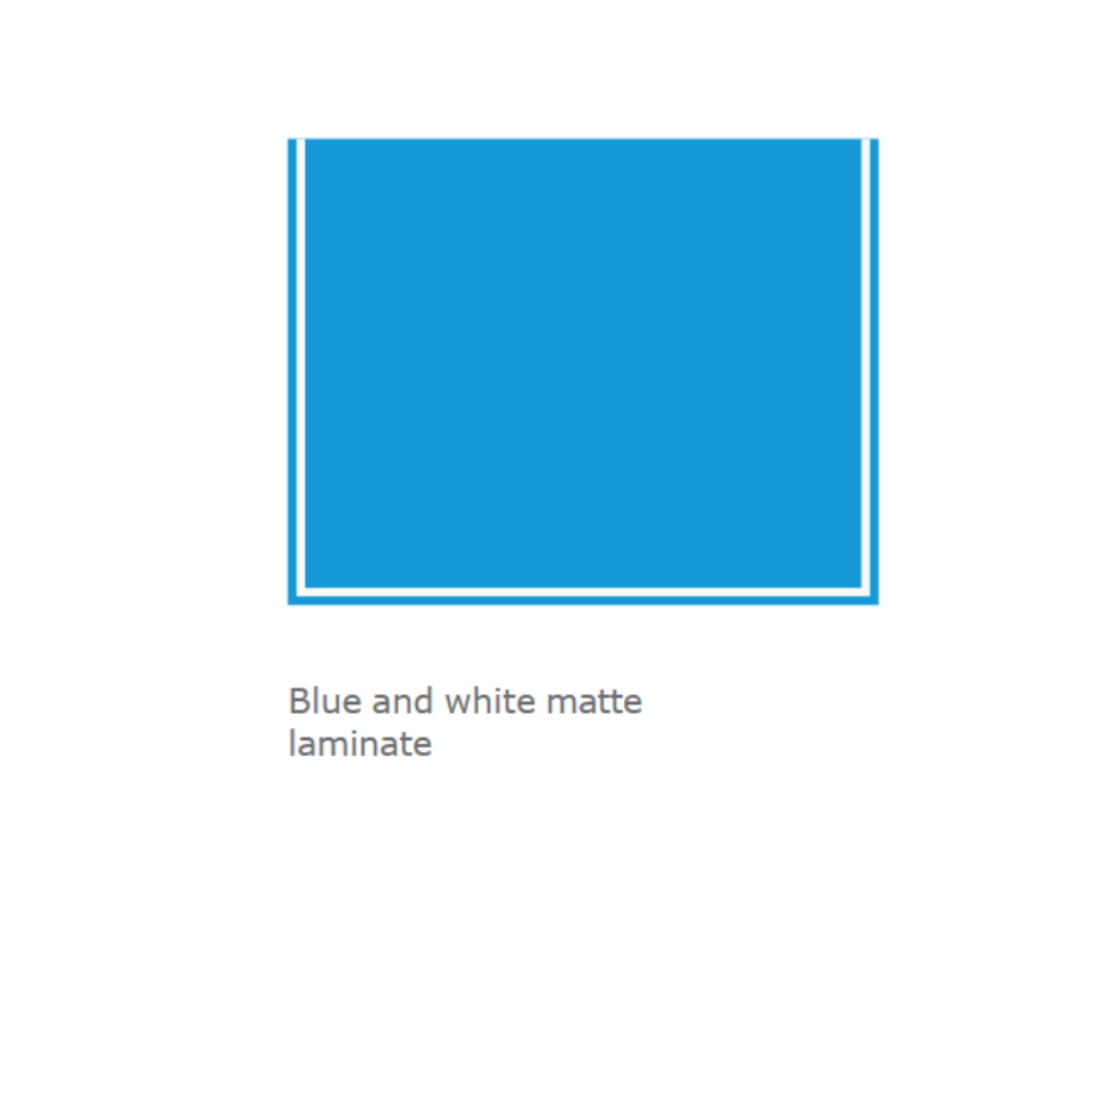
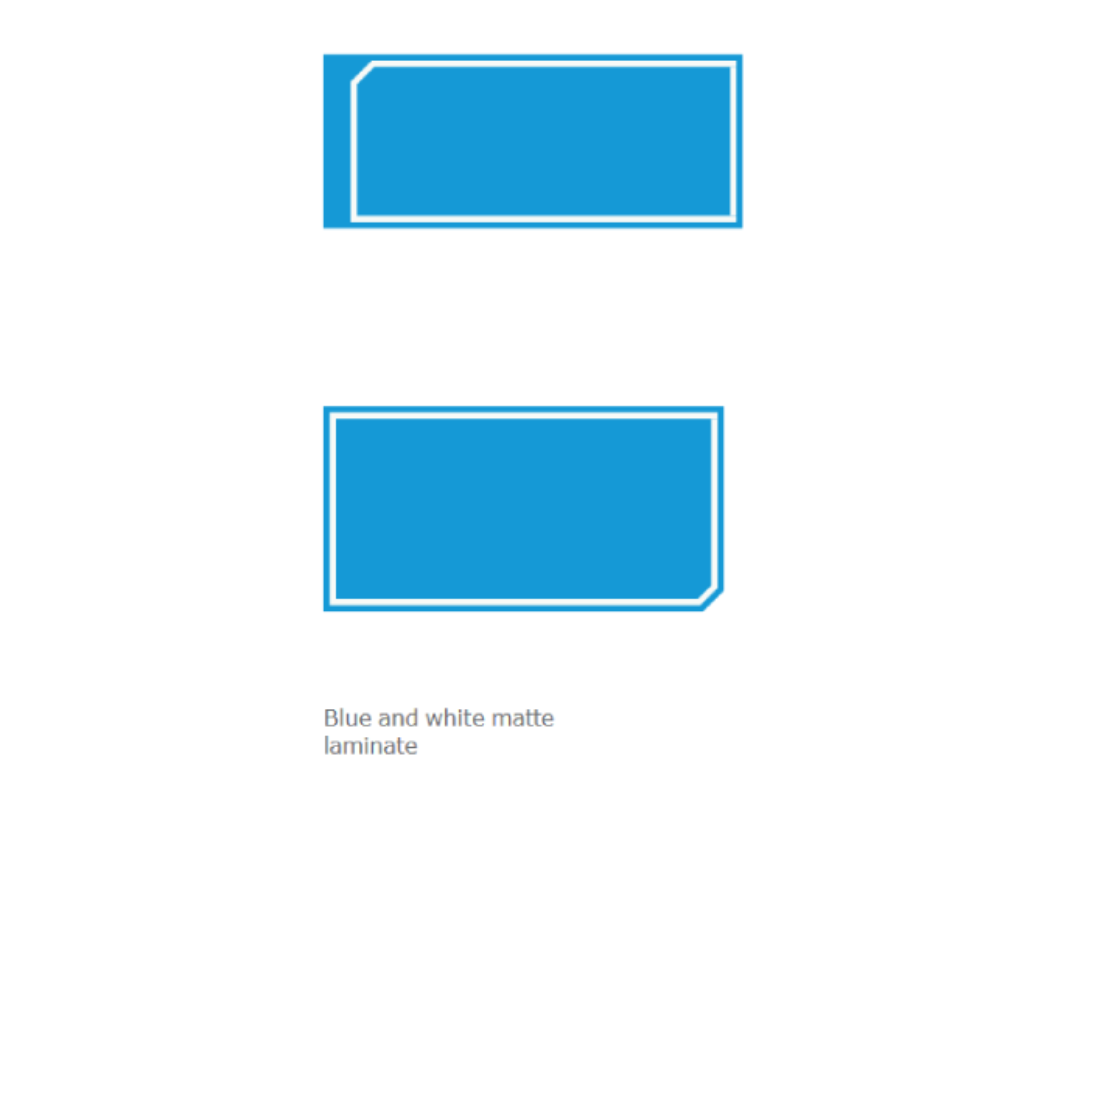
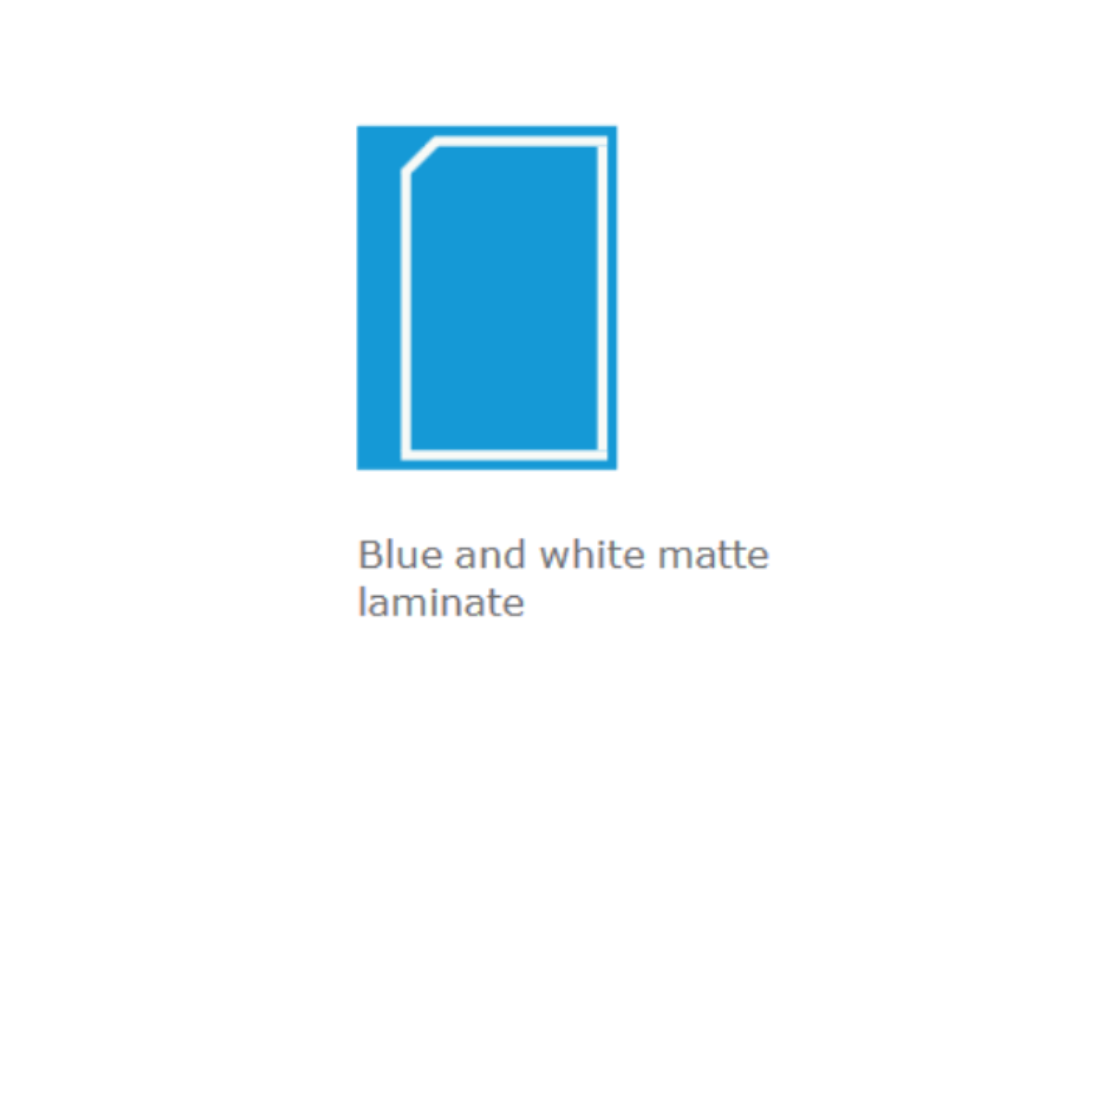
Material Details (recommended)
-
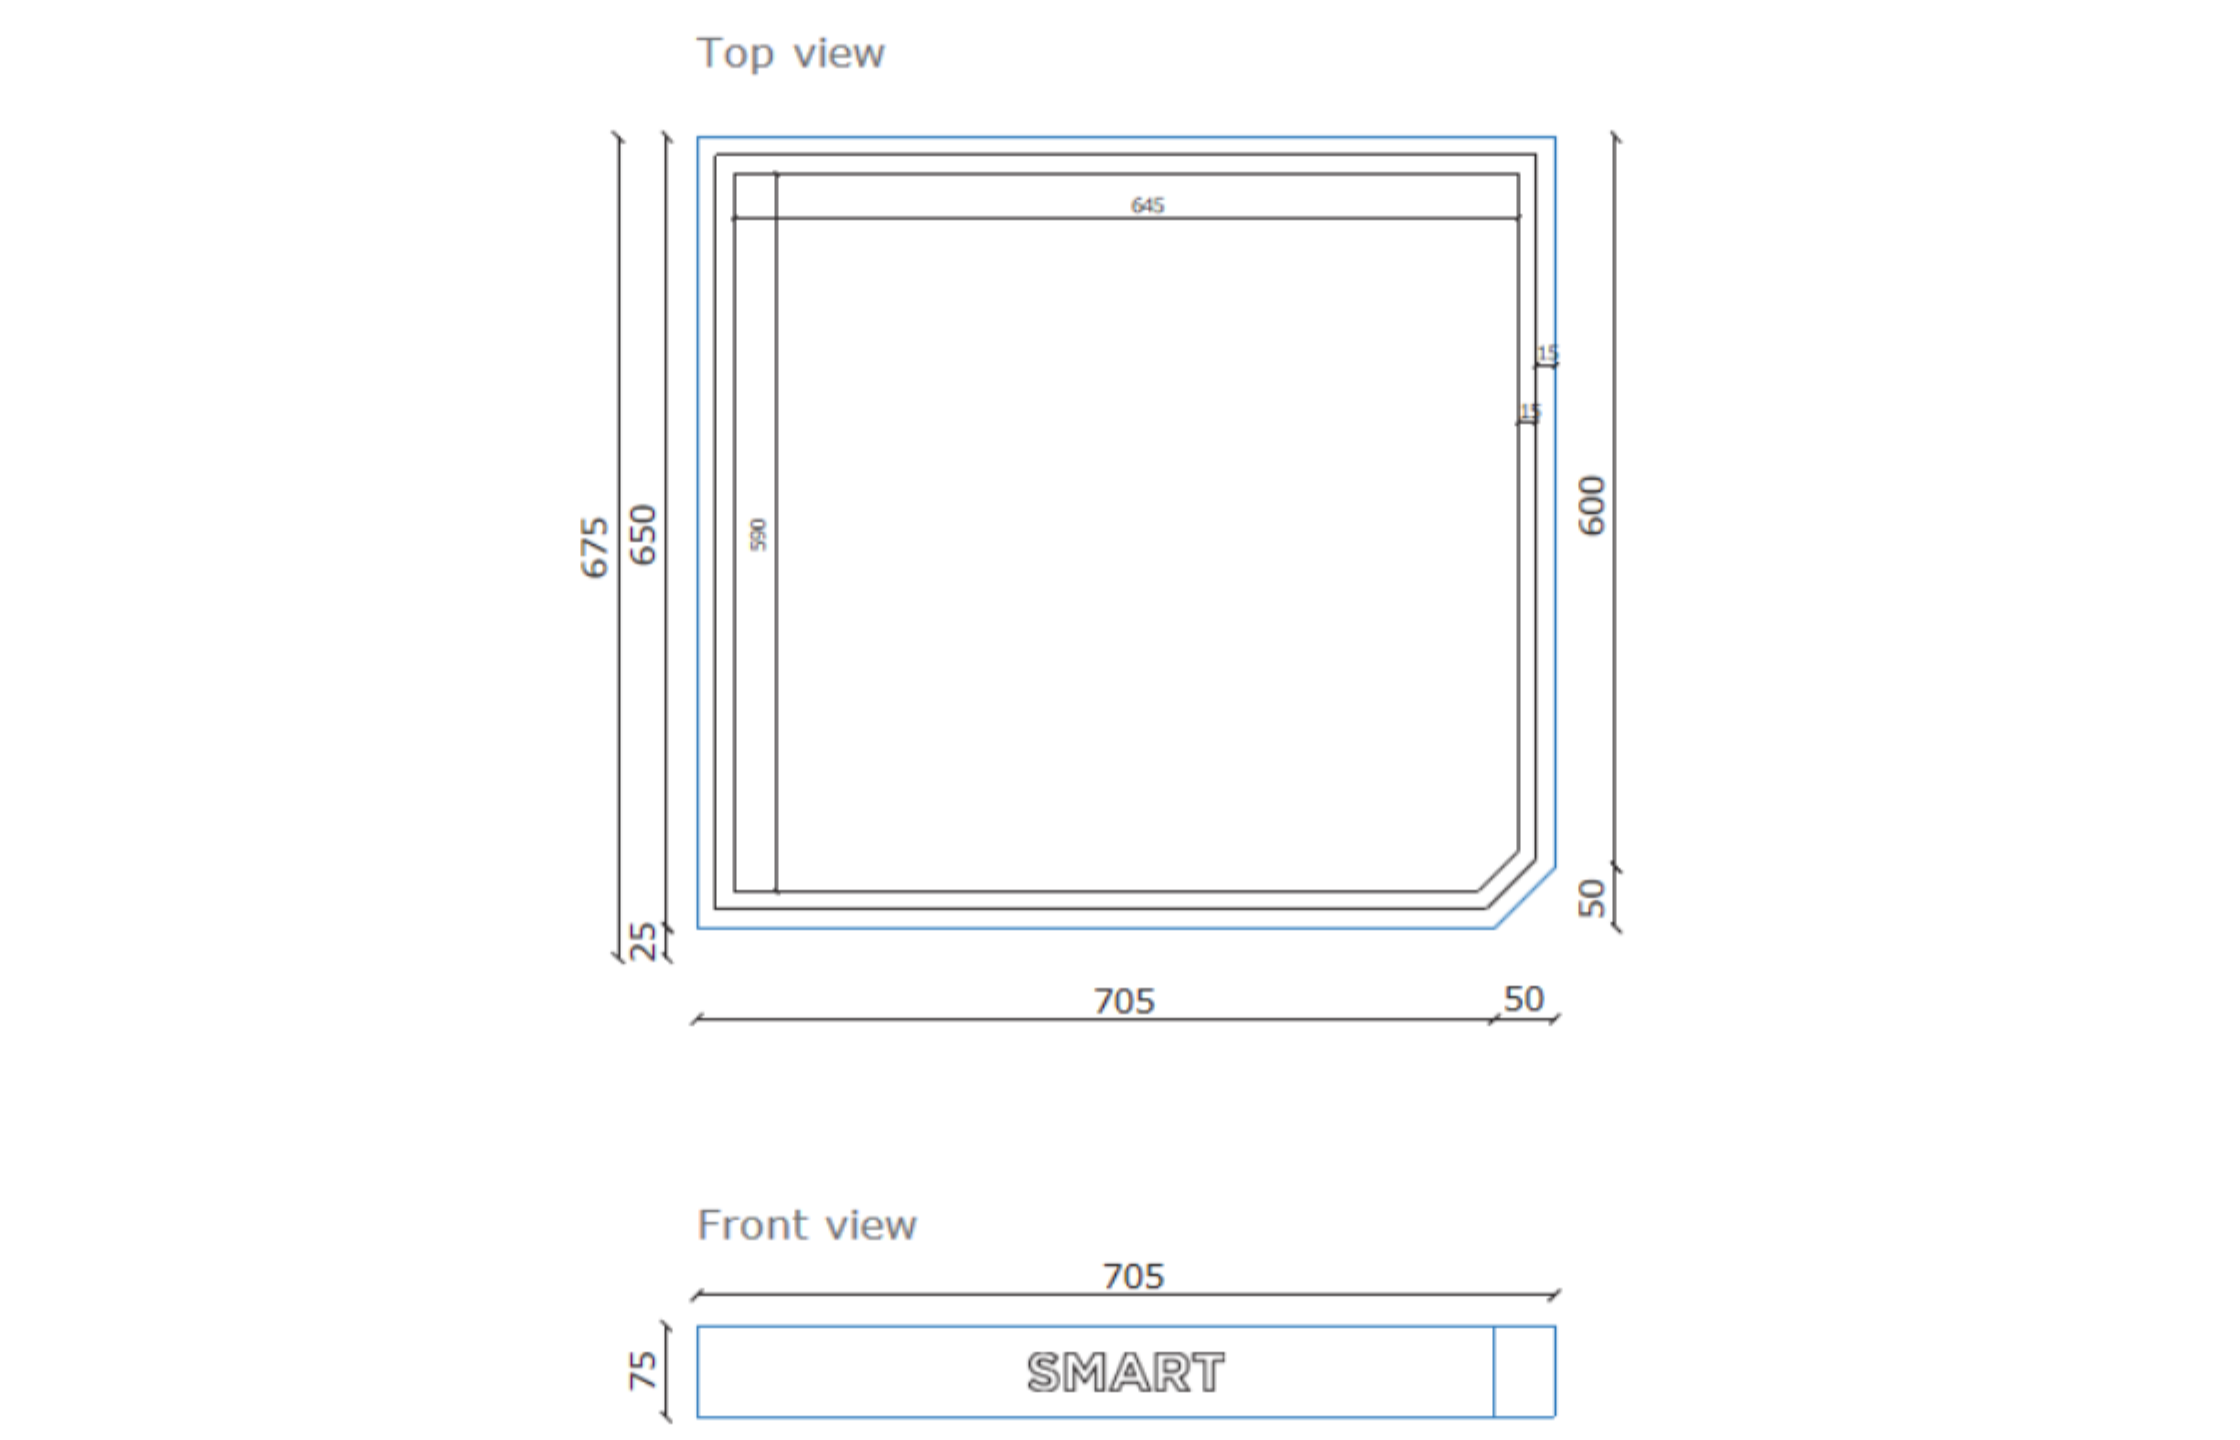
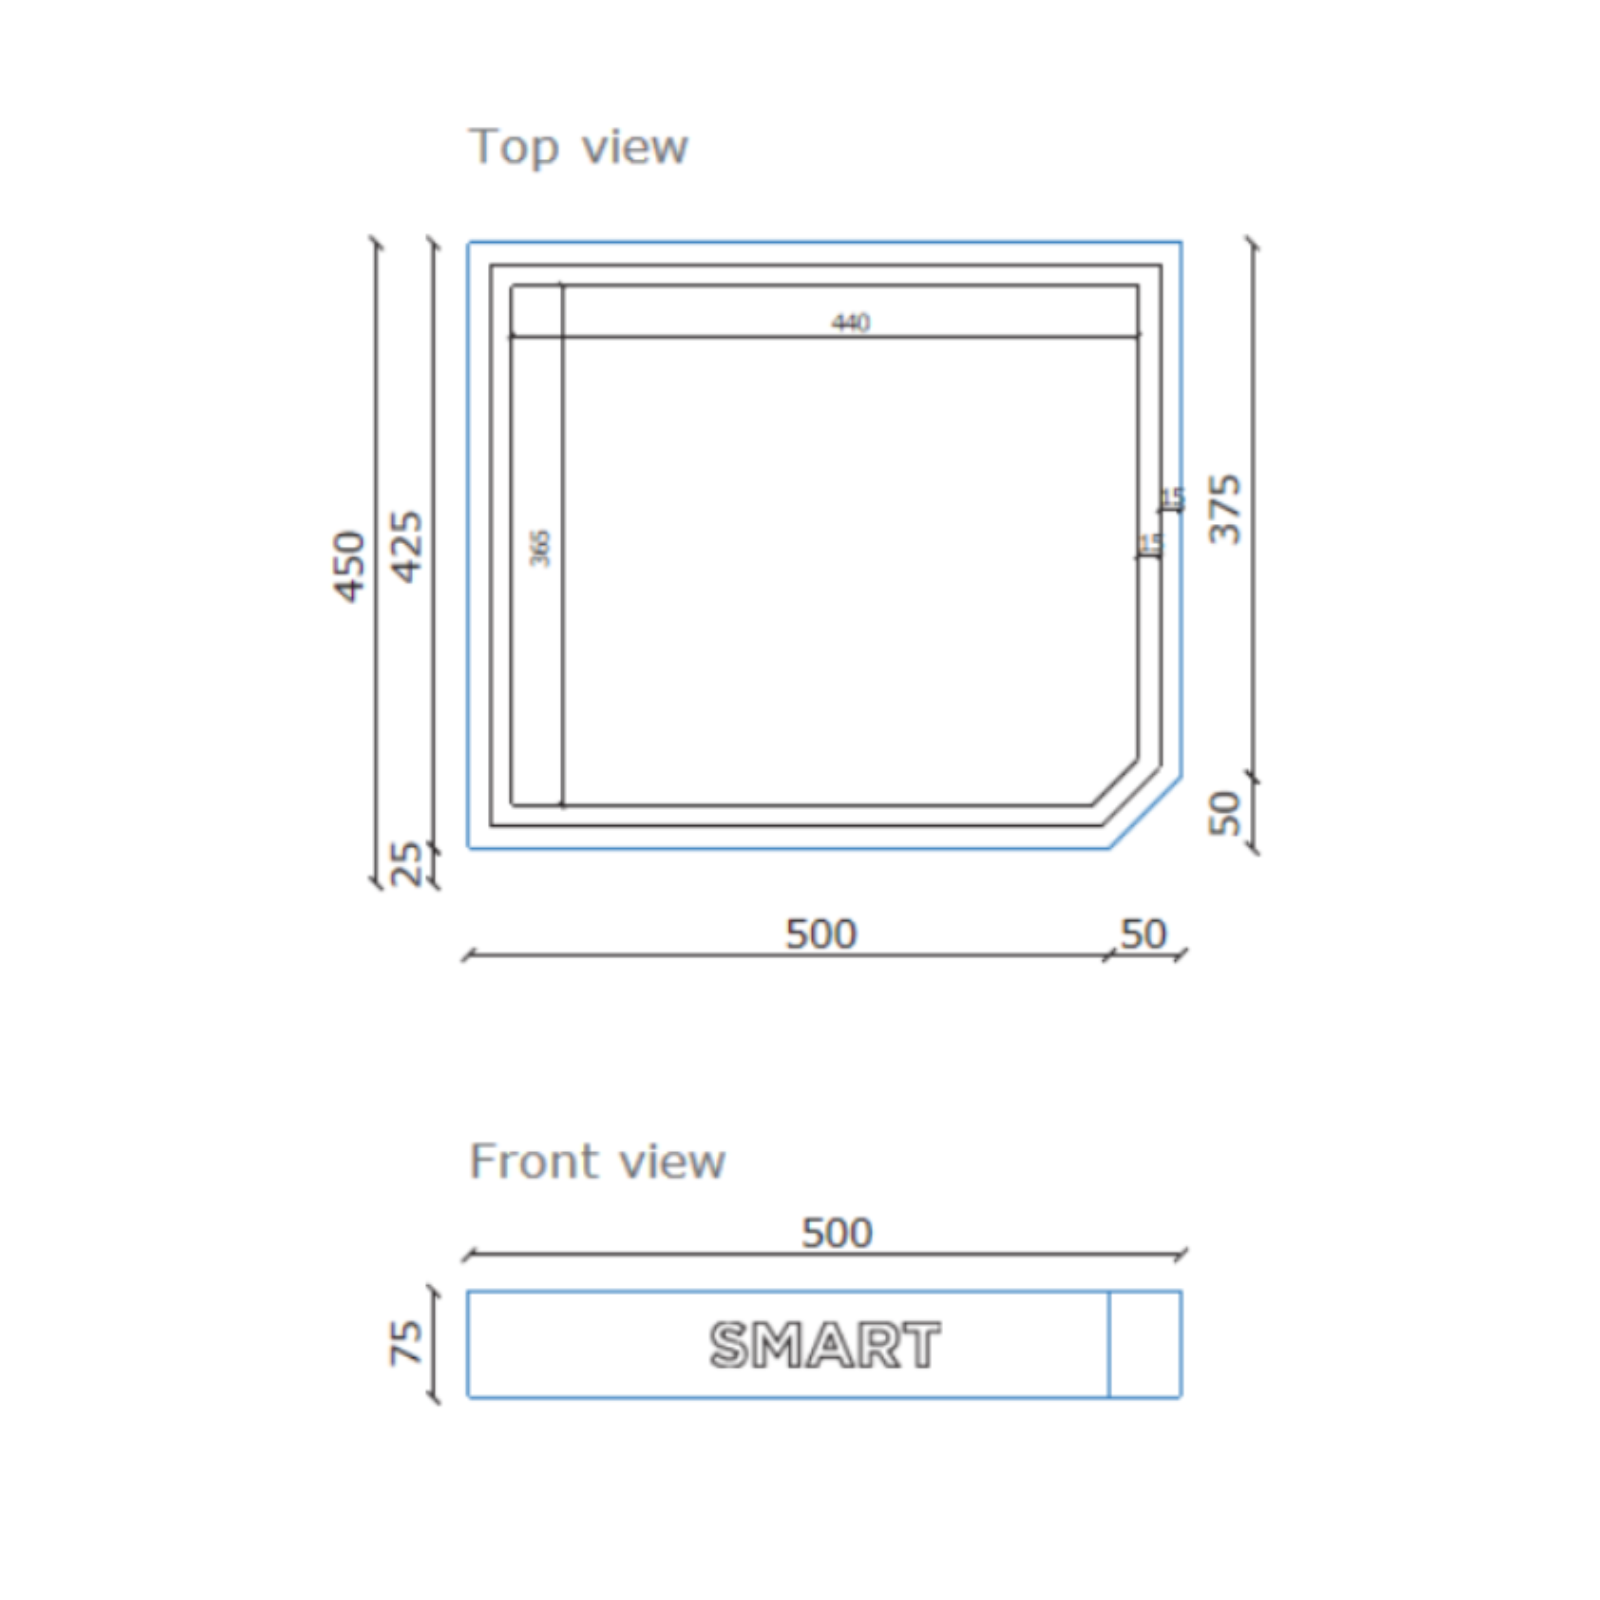
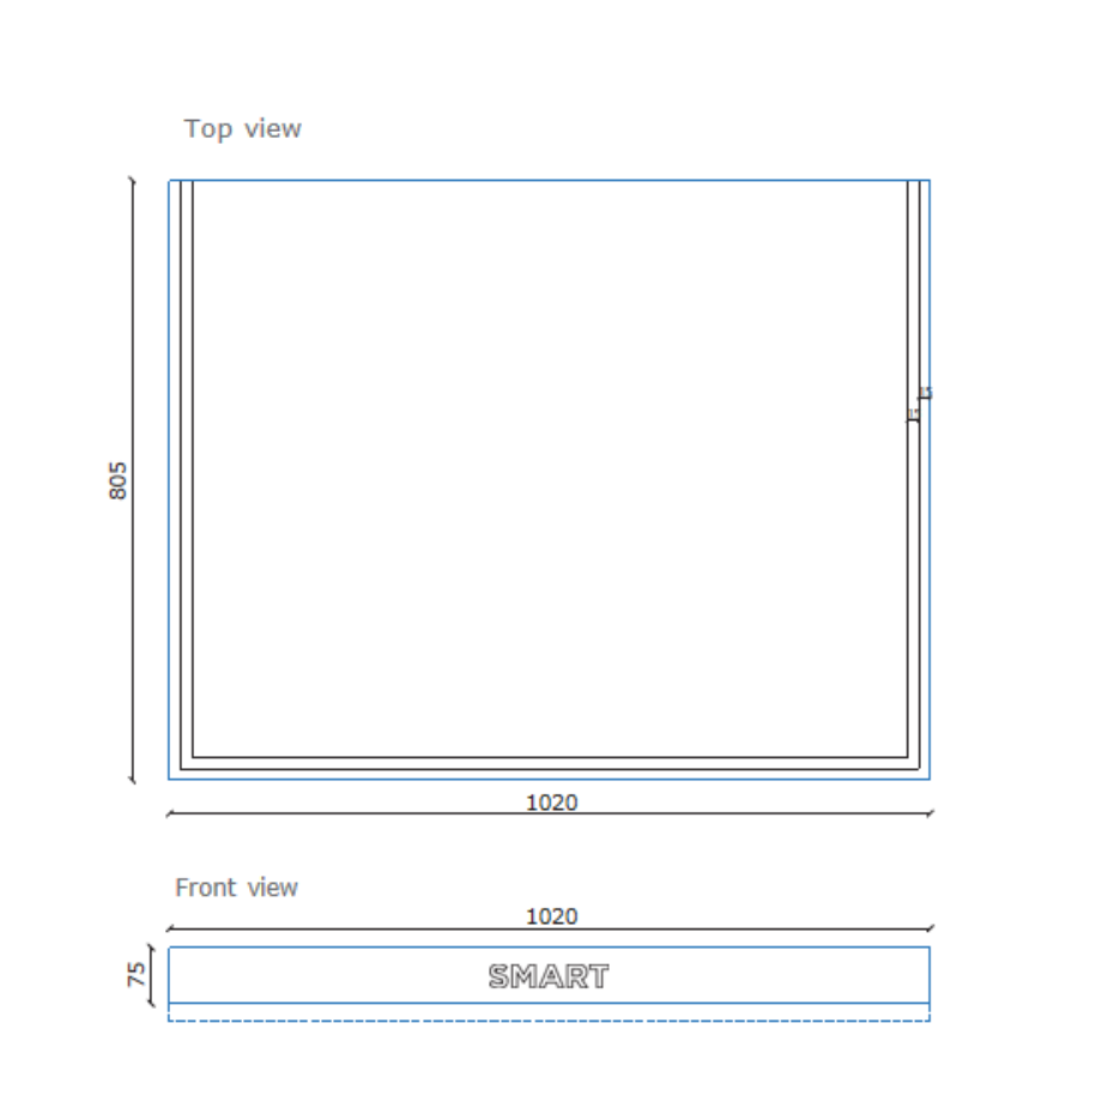
Smart Product Base Dimensions (recommended)
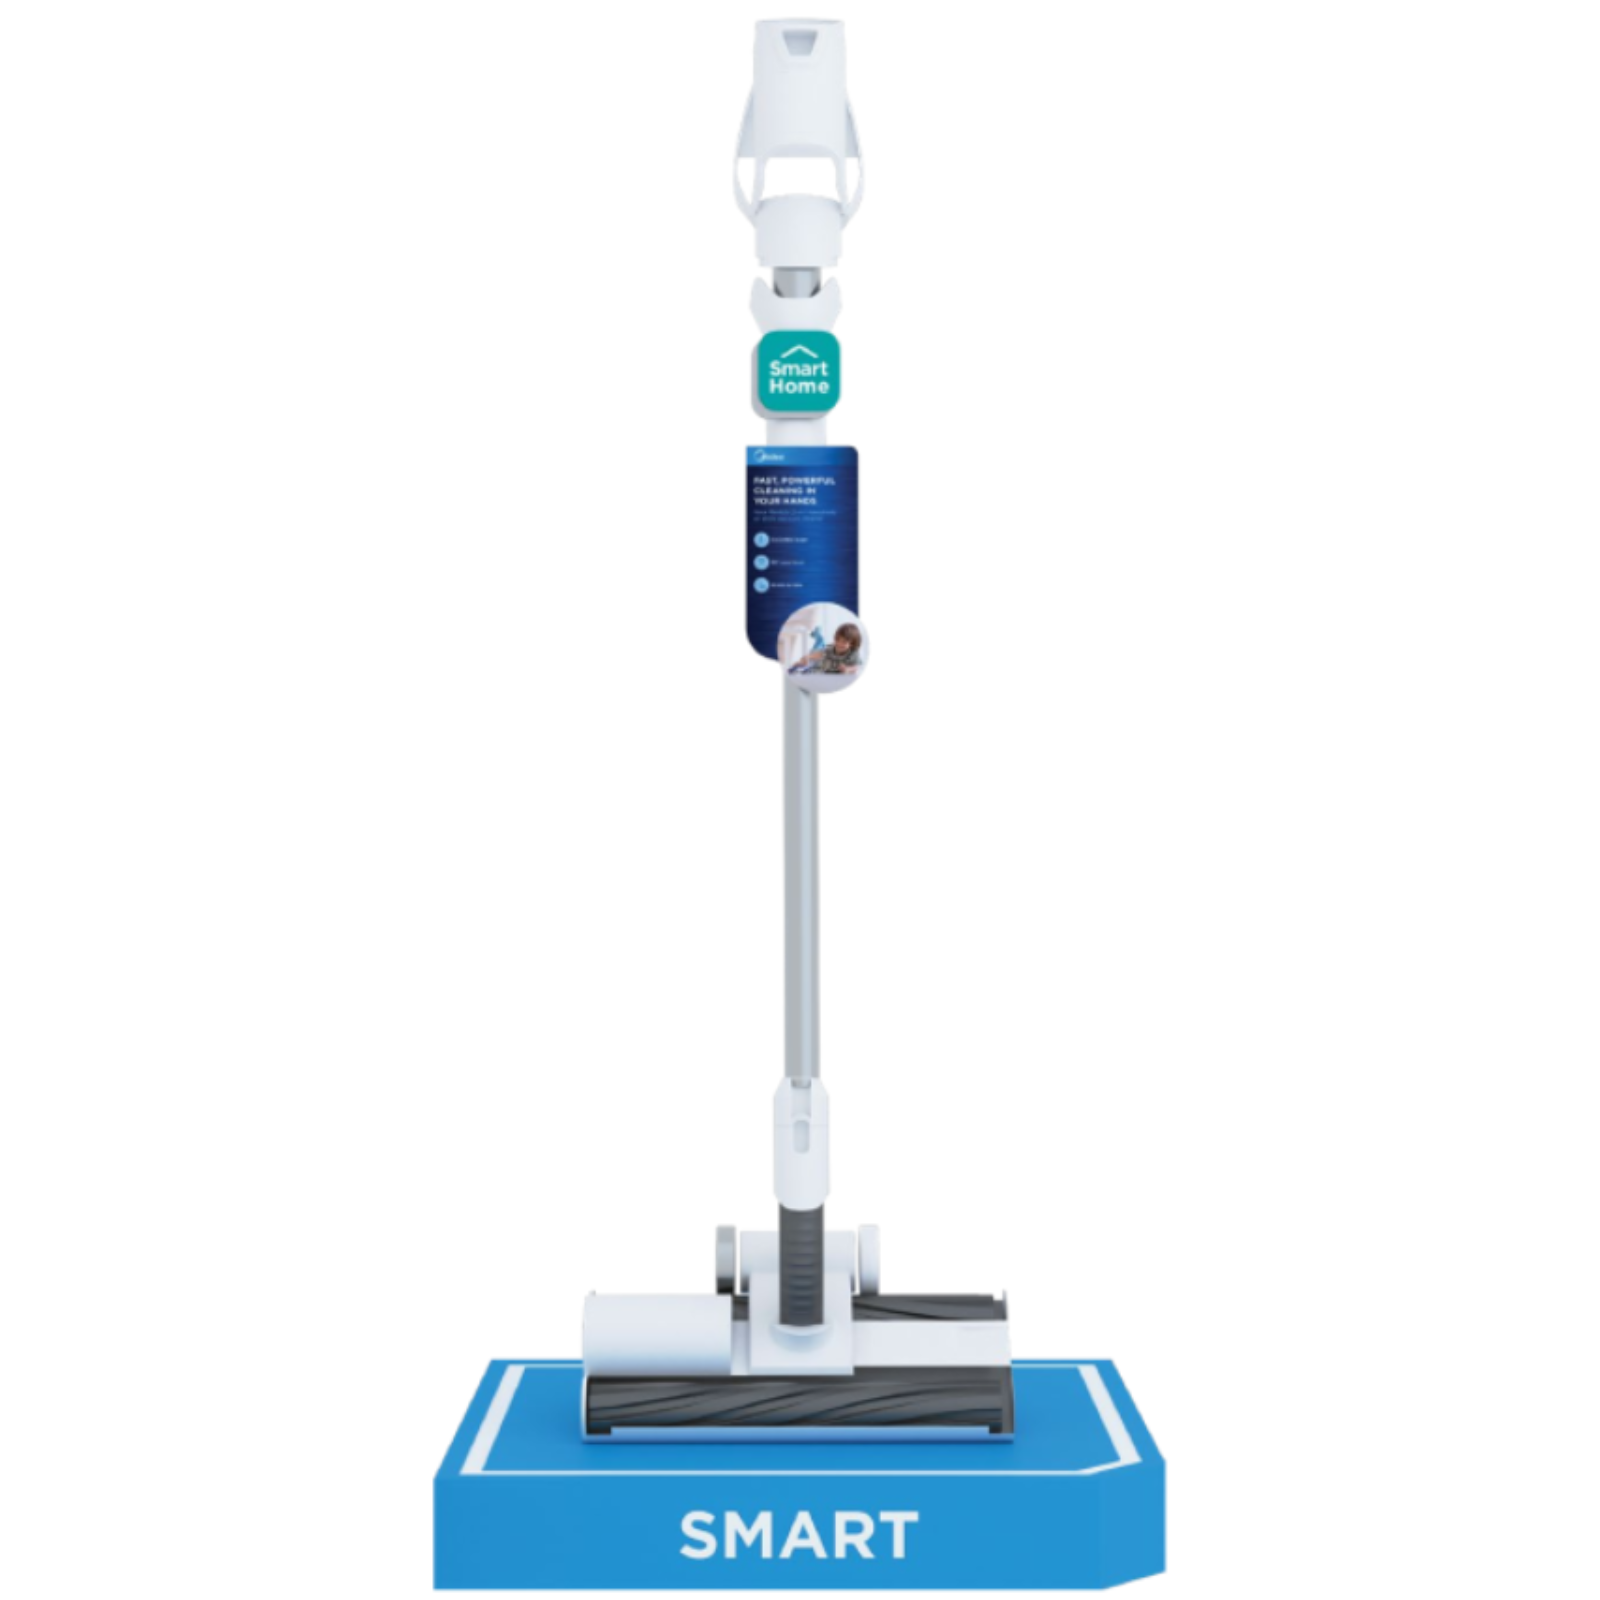
Small Domestic Appliance
Handheld Vacuum Cleaner
-
Material Details (recommended)
-
Smart Product Base Dimensions (recommended)
-
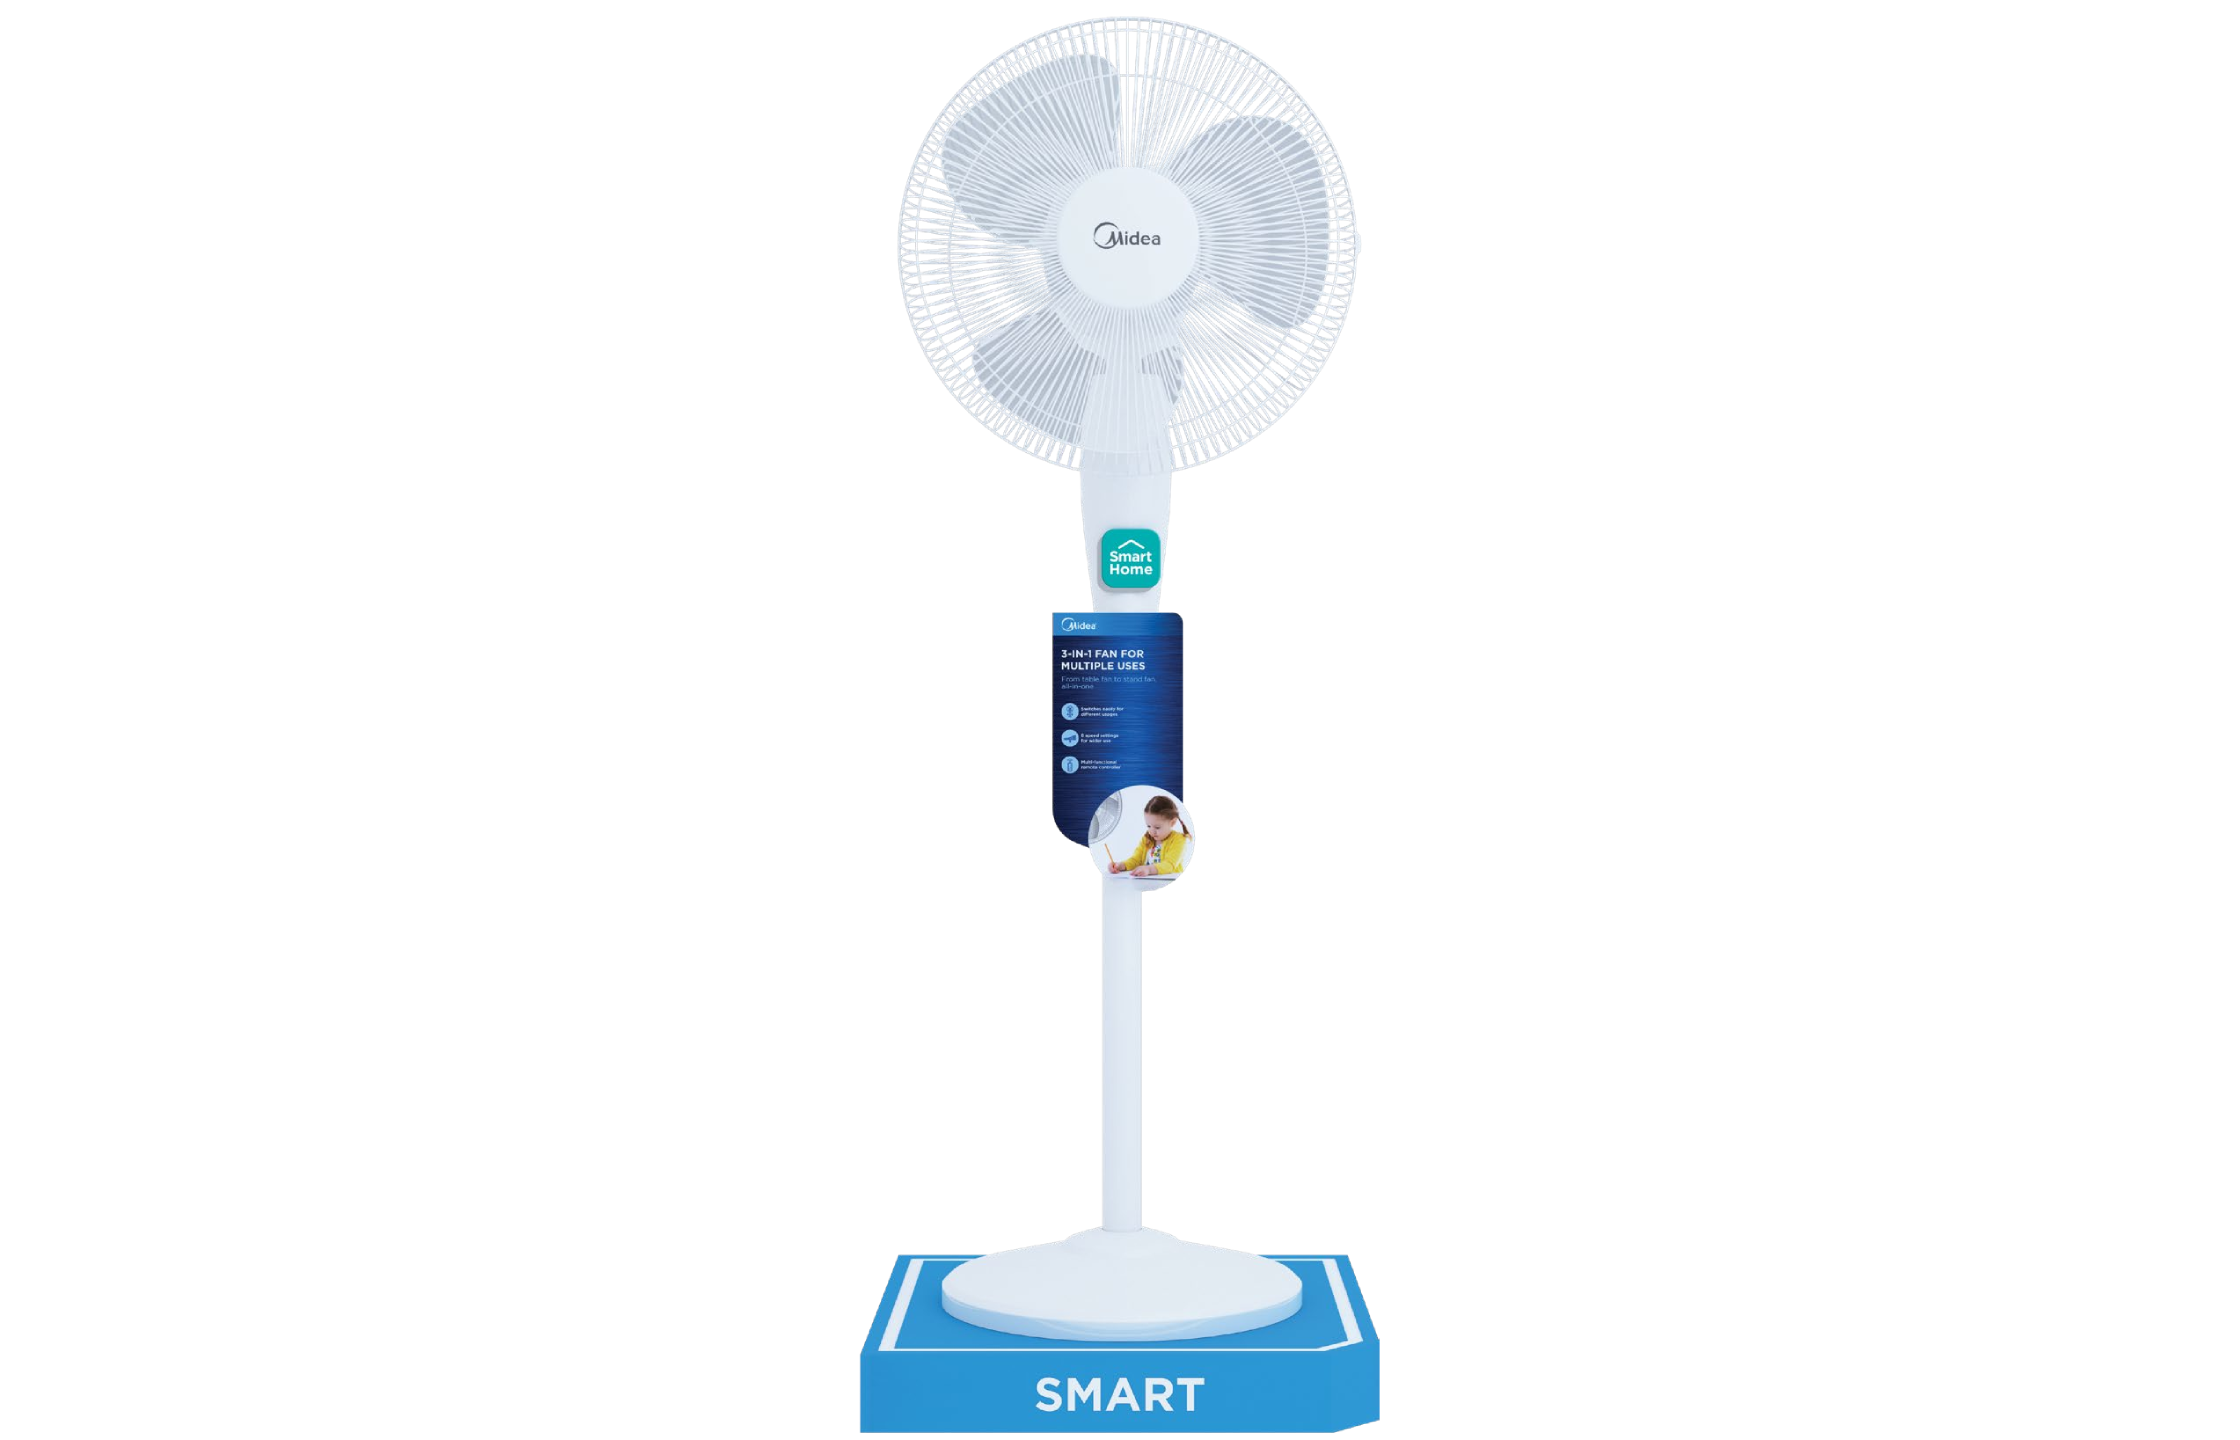
Small Domestic Appliances
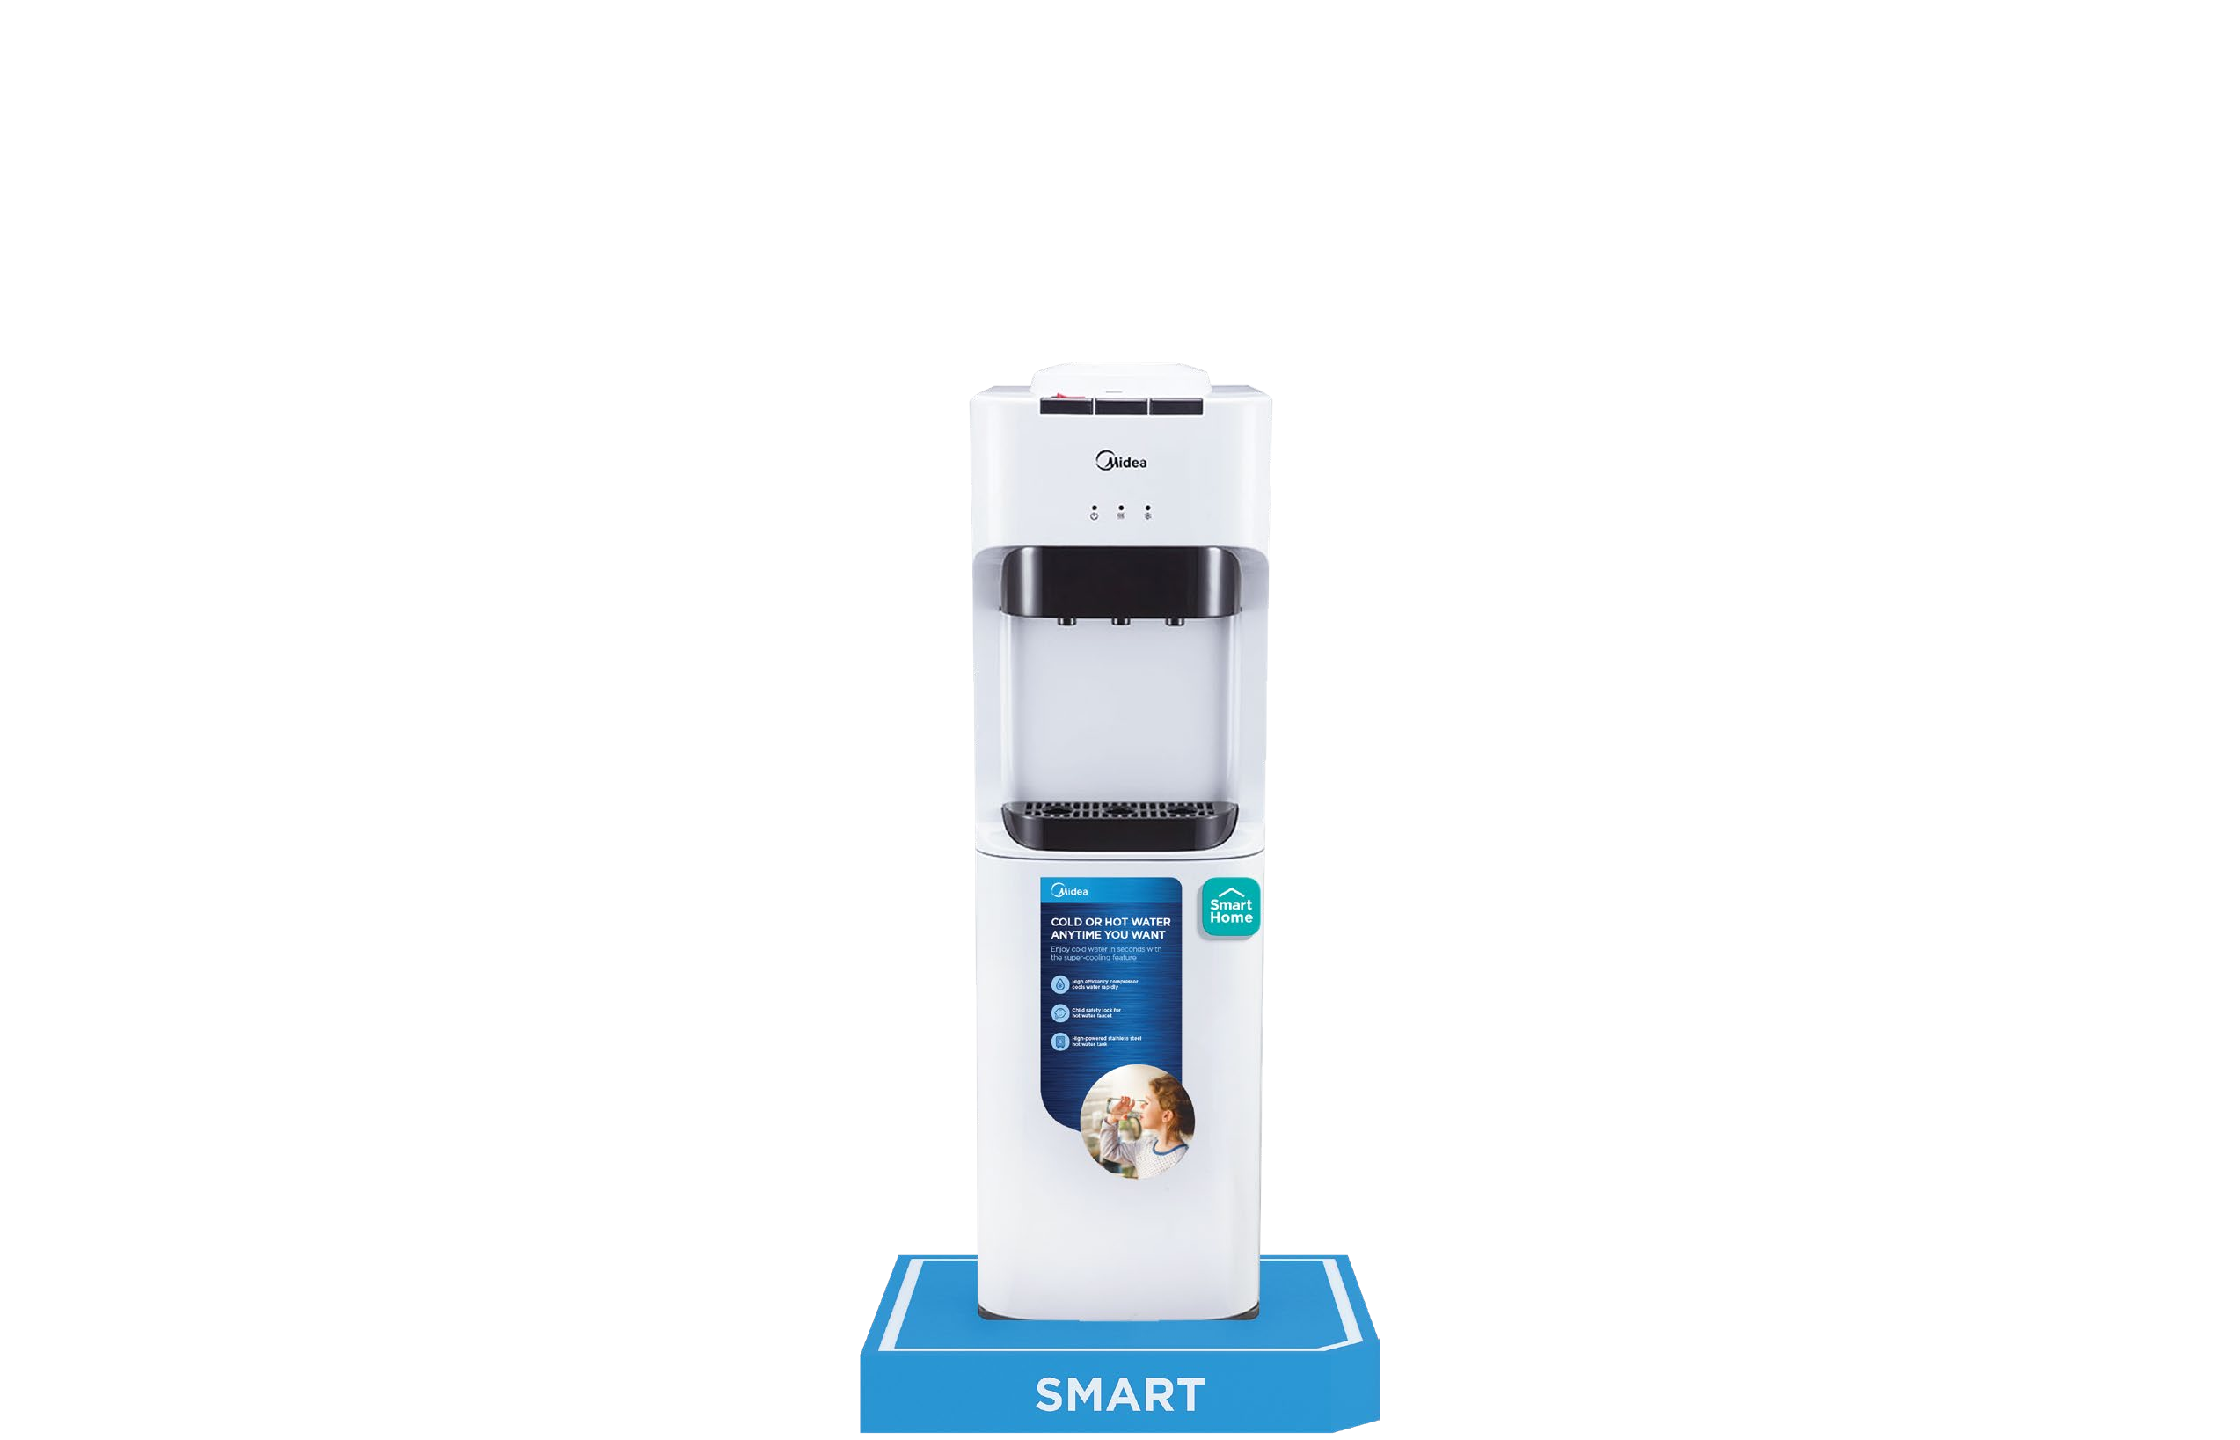
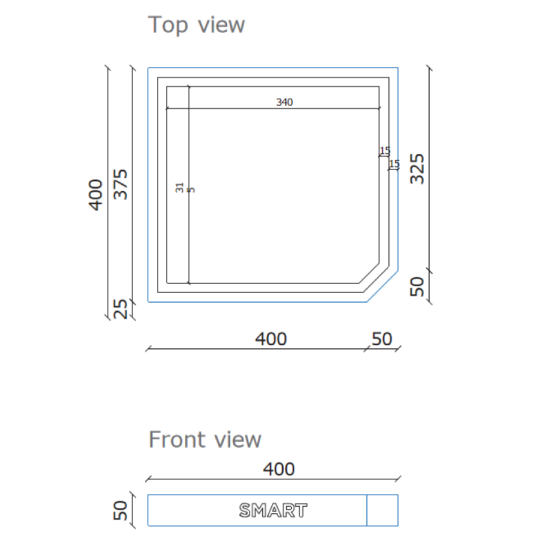
Standing Fan | Water Dispenser
-
Material Details (recommended)
-
Smart Product Base Dimensions (recommended)
Small Kitchen Appliances (Small)
Electric Jug Kettle | 3L Water Purifier
-
Material Details (recommended)
-
Smart Product Base Dimensions (recommended)
-
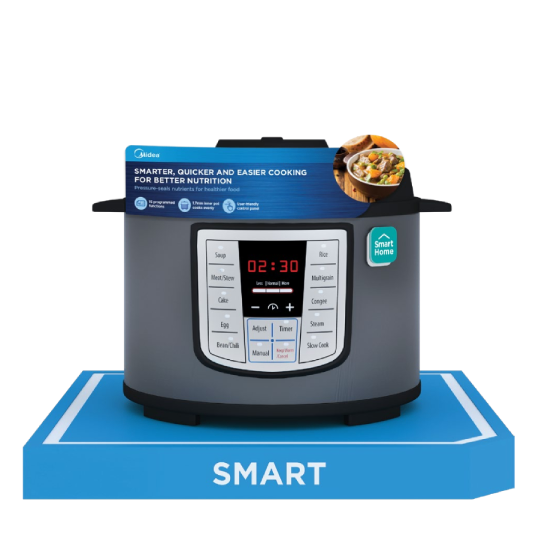
Small Kitchen Appliances (Medium)
Rice Cooker | Pressure Cooker | Air Fryer | Toaster Oven | Multi Cooker
-

Material Details (recommended)
-
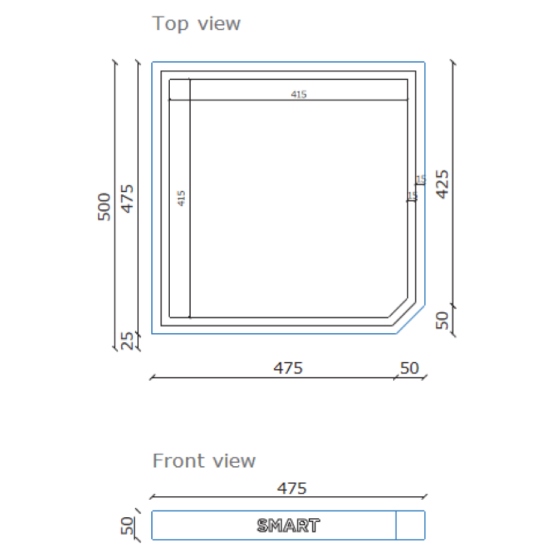
Smart Product Base Dimensions (recommended)
-
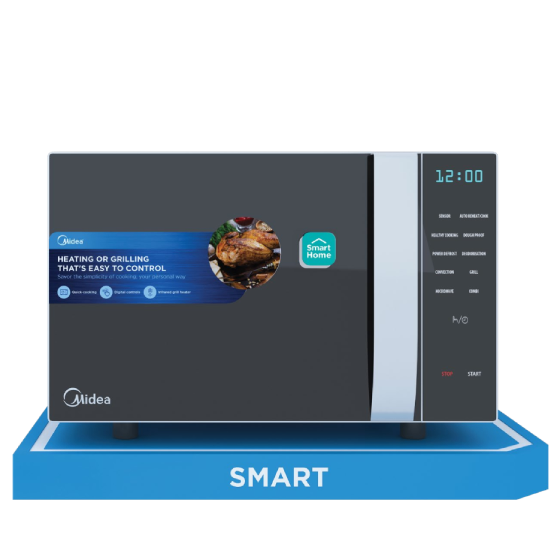
Small Kitchen Appliance (Big)
Microwave Oven
-

Material Details (recommended)
-
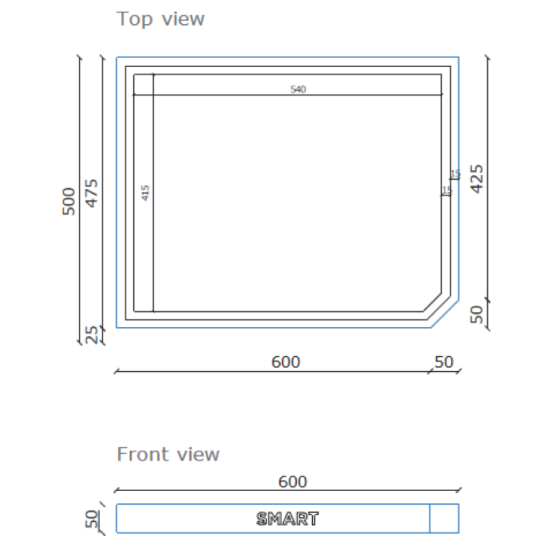
Smart Product Base Dimensions (recommended)
-
Major Kitchen Appliance
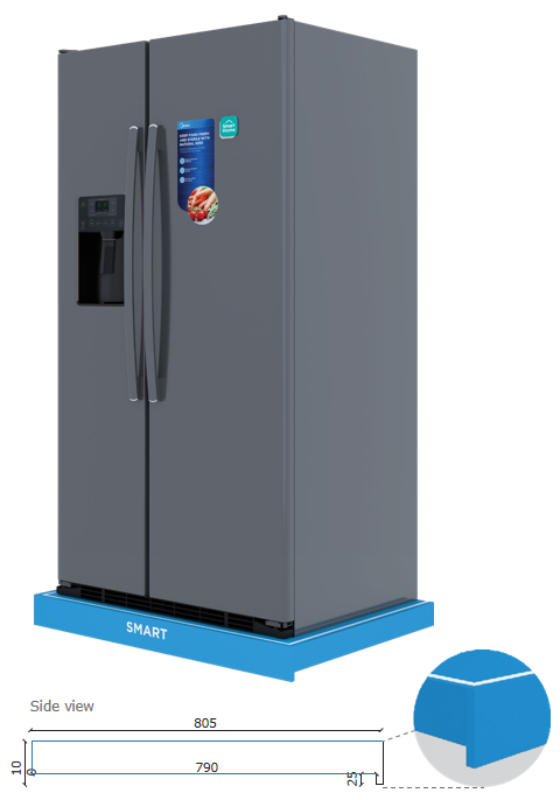
2-Doors Refrigerator
-
Material Details (recommended)
-
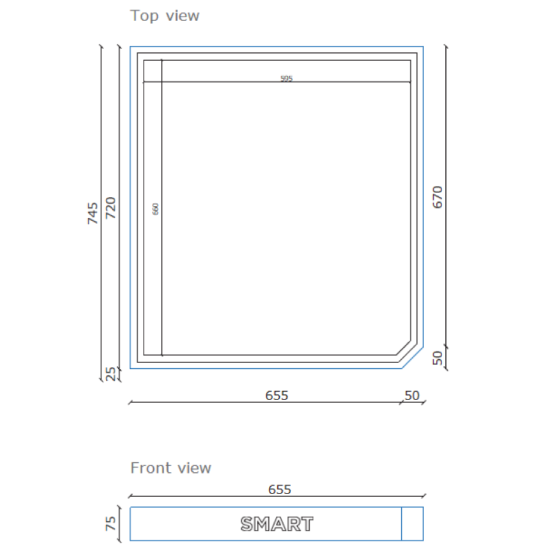
Smart Product Base Dimensions (recommended)
-
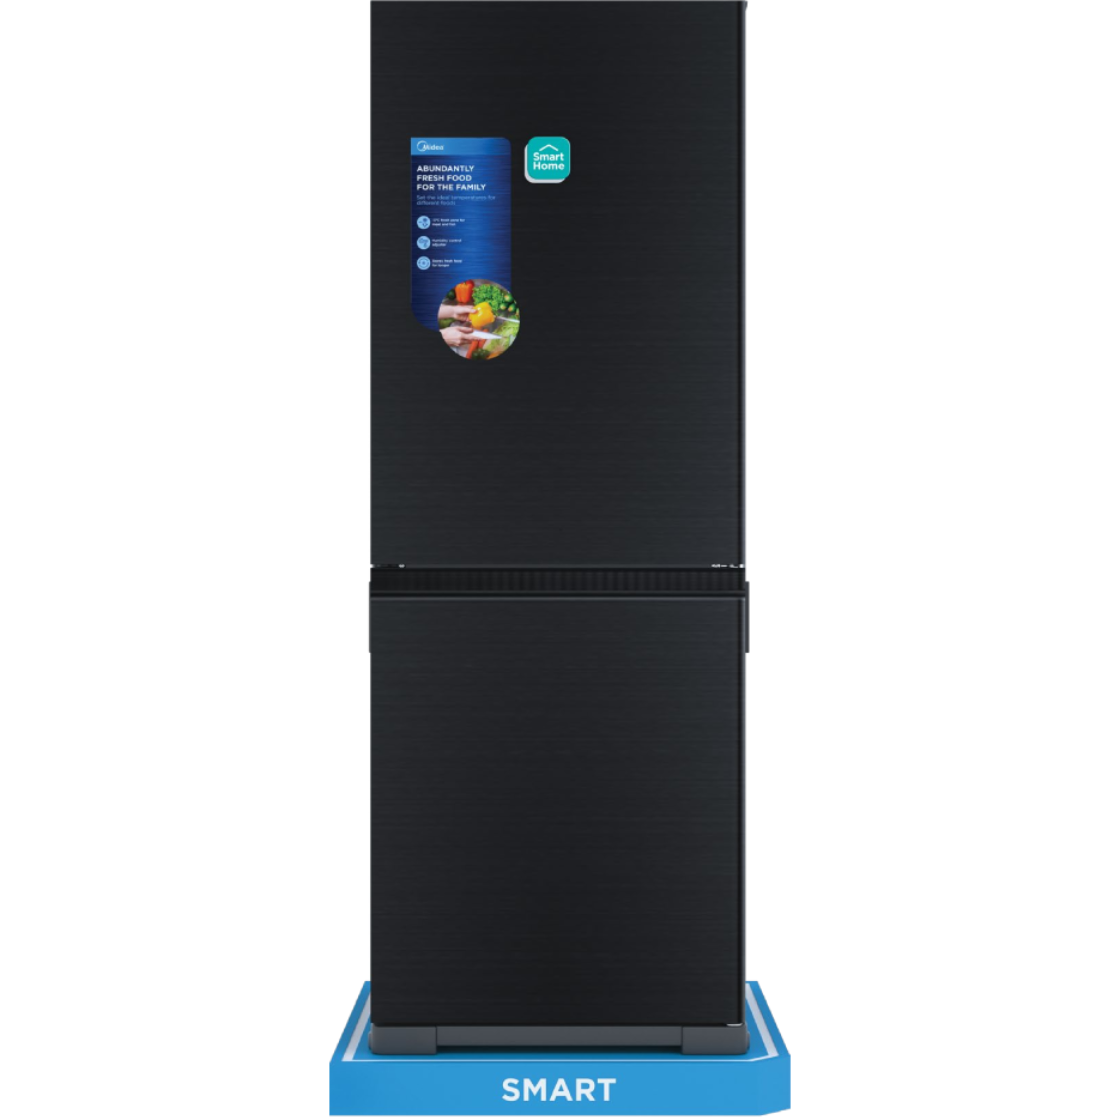
Icon and SMART text on Smart Product Base
Laundry Appliances | Vacuum Cleaner | Standing Fan | Water Dispenser | Small Appliances | 2-Doors Refrigerator | Air-conditioner Compressor
Major Kitchen Appliance
Side-by-Side Refrigerator
-
Material Details (recommended)
-
Smart Product Base Dimensions (recommended)
-
Icon and SMART text on Smart Product Base
Side-by-Side Refrigerator
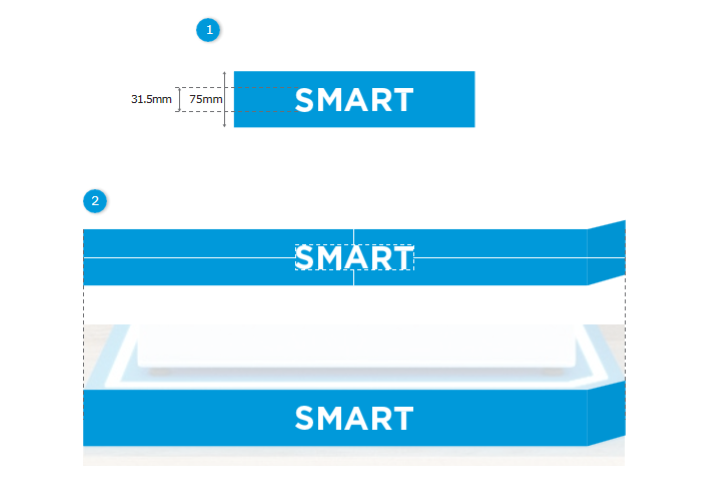
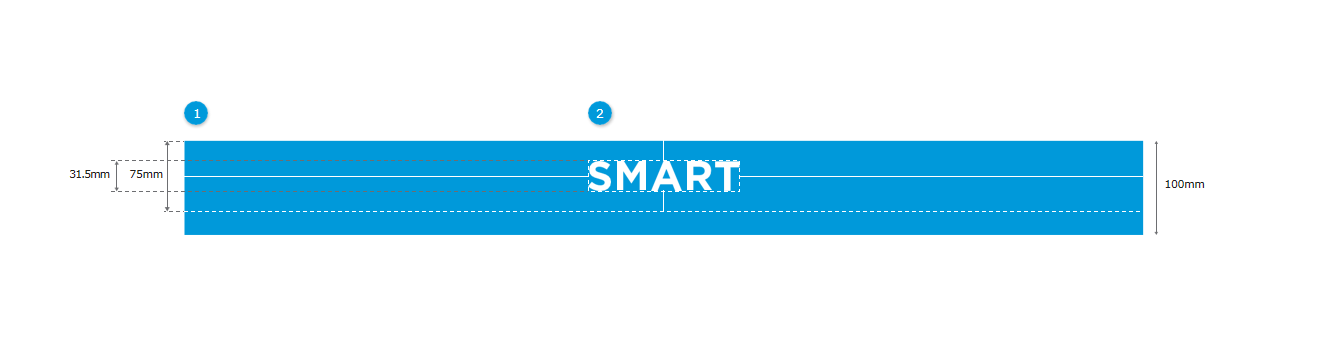
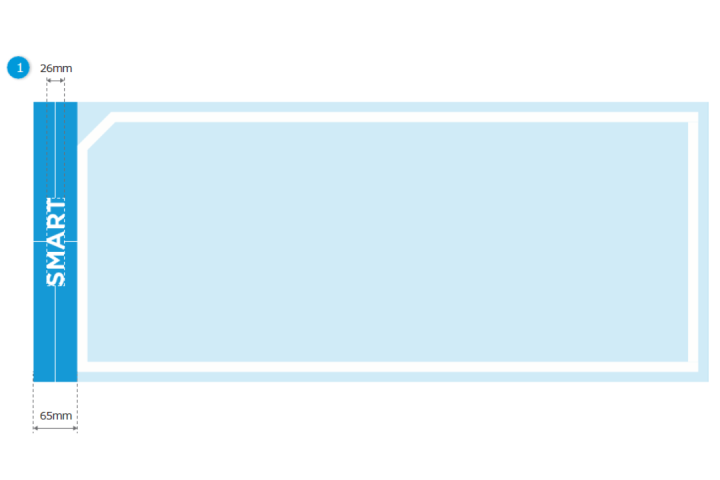
Material
Die-cut White Vinyl Text
- ‘SMART’ text height to follow 42% of 75mm base height Font: Gotham Bold
- Text should be vertically center align within the top 75mm height of the base and centralized horizontally to the full width of the base.
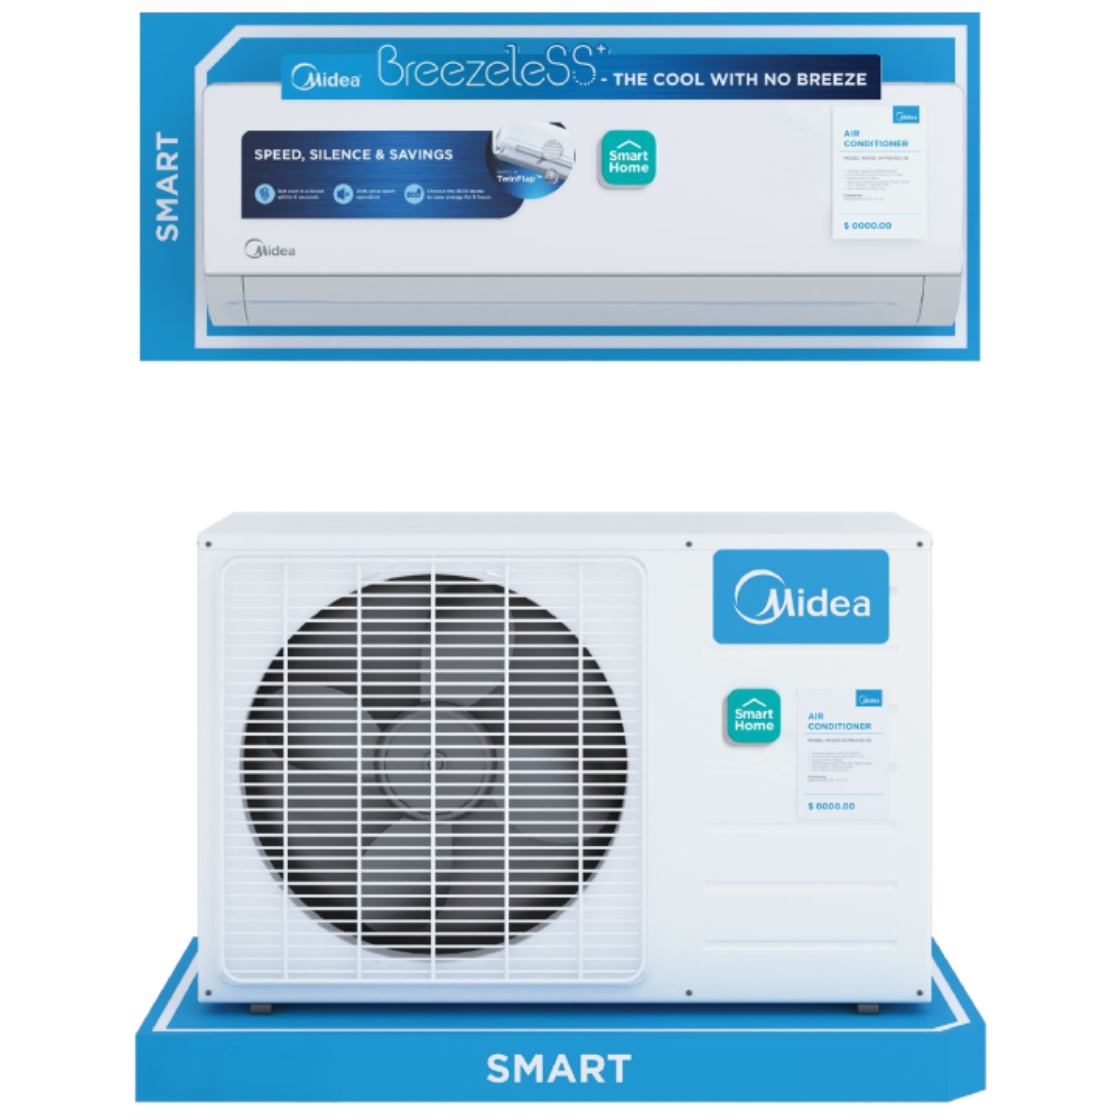
Major Domestic Appliances
Split Air-conditioner System
-
Material Details (recommended)
-
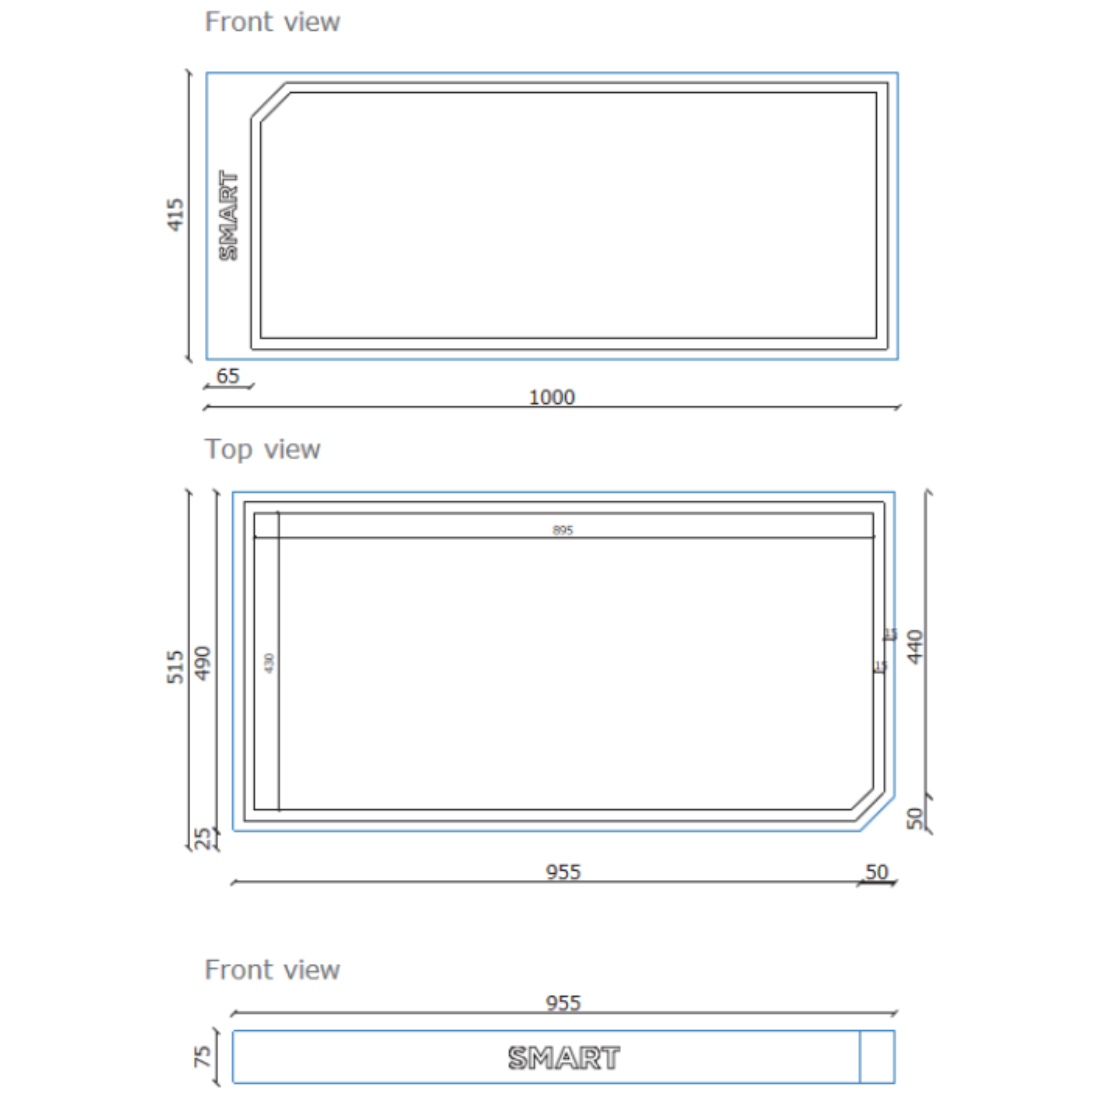
Smart Product Base Dimensions (recommended)
-
Small Domestic Appliance
Water Heater
-
Material Details (recommended)
-
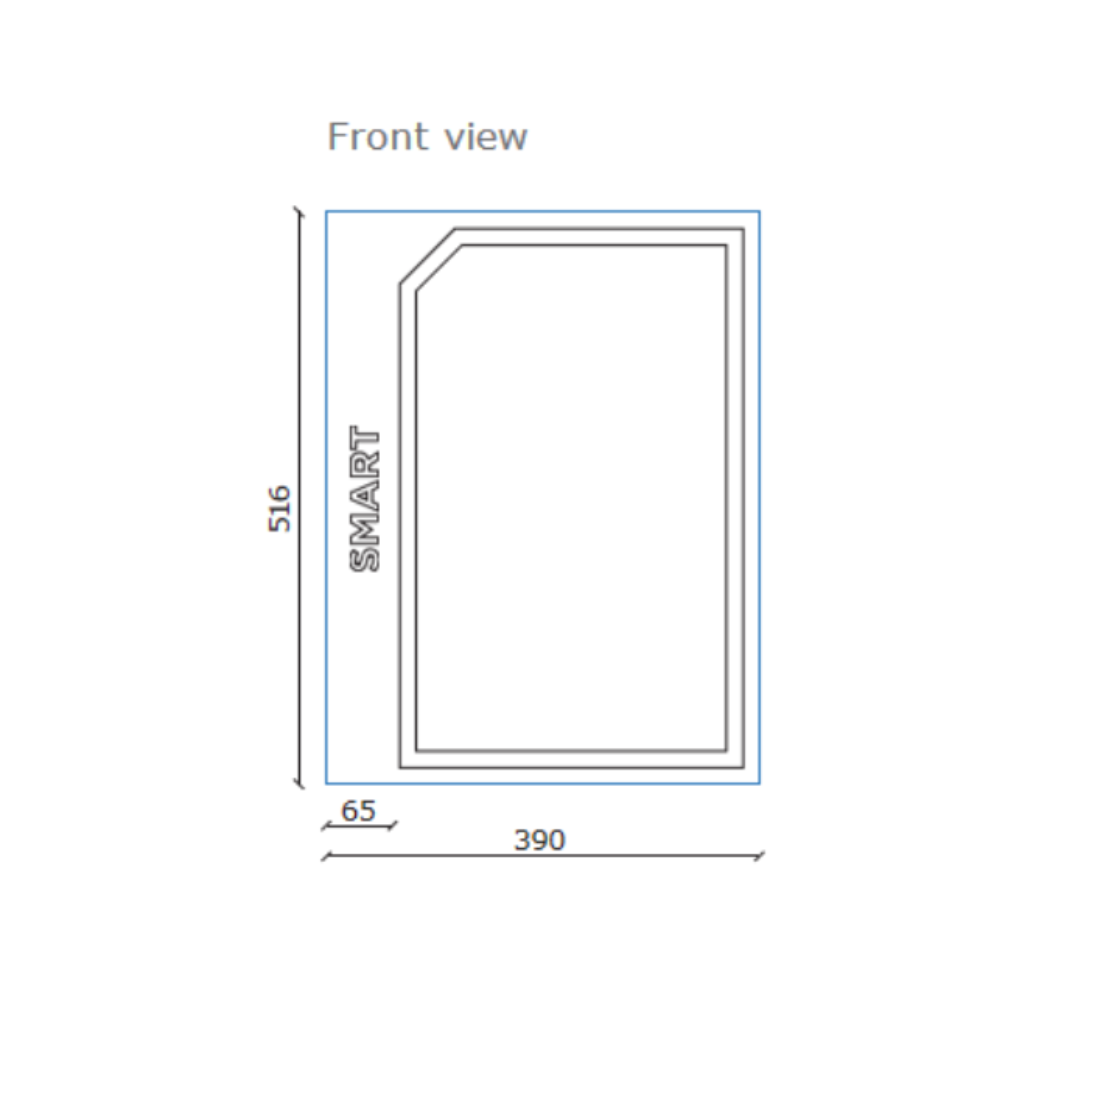
Smart Product Base Dimensions (recommended)
-
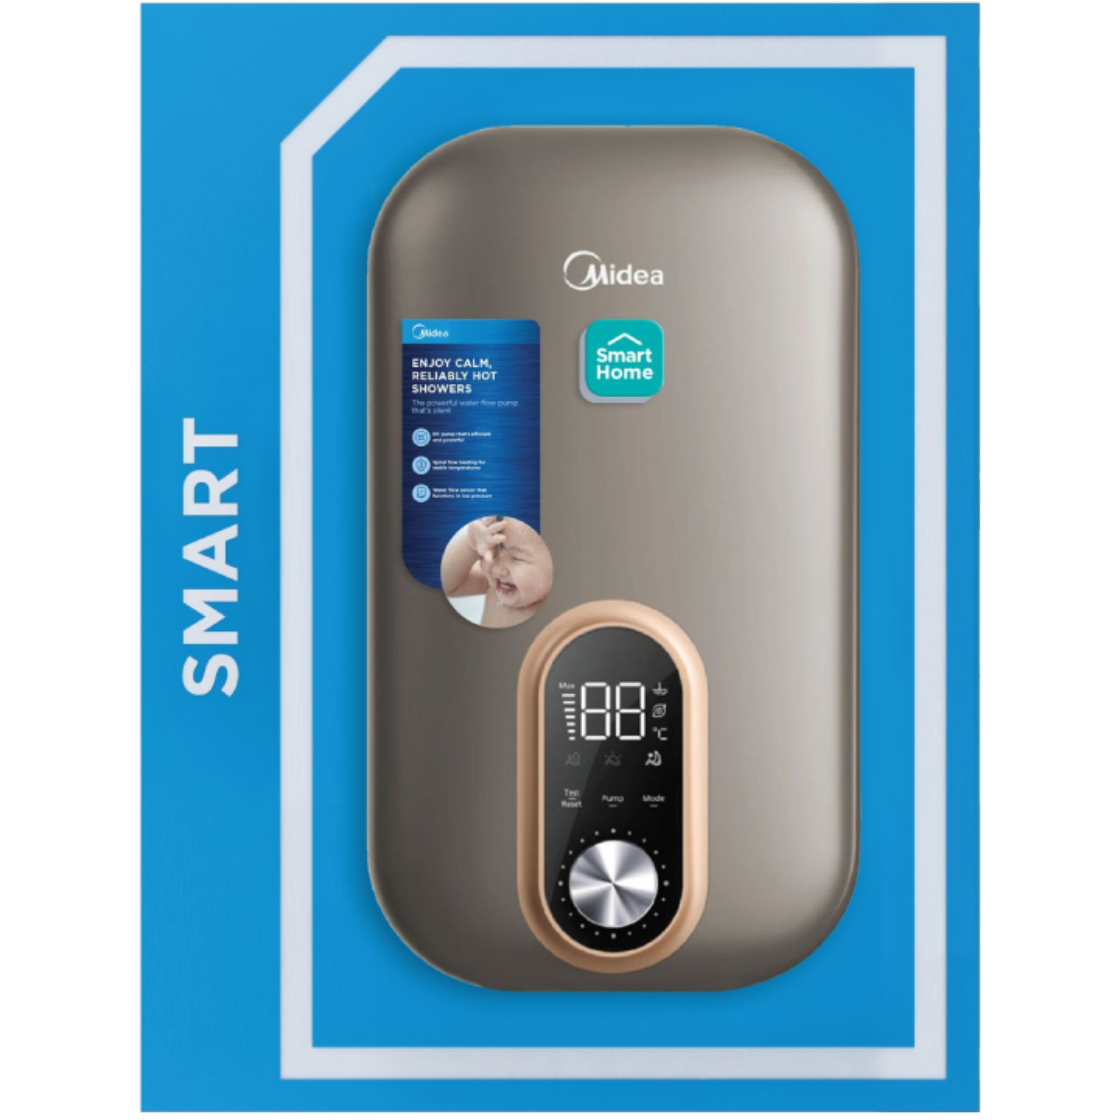
Icon and SMART text on wall mounted Smart Product Base
Air-conditioner | Water Heater
4.0 In-Store Applications Reference
4.1 GOOD
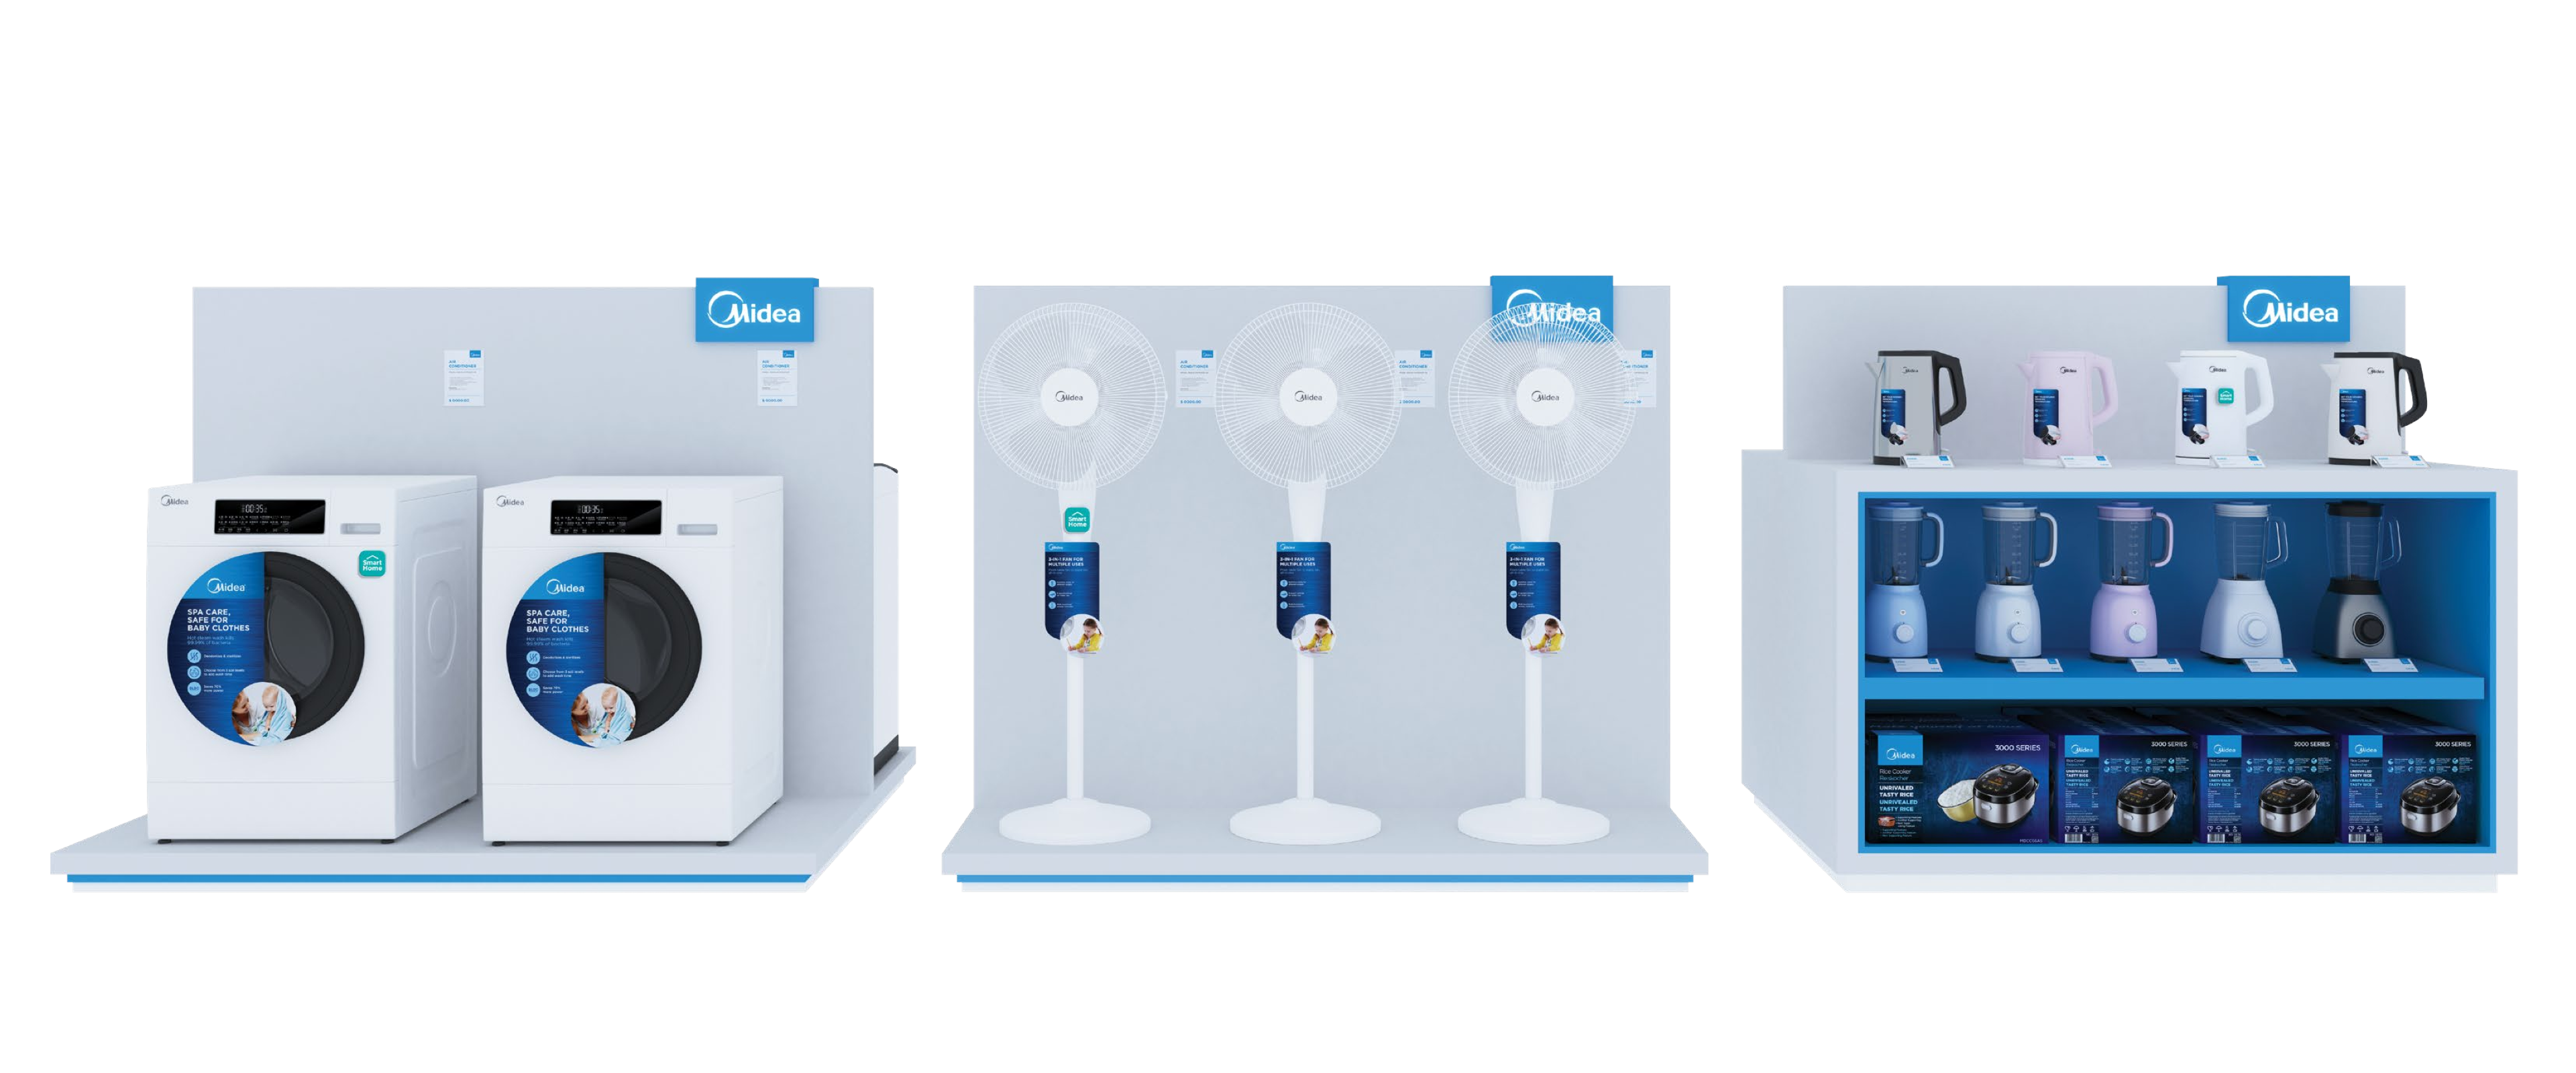
→Major Domestic Appliances Island →Small Domestic Appliances Island →Small Kitchen Appliances Island

→Refrigerator Wall Bay
4.2 BEST
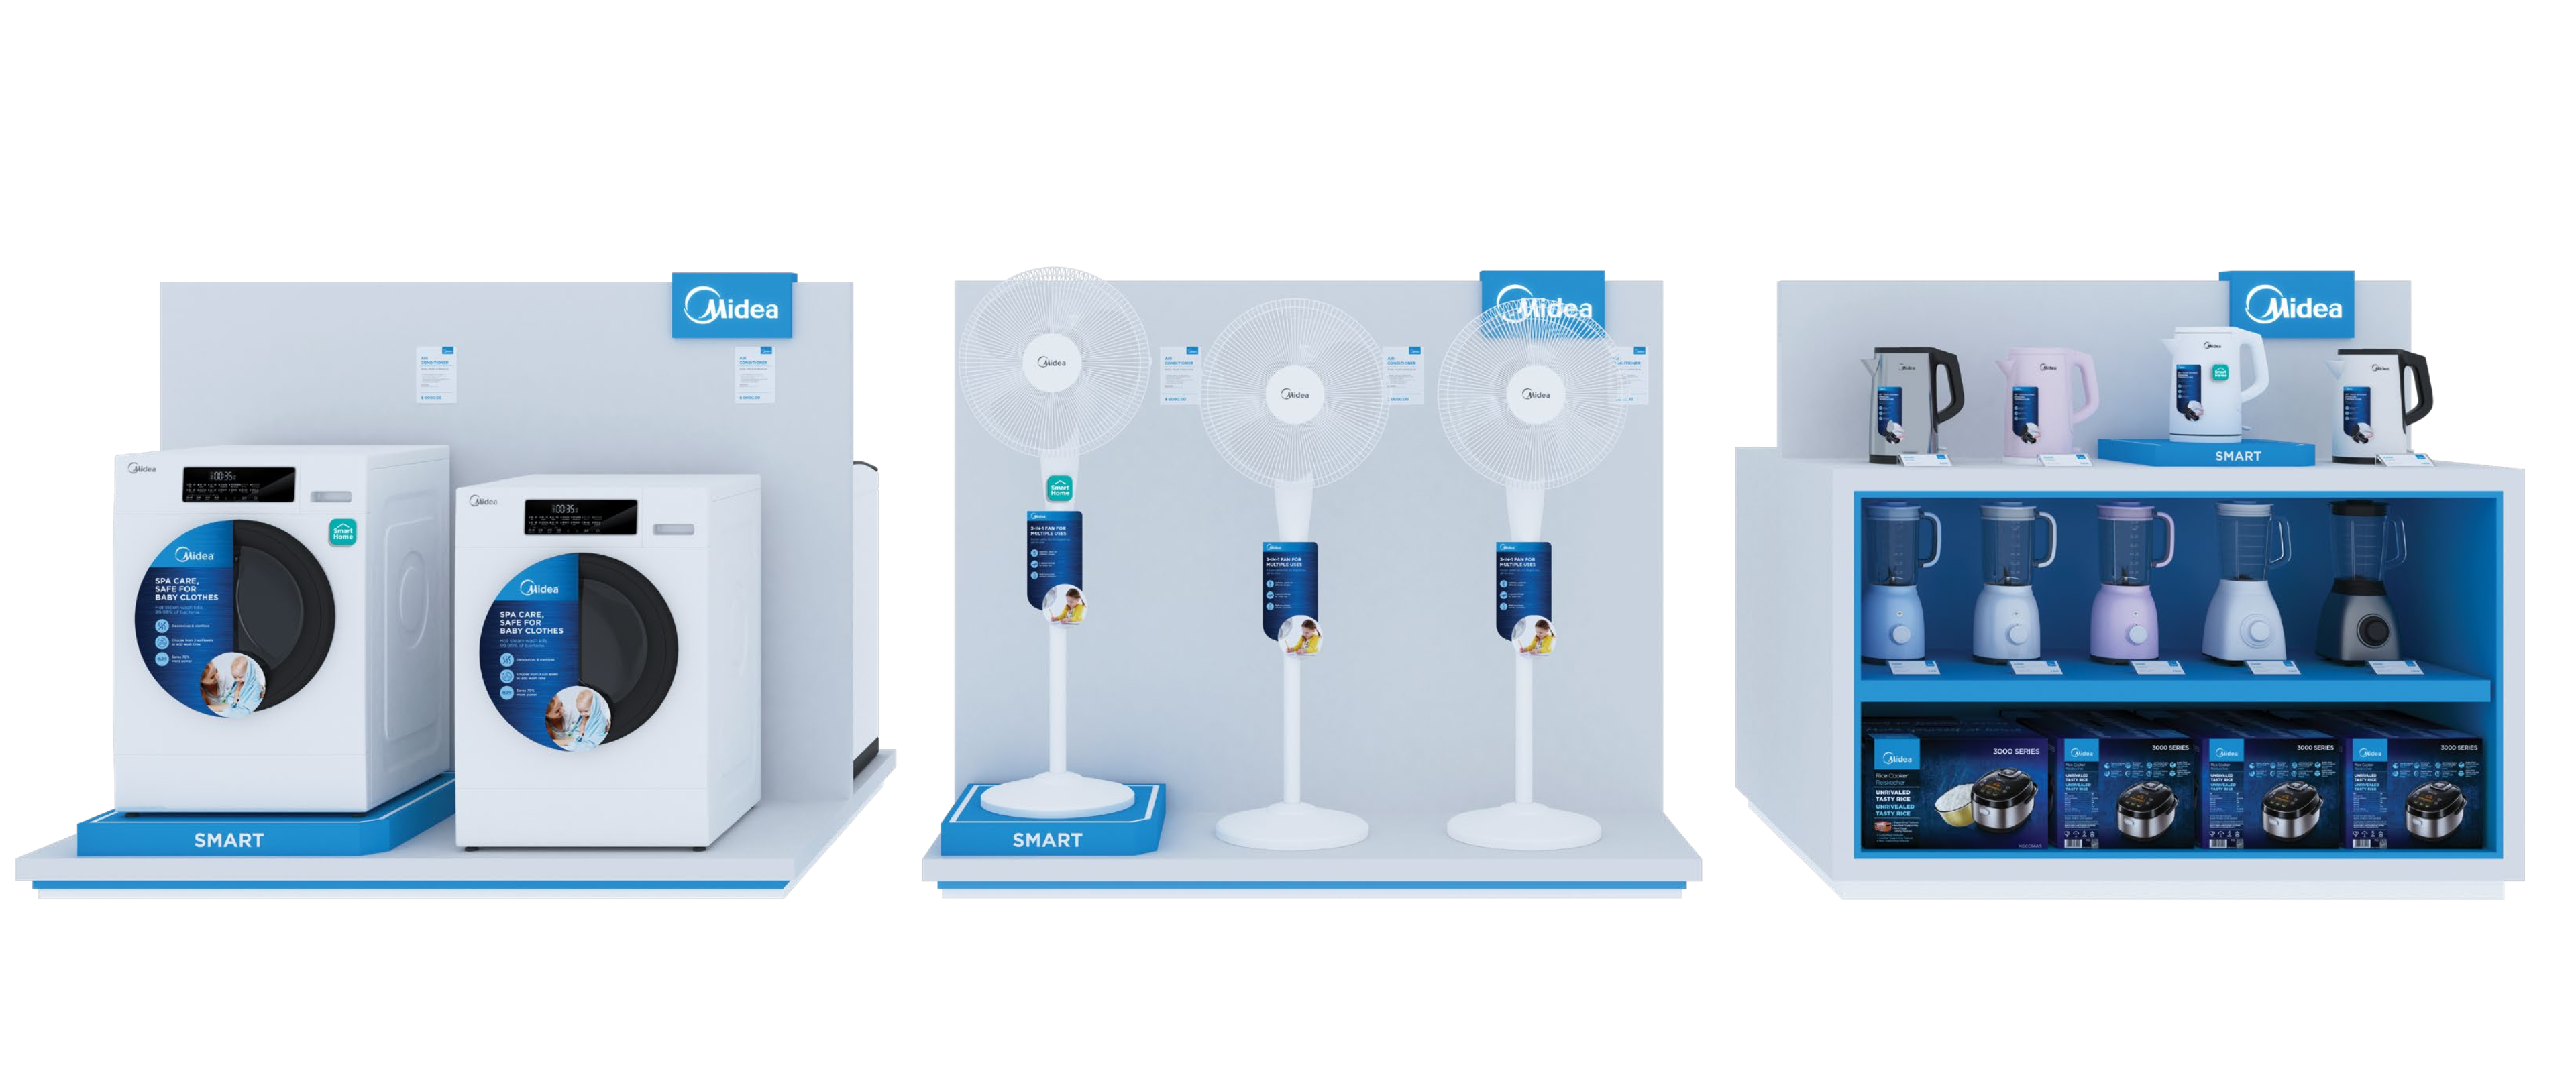
→Major Domestic Appliances Island →Small Domestic Appliances Island →Small Kitchen Appliances Island
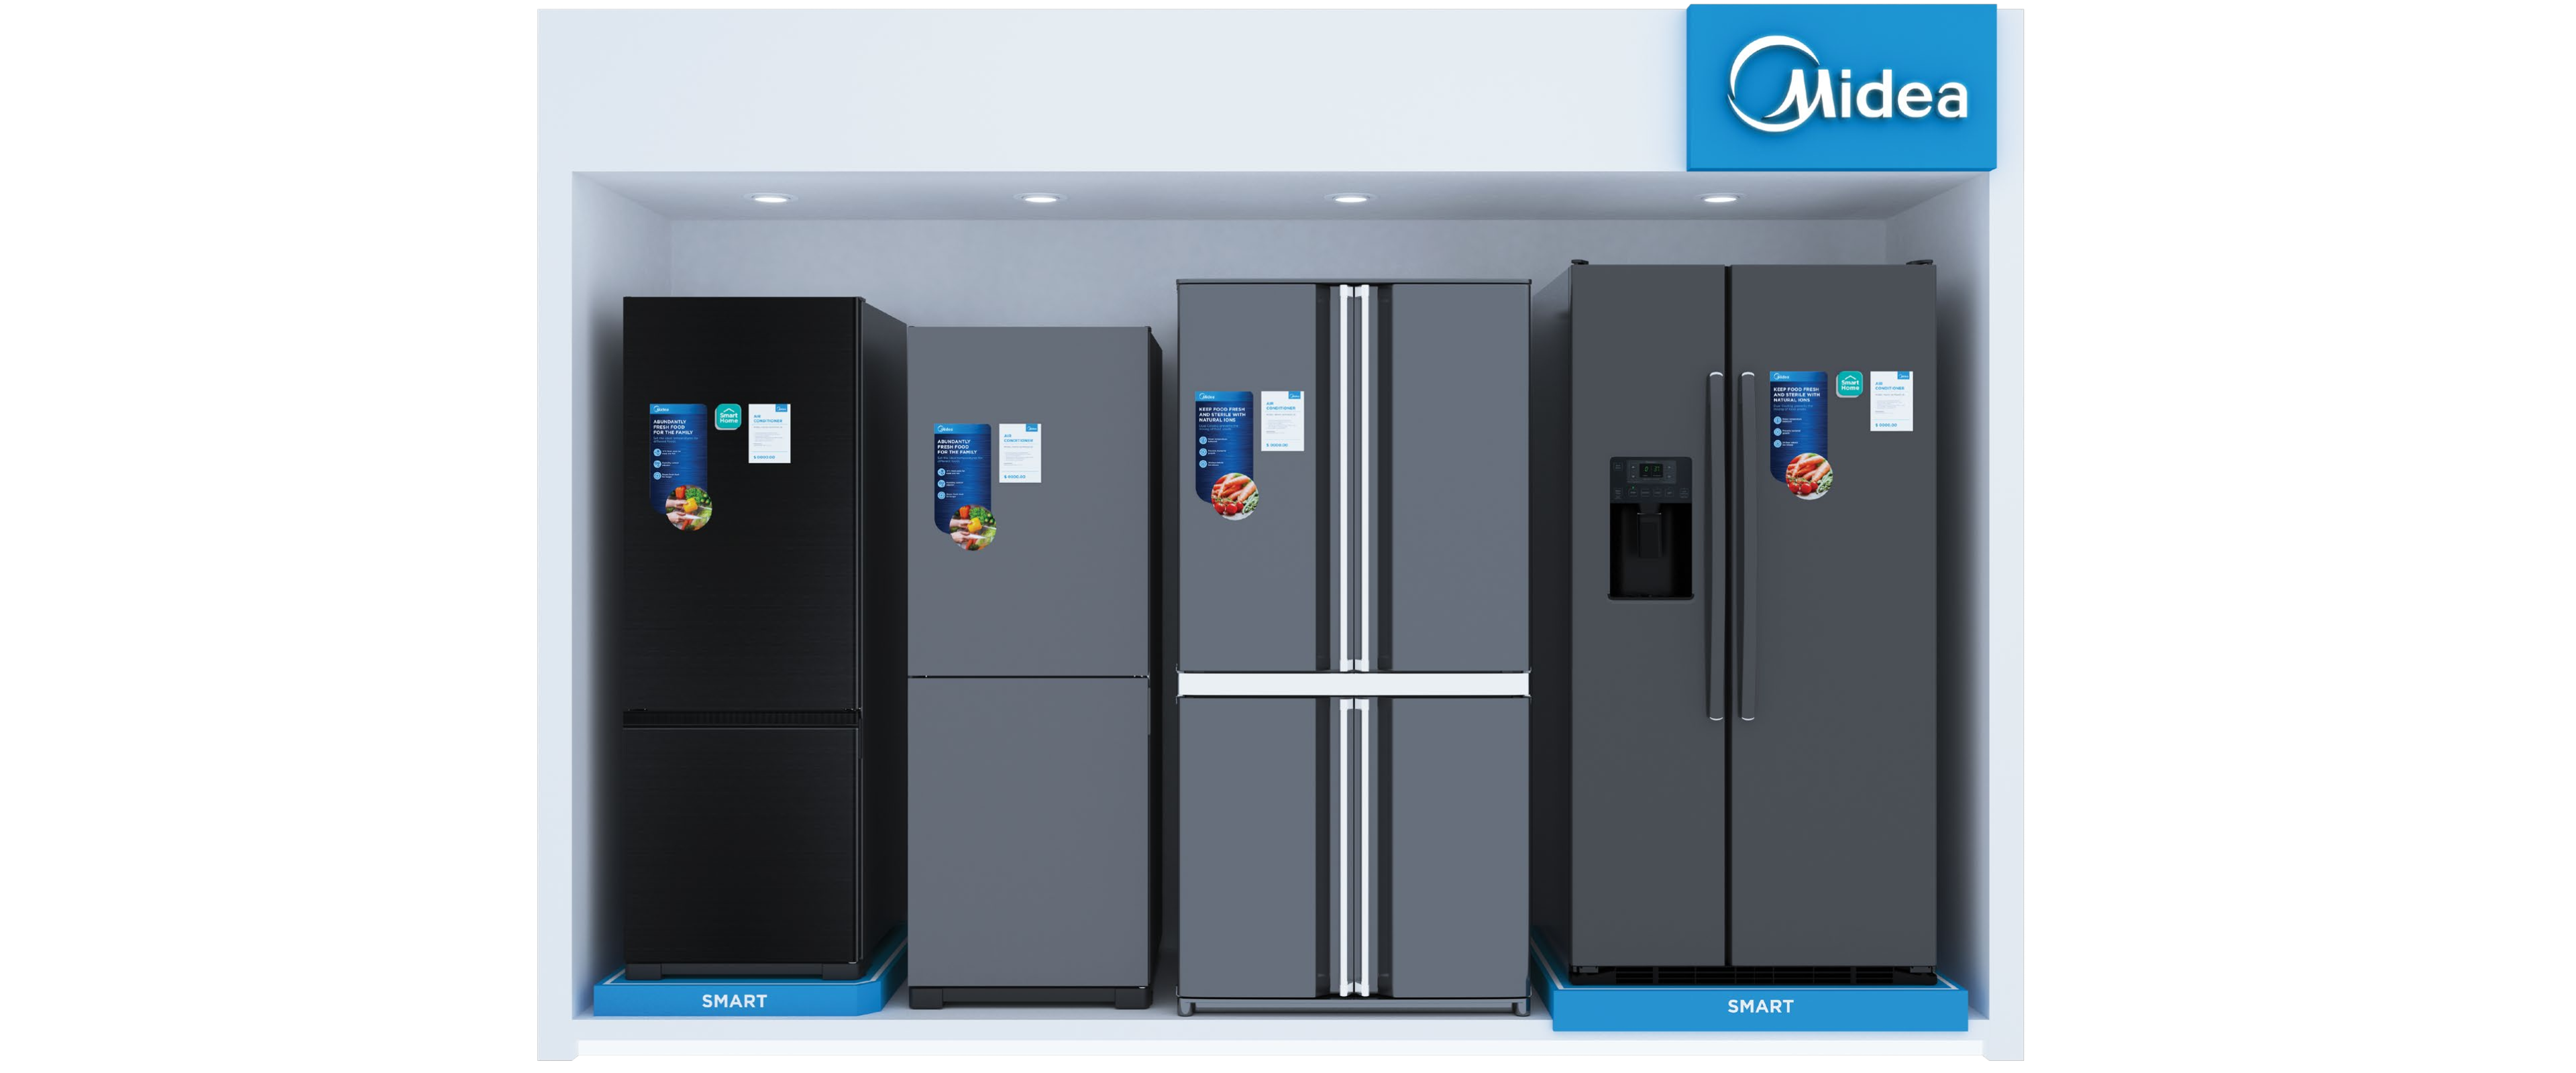
→Refrigerator Wall Bay